
This article was written by Rachel Wright, certified Jira administrator and author of the Jira Strategy Admin Workbook.
Your Jira application doesn’t maintain itself. Often, you need to perform periodic maintenance activities, clean up unneeded configuration elements, migrate data or entire applications, or upgrade applications and apps to their latest versions (read more about maintaining your Atlassian Stack). Obviously, you should test these types of changes in a sandbox environment first (e.g. a Jira test instance) to avoid problems and unforeseen impacts in the production environment.
But how do you ensure your application is prepared for a major test and is functioning properly after the test? You need a standard procedure to follow any time you make material application changes.
Before the Test
Before any major test, you need to create a clean slate to start from. Remove or reset any old settings or data from previous tests. For example, are there any partially migrated data or expired app trials to remove?

If there are a lot of changes needed or if it’s been a while since the sandbox environment was updated to match production, simply recreate the entire test environment to start fresh. You can refresh, restore, or sync configuration settings using an app from the Atlassian Marketplace, by taking a production snapshot and deploying it in a test environment (for Jira Server and Jira Data Center), or by deleting and resetting all data (for Jira Cloud).
Cloud Premium and Enterprise customers can also use the sandbox feature. Simply delete the current sandbox and recreate it again.
Next, make sure your test environment settings and configurations match your production environment as much as possible. For Server and Data Center users, don’t forget to include any reverse proxies, SSL, or load balancer settings.
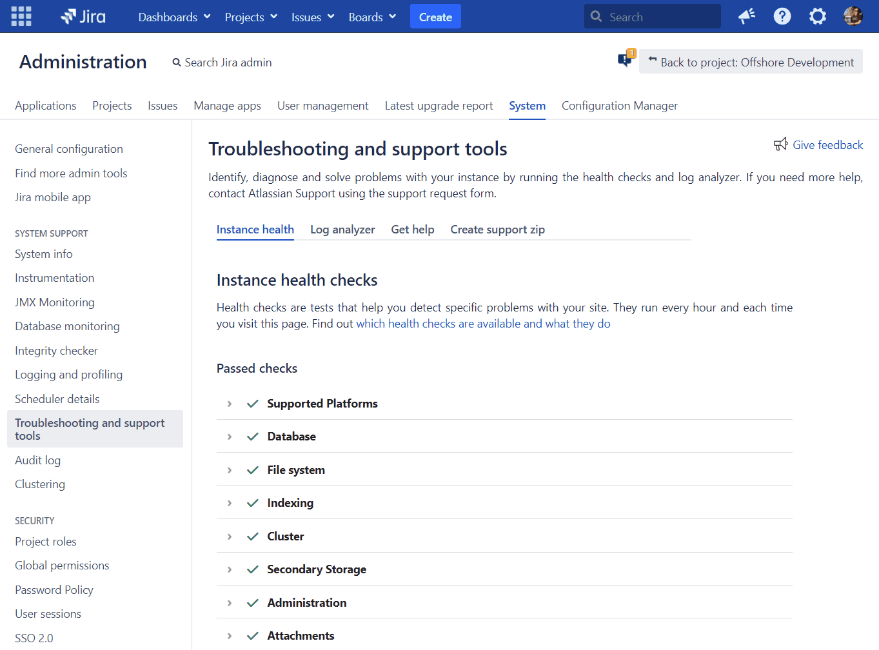
Now that you have a clean test environment, make sure it is healthy and stable. In Server and Data Center, use the built-in system health tools to check for errors.
First, run the instance health check by visiting Admin > System > Troubleshooting and support tools. Then address any issues reported. You should also check the server logs and address any uncommon errors shown there.
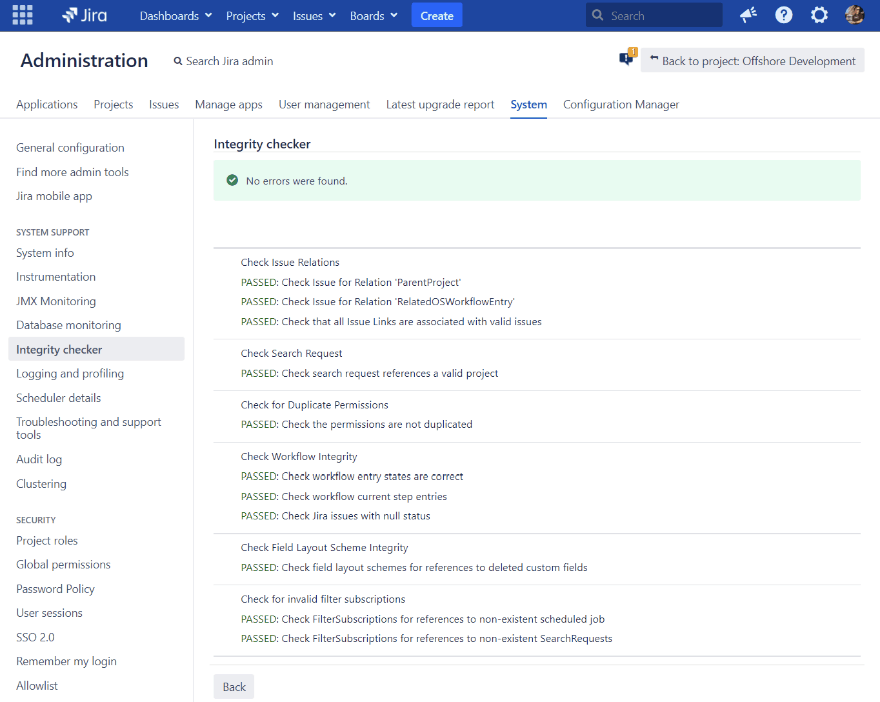
Next, run the integrity checker which checks your application for a variety of issue, search, permission, and workflow problems. Server and Data Center users can access this tool at Admin > System > Integrity checker.
This check can take a while to complete, but you can choose to exclude some of the tests when appropriate. If a problem is detected, investigate and fix it manually or let the integrity checker try to fix it for you. Then re-run the check to make sure the problem is resolved.
In all deployment types, perform some basic and standard test cases, like creating an issue and transitioning it in the workflow from creation to completion. See the checklist below for more standard actions to perform.
Next, make sure enough sample or real data exists for the needs of the test. Using a sub-set of real production data is best, but if that’s not permitted, simply import sample issues from a CSV file or use Jira’s sample data feature.
Here’s how:
Loading Sample Data
In Server or Data Center:
- Click the admin “cog” or “gear” icon on the top right of any Jira page.
- Select “Projects” from the admin menu.
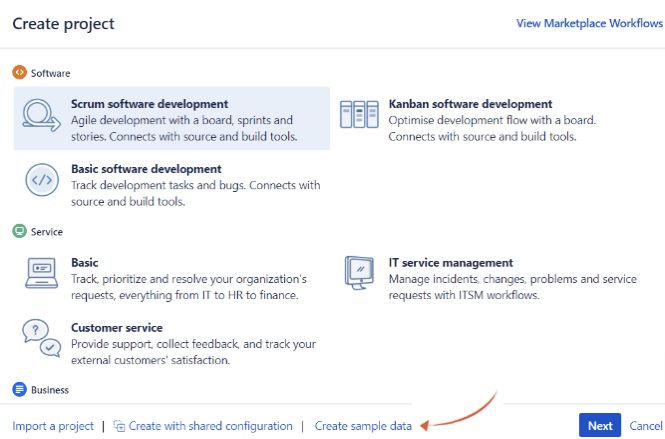
- On the “Projects” admin page, click the “Create project” button at the top right.
- Then click the “Create sample data” link at the bottom of the overlay.
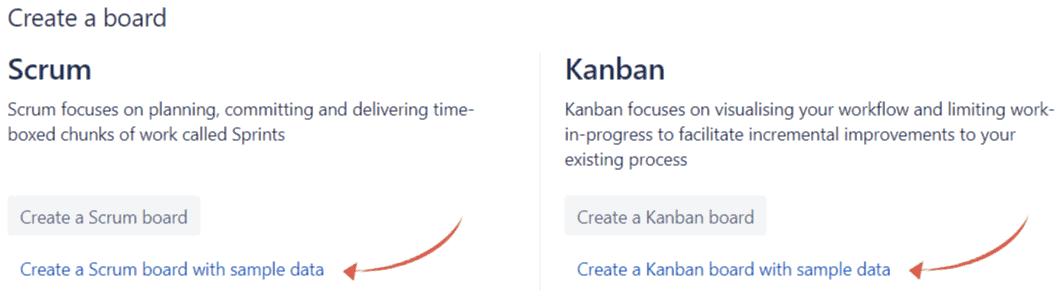
In Cloud, the process is a little different. You’ll need to create a board and a project at the same time.
- On the top right of any Jira page, click the “Search” bar’s text area.
- Then click “Boards” at the bottom of the menu.
- From the “Boards” page, click the “Create Board” button at the top right.
- Then click the Scrum or Kanban “Create with sample data” link at the bottom of the overlay.
Finally, make sure the right types of user accounts exist so testing is performed from multiple perspectives. At a minimum, there should be a test admin account and a regular user account. Create additional accounts as needed for your specific test scenario in the Jira test instance.
Now the sandbox environment is ready to test major changes. Be prepared to repeat this environment reset procedure periodically, after each major test, and when production settings change.
After the Test
After your test is successful, it’s time to ensure Jira is functioning properly and the testing didn’t cause any undesired problems.
Here are 32 things I specifically check:
- Is login authentication completed quickly?
- Does a single issue load quickly?
- Can a new issue be created or cloned?
- Can an existing issue be edited?
- Can an issue be moved?
- Can an issue be deleted?
- Can an issue be linked to another issue?
- Does a simple query return results?
- Does a complex query return results in a timely manner?
- Do results from existing personal filters load?
- Do results from existing shared filters load?
- Can new filters be created and saved?
- Do results from existing personal boards and dashboards load?
- Do results from existing shared boards and dashboards load?
- Do gadget or data-intensive dashboards load?
- Does the “Default System” dashboard display properly?
- Does a single issue transition property?
- Does a bulk transition complete properly?
- Does the instance health check or integrity checker indicate any problems?
- Are the intentionally restricted projects still protected?
- Are protected transitions functioning properly?
- Are issue update email notifications arriving as expected?
- Is the mail queue backed up or show errors?
- Are email issue create requests correctly processed?
- Are there any unexpected messages on the “Manage apps” admin page? (Example: “Update Available”)
- Are attachments present?
- Can new files be attached?
- Are connections to other applications succeeding?
- Can Jira connect to the Atlassian Marketplace?
- What errors or issues do the log files reveal?
- Are problems presented by any new features?
- How is the system performing under load?
Don’t forget to include any special cases specific to the purpose of your test.
Checklist
You can also download the list above as an Excel file here.
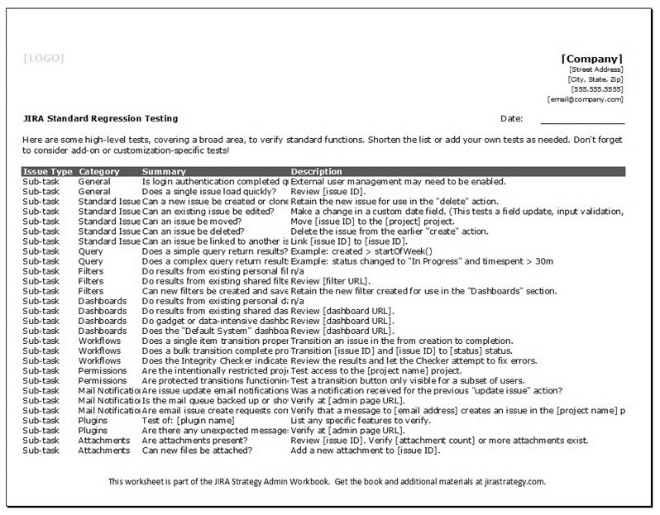
Use the checklist to verify Jira is functioning properly after major changes, upgrades, or migrations.
Tip: Convert the downloaded Excel file to CSV format and import the data into Jira as sub-tasks to track this effort!