

Jira is a project management tool that helps teams plan, prioritize, and track issues. It is also used as a bug-tracking and reporting tool. Salesforce is a CRM platform that gives teams a single and shared view of every customer. Both these tools are popular and best suited for increasing business productivity and efficiency. But to enhance their power further, there is a need for a Jira Salesforce Integration.
Such integration can help provide a holistic view of business information and increase collaboration between teams who can then complement each other and work towards gathering the required expertise.
This guide describes how a Jira Salesforce integration can help teams collaborate and communicate faster and more effectively. It then provides a step-by-step approach to achieving this integration, and finally presents a few common use cases that can benefit from such integration.
Note: We have used a tool called Exalate for this guide. You’ll learn more about it as we go on.
Here’s what we’ll cover in this blog post:
- Why do you Need a Jira Salesforce Integration?
- How to Choose the Right Tool for a Jira Salesforce Integration
- How to Set up a Jira to Salesforce Integration
- Common Use Cases
Why do you Need a Jira Salesforce Integration?
What is Jira?
Jira is a great platform for issue tracking, project management, and bug fixing. It has been used widely by both software and non-software teams for a variety of purposes. It is also a widely used tool for teams following agile methodologies. It comes with many predefined templates suitable to different teams like Software Development, Marketing, HR, and the like. 
What is Salesforce?
Salesforce is a very popular CRM tool. It is predominantly used by sales teams to view and manage all customer-related information. Sales teams can track their leads, manage their deals, and even provide after-sales support with the help of Salesforce. It also provides immense customizability to adapt to specific business needs and is scalable. AppExchange in Salesforce comes with some great apps to extend its power further. 
Why a Jira Salesforce Integration?
Today’s global teams often collaborate with one another to get the expertise they need as fast as possible to help them increase their efficiency. They also wish to keep working in environments they are already familiar with to save time and get things done faster.
In this collaborative world, teams often copy and paste data manually between their tools, send emails across or even spend time on meetings and phone calls. This leads to delays in sending data back and forth, manual data entry mistakes, misplaced or altered data, and above all, it simply wastes time and efforts of valuable resources.
So using a tool to help teams pass critical business information between them not only would streamline communication, but also reduce the number of costly errors and leave teams to work on more important things. This, in turn, can help achieve transparency in the way teams collaborate and help automate their business processes end-to-end.
For all of these reasons, it is important to consider a Jira Salesforce integration where information is passed between sales and other teams automatically in real-time and in a consistent manner so that it reaches the right people at the right time. Such integration can help these teams avoid working in silos and ensure everyone has the correct and up-to-date information.
Now that we have discussed the advantages of a Jira Salesforce integration, let’s quickly see why choosing the right technology for this is also crucial.
How to Choose the Right Tool for a Jira Salesforce Integration
Choosing the right tool for your Jira Salesforce integration is very important since it hugely affects the benefits such integration can bring. However, there are certain points you should consider before proceeding.
Decentralized Integration
The tool should let teams work independently in their familiar environment and still allow information to be passed between them. In this case, a decentralized integration would be the ideal choice since each side will control what information is sent over to the other side and how incoming information is interpreted, without having to inform or consult the other side in advance. 
Flexibility
Business and customer requirements evolve and change over time. The data you synchronize currently might not need synchronization next year. Or you might want to synchronize some new data altogether. With such a change comes the pain of having to spend a huge amount of time and effort configuring the integration tool.
But a tool that supports information exchange with the least configuration, even for the most complex and customized use cases must be your first priority. Handling changing business requirements with minimal tweaking must be possible.
Reliability
The reality of downtime and the way it is handled cannot be ignored. The tool must be able to guarantee synchronization without any kind of manual intervention. When one system is down, then the tool should be able to resume operations once it’s back up again. 
Exalate: an Integration Solution
Exalate inherently supports decentralized integration. It allows you to control information flow and work independently on both sides of integration with the help of sync rules. It also provides security mechanisms like encrypted file exchange, role-based access controls, secure protocols like HTTPS, and the like.
You can learn more about this by reading Exalate’s security architecture whitepaper.
It also comes with different configuration modes and advanced scripting capabilities for enhanced flexibility.
You can have a look at how to sync multiple related Salesforce objects to Jira to get an idea about the capabilities of Exalate’s scripting engine.
And above all, it is easy to use and understand by both business and technical users. Let’s have a look at how a step-by-step Jira Salesforce integration can be implemented using Exalate.
How to Set up a Jira to Salesforce Integration
We’ll get to the step-by-step process of the integration, but if you prefer videos over articles, you can go ahead and watch this tutorial instead.
Note: You can also refer to this Getting Started guide for a step-by-step tutorial on setting up a Jira Salesforce integration.
To begin with, you need to install Exalate on both Jira and Salesforce. Once that is done, you move ahead and set up a connection between them.
You can start synchronizing Salesforce entities with Jira issues after that. If and when needed, you can configure and control what information is shared between them. We will look at all the steps in detail. So let’s get started.
Step 1: Install Exalate on Salesforce
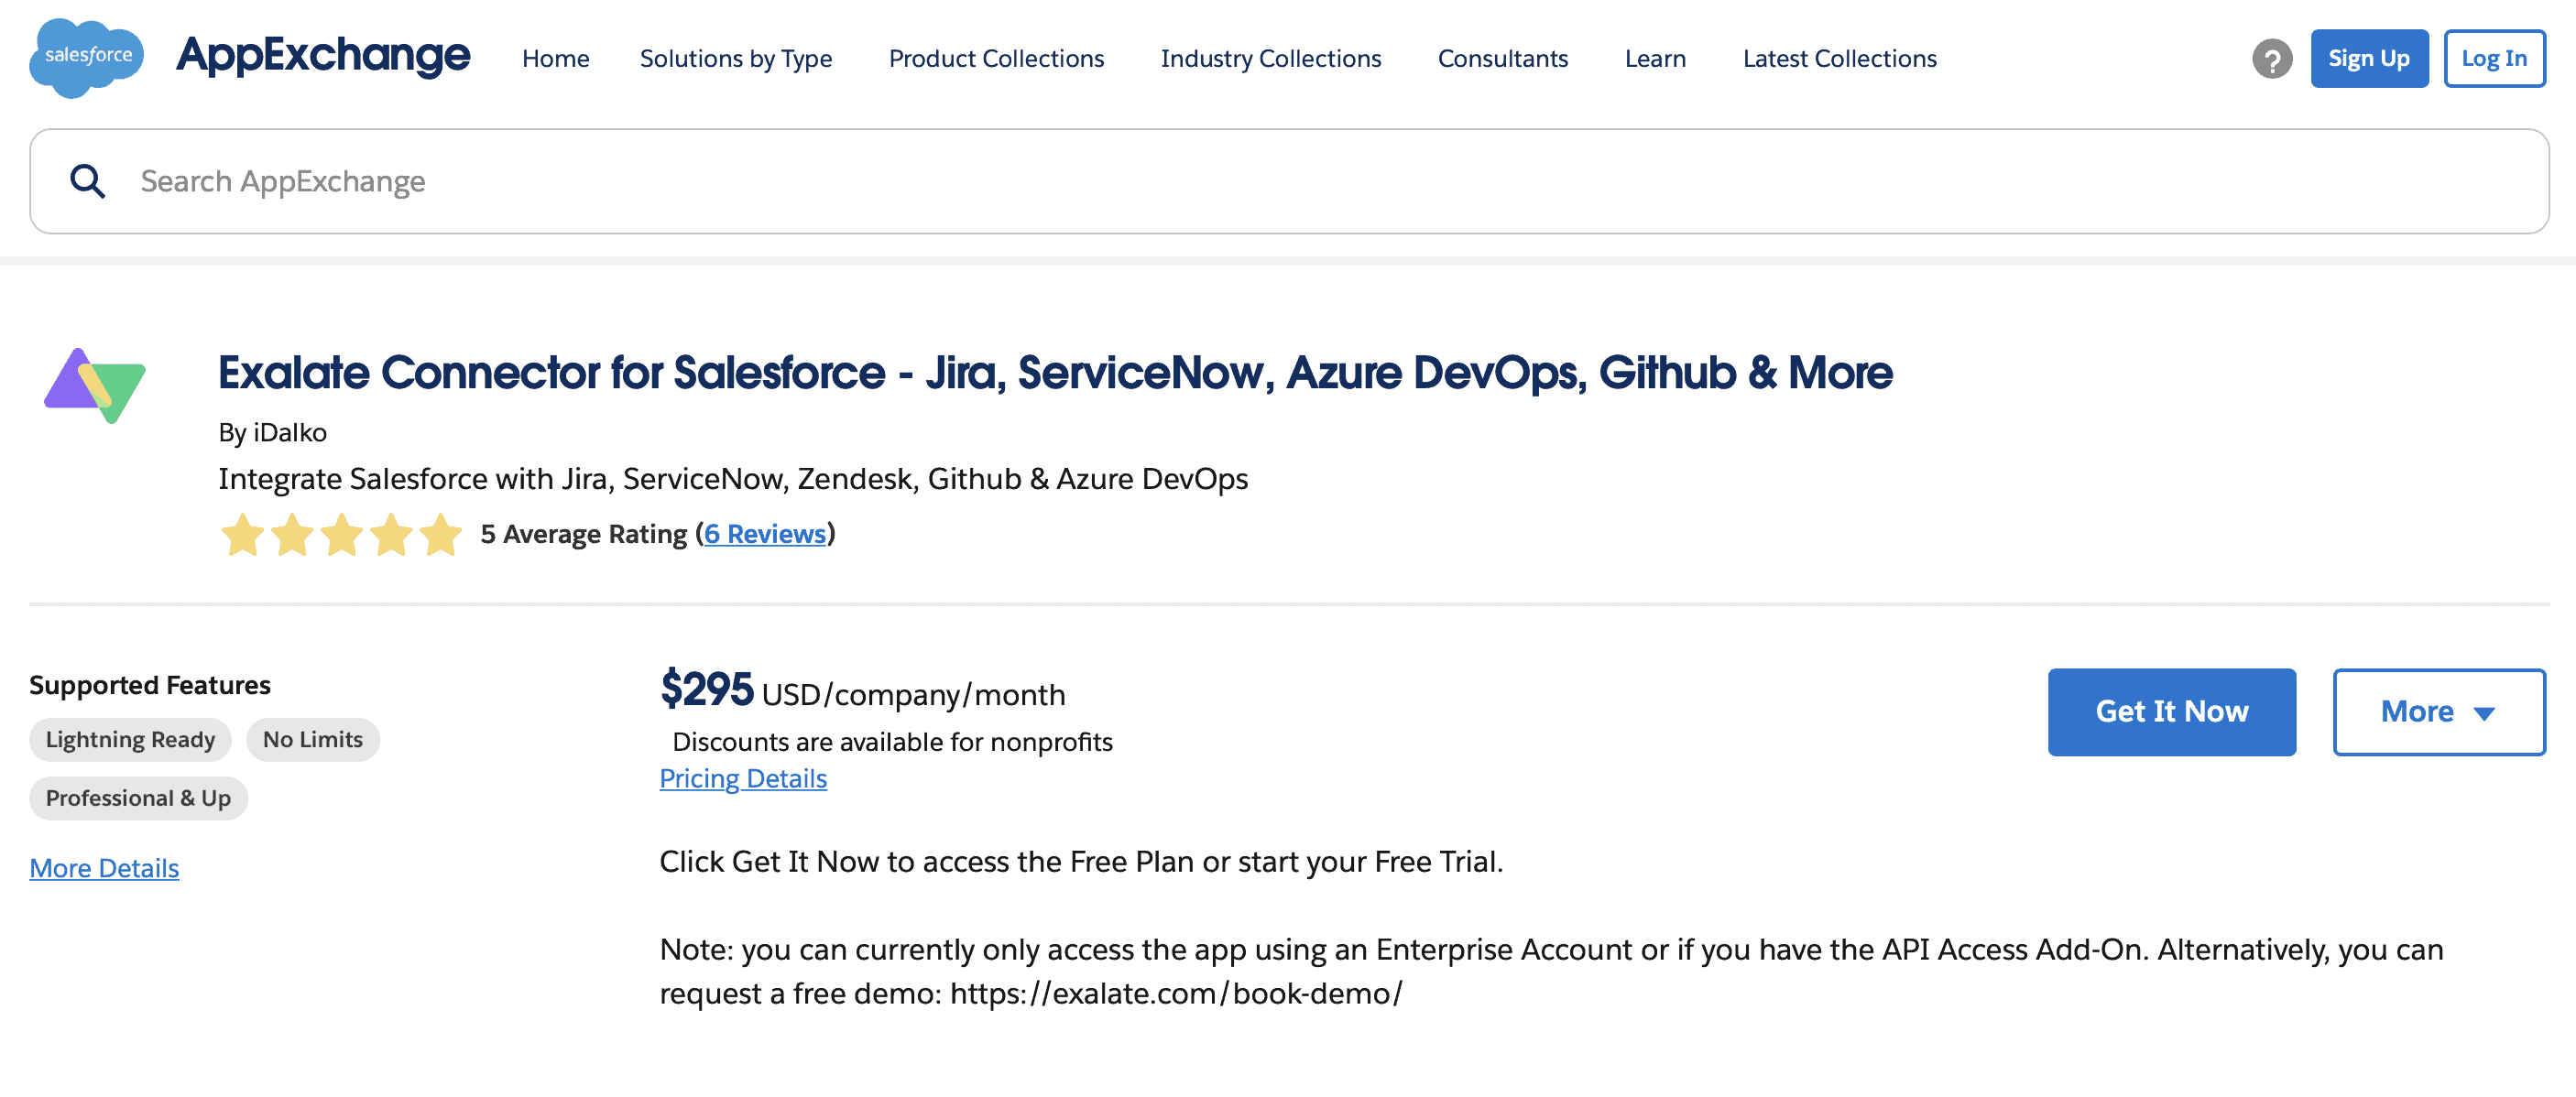
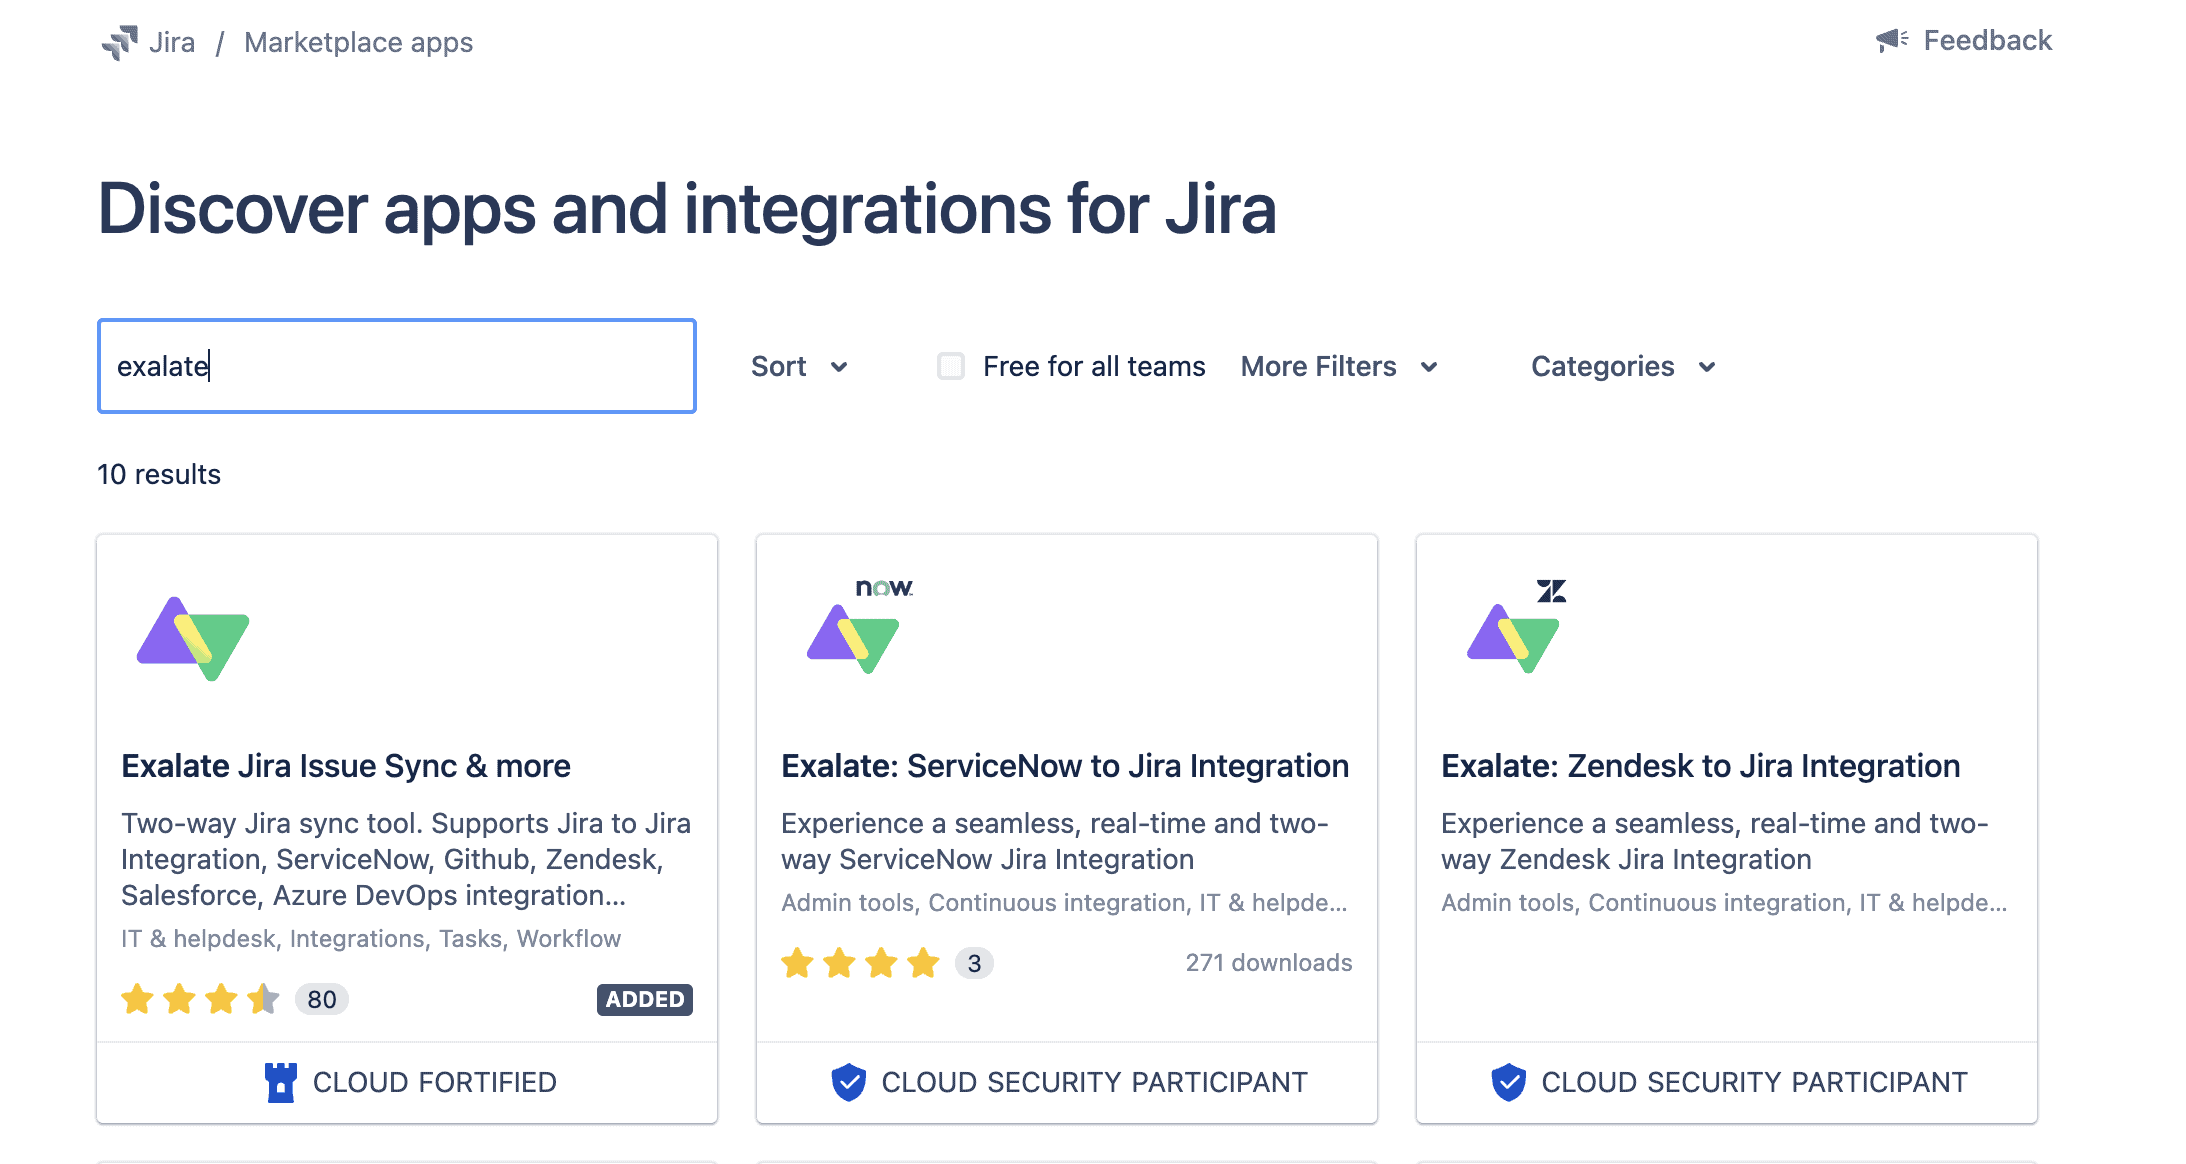
Install Exalate on Salesforce by visiting its marketplace i.e AppExchange. Search for Exalate there after logging in.
Go through the details of the app if you want to know a little more about how it works. Click on “Get It Now” to begin the installation process.
On the next screen choose the environment to install Exalate on Production or Sandbox. Choose according to your requirements. I have chosen “Install in Production” here.
Read further the terms and conditions displayed on the screen, then head over to the bottom of the page, accept them and click “Confirm and Install”.

If you haven’t logged into your Salesforce instance, now is the time you do.
After that, you will be redirected to an important screen. This screen allows you to choose the users that will have access to the Exalate app. You can decide to choose only admins, all users, or specific users only. For the specific profiles option, you will be prompted with a screen that has a list of all the available users and their permissions that you can set. Once confirmed with your choices click the “Install” button to proceed.
Note: You can change the user permissions you have set anytime!

On the next screen, you need to allow access to third-party websites.
Click “Continue” to allow access.
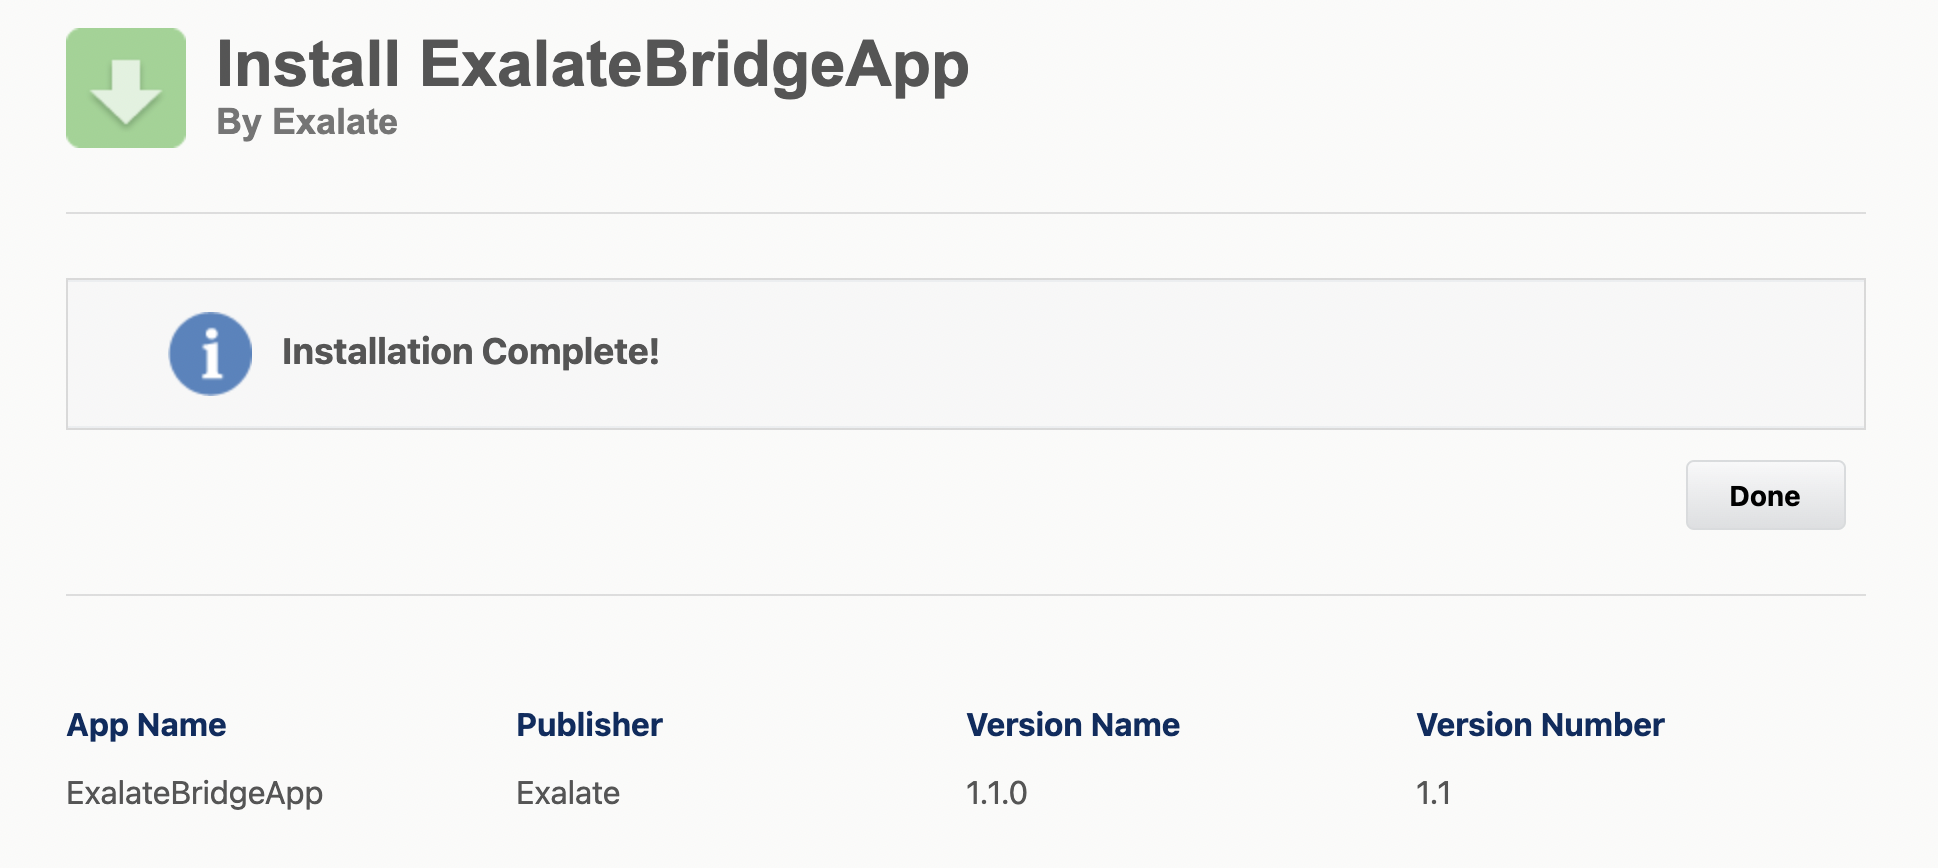
This will successfully install Exalate on Salesforce and display the message “Installation Complete!”. It’s time to request an Exalate node for your Salesforce instance. To proceed click “Done”.
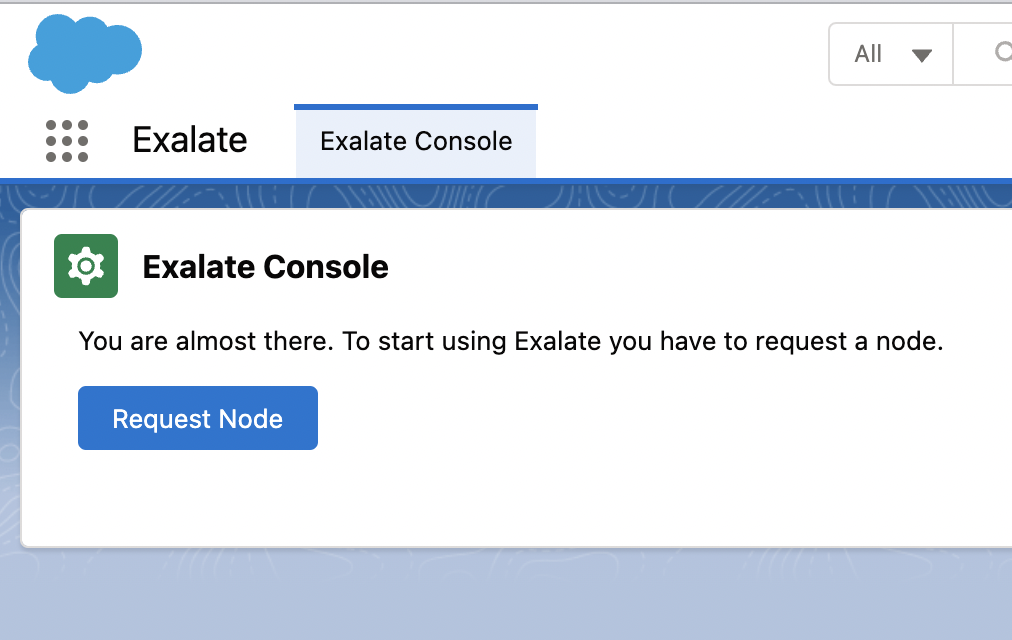
Back to your Salesforce environment, go to Apps, and type Exalate in the search bar.
Click on the blue “Request Node” button. On the next screen, “Allow” access to Exalate with the necessary permissions.
Then proceed to fill in your basic details so Exalate can verify your instance, activate an evaluation license, and make an admin account to receive error notifications.
After you click “Agree and Submit”, a verification email will be sent out. For verification, open your email and click “Verify Exalate instance”.
Voila, your work here is done! You can now log in to your Salesforce Exalate instance by following these steps.
You can start setting up your first connection already by skipping to step 3 if you have installed Exalate on your Jira instance.
If you still haven’t, then move on to the next step.
Step 2: Install Exalate on Jira
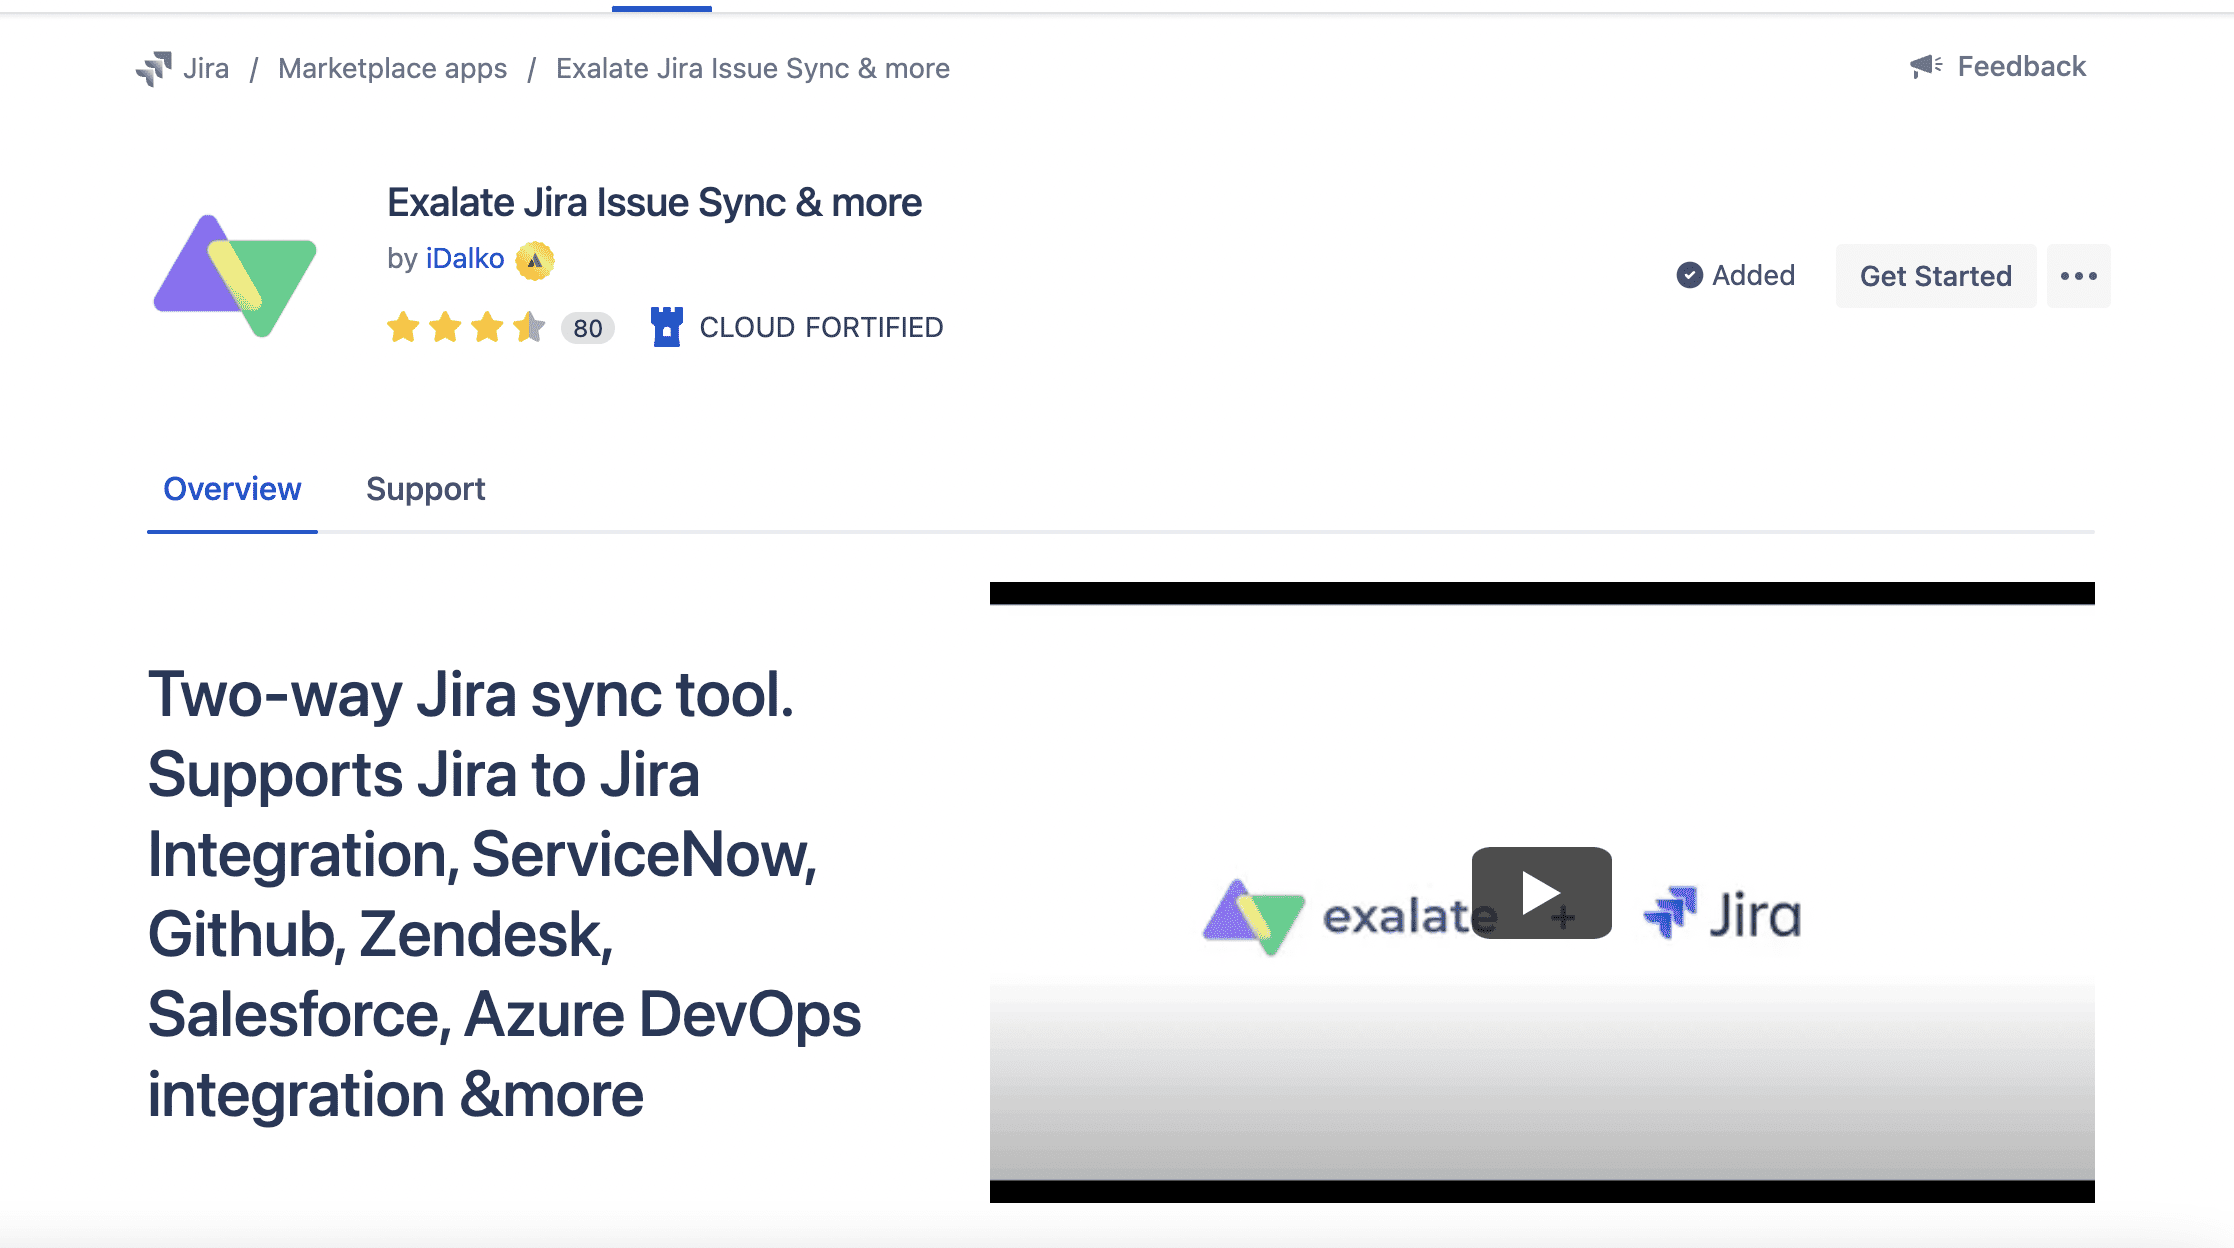
Installing Exalate on Jira is pretty straightforward. You can do it directly from the Exalate website, or by visiting the Atlassian marketplace.
We’ll set up Exalate from within Jira here.
We are assuming you use Jira Cloud, but Exalate allows you to synchronize Salesforce with Jira on-premise as well. You can find out how to go about the installation for that here. Check out more information about Jira Cloud here.
To install Exalate, first, click on the “Settings” icon on the top right of your Jira instance and choose “Apps” from the drop-down menu. 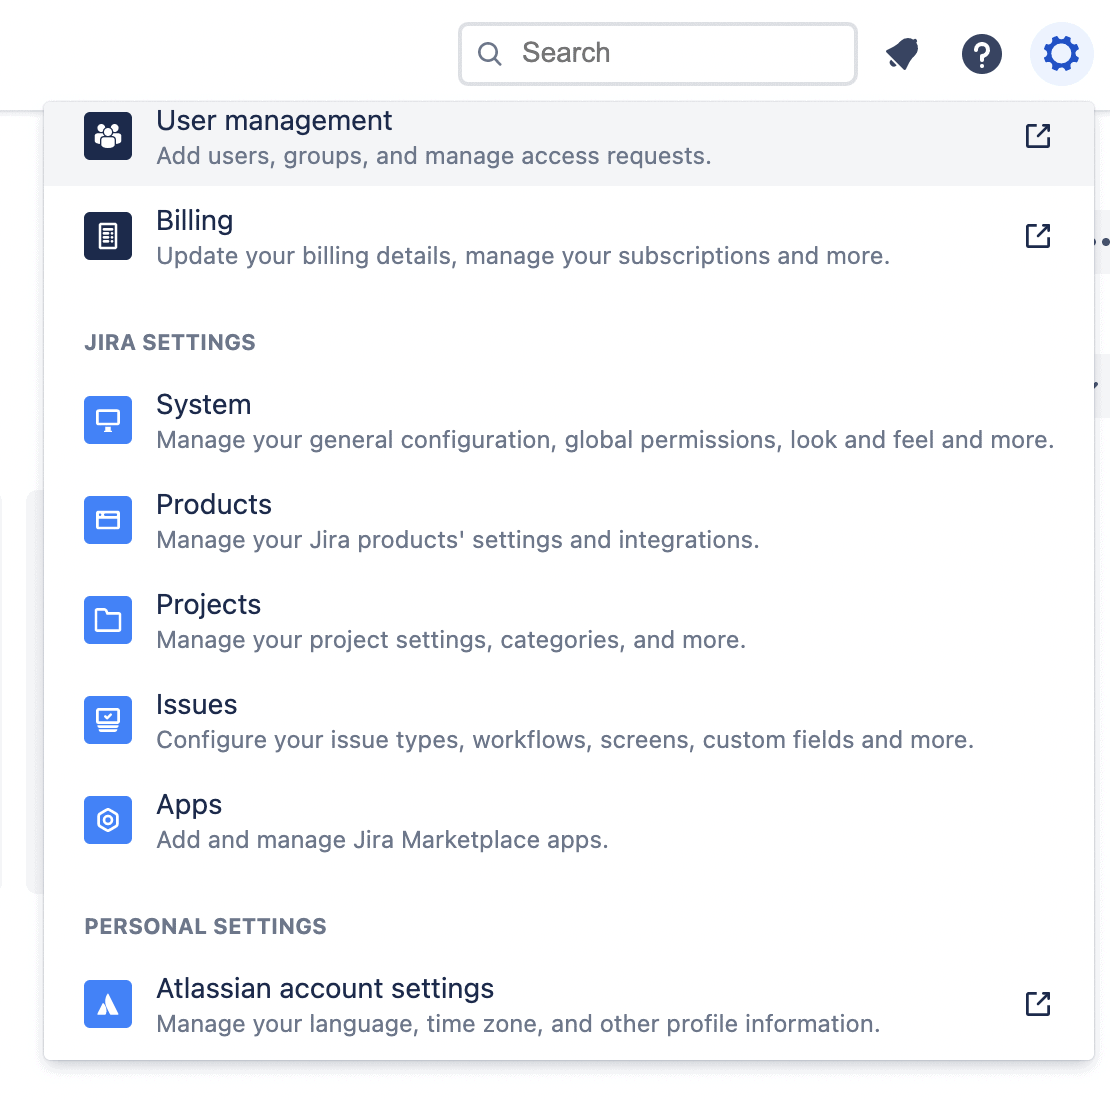

Now click on the “Try it free” button.
An “Add to Jira” pop will be displayed. You can have a look at the Exalate app details by clicking on the “View app details” button. If not, click on the “Start free trial” button to start the evaluation for Exalate on Jira. A few pop-ups will be displayed that will indicate the status of the app installation process.
After a while, click on the “Get Started” button.
Now you are all set to start with your first connection.
Step 3: Connect Jira to Salesforce
The first thing you do when Exalate gets installed is to initiate a connection on one side and accept it on the other side.
Here, we will start initiating the connection from Salesforce, but you can start from either side. Exalate offers you uniformity in terms of its interface across all platforms, so you don’t have to worry about where to start and how to proceed.
Your Salesforce instance looks like this. In case you have logged out, follow these steps to log in again.
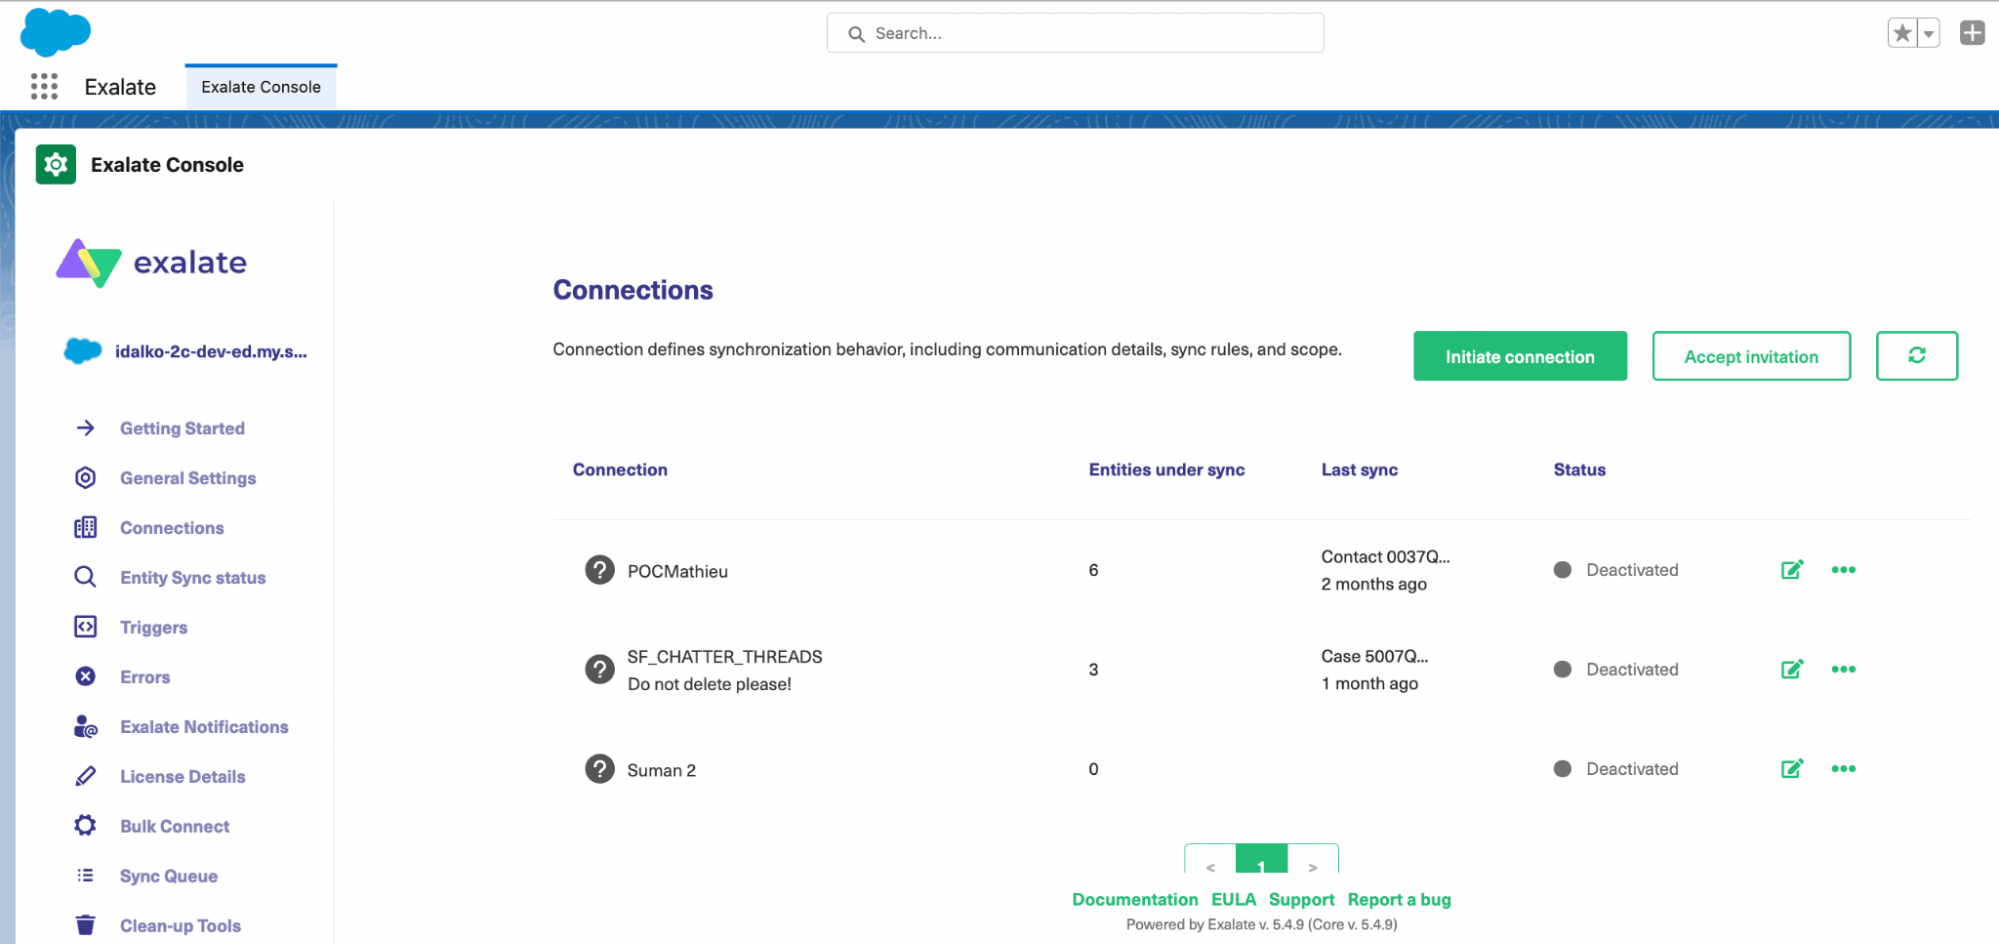
If you have already created connections before, the screen will list their names and statuses.
If this is your first time, you start by clicking on the “Initiate Connection” button. The next screen prompts you to enter the destination instance URL. 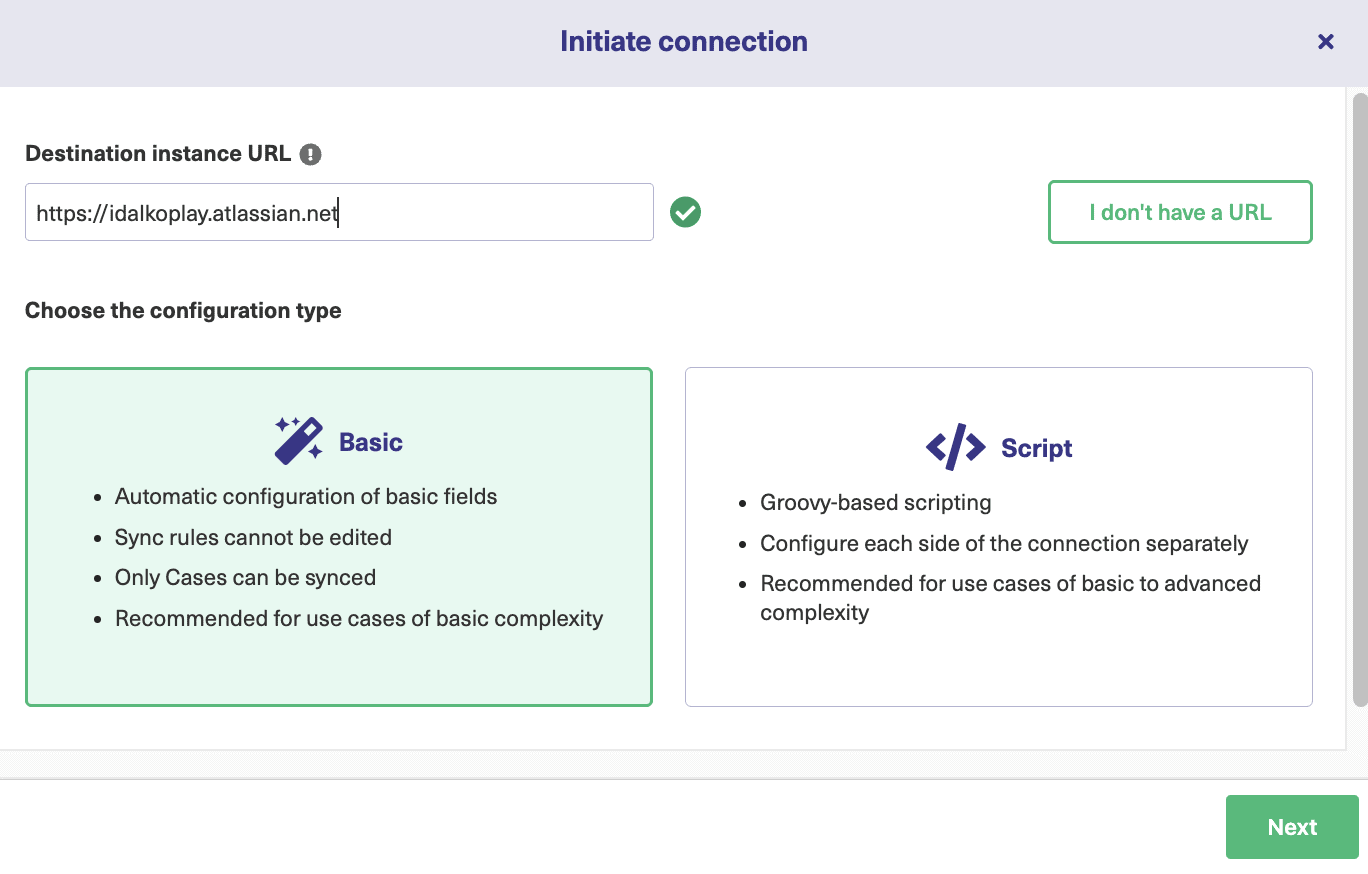
Click on “I don’t have the URL” if you are not aware of your destination URL and follow these steps.
We enter the Jira instance URL since we are initiating the connection from the Salesforce side. After a quick check, you will now need to choose the mode of connection.
Exalate for Salesforce comes in 2 modes: Basic and Script. The Basic mode is a low-code, no-configuration user interface that works well for simple synchronization use cases. There are some predefined mappings and configurations in this mode that you cannot change.
Note: Exalate also has a forever “Free Plan” for the Basic mode connections that allow up to 1000 syncs per month for free. You can get started here. But we recommend you use the Script Mode since it provides you with a lot more customization capabilities to accommodate even the most complex and advanced use cases. We will have a look at both modes here. Let’s start with:
Continue with the Basic Mode
After clicking “Next” on the screen above, you will be asked to verify if you have admin access to the destination side, in our case the Jira instance.
Click “Yes, I have admin access” and click “Initiate”. If you don’t have access, you would be required to manually copy and paste an invitation code on the Jira side.
You will come to know more about how to do this in the Script mode. 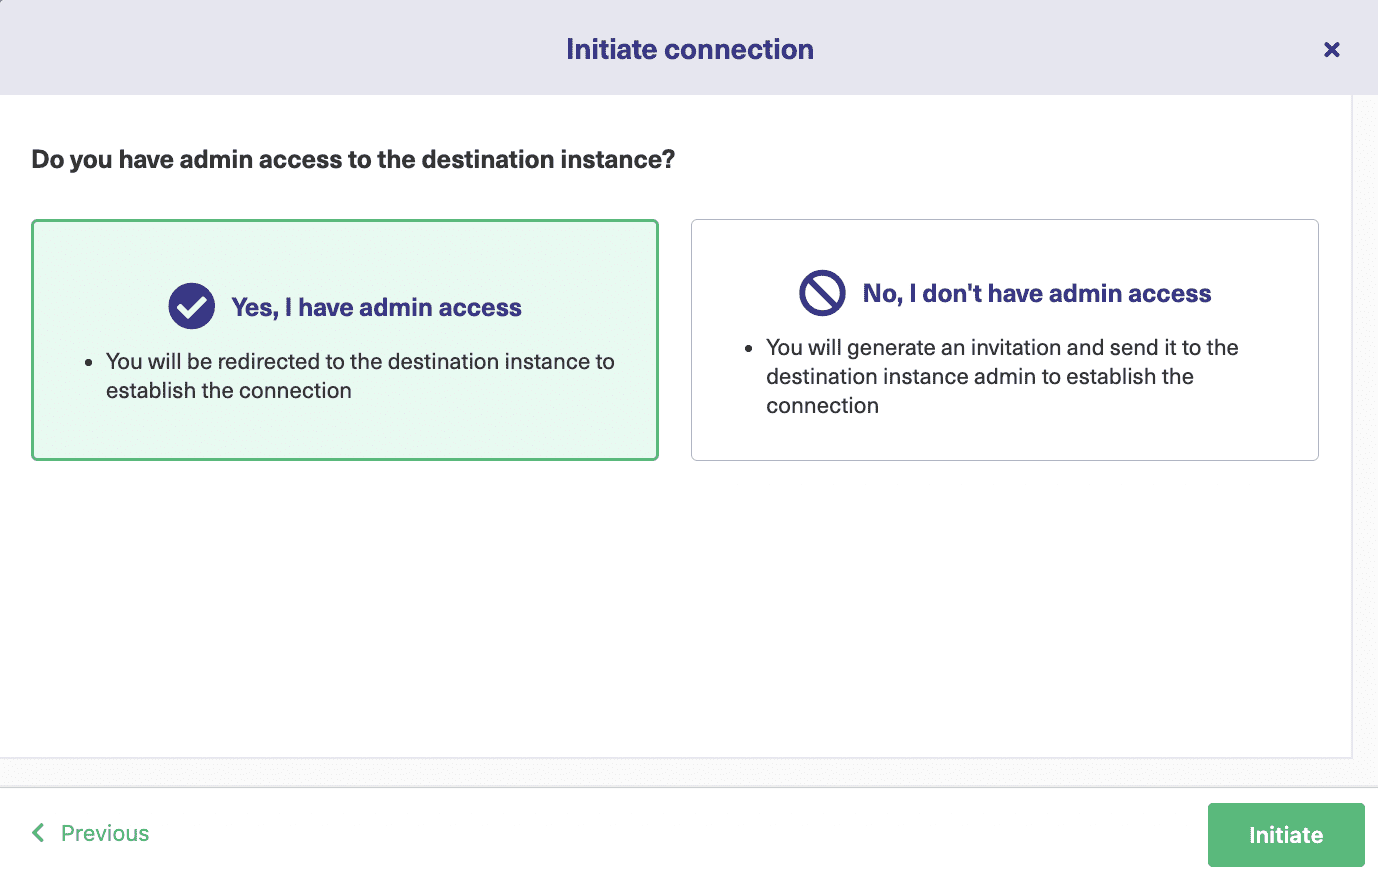

You can even sync issues or Salesforce entities individually using the connect operation, or in bulk using the “Bulk Connect” option, or create automatic triggers for syncing. We will cover triggers in the coming sections.
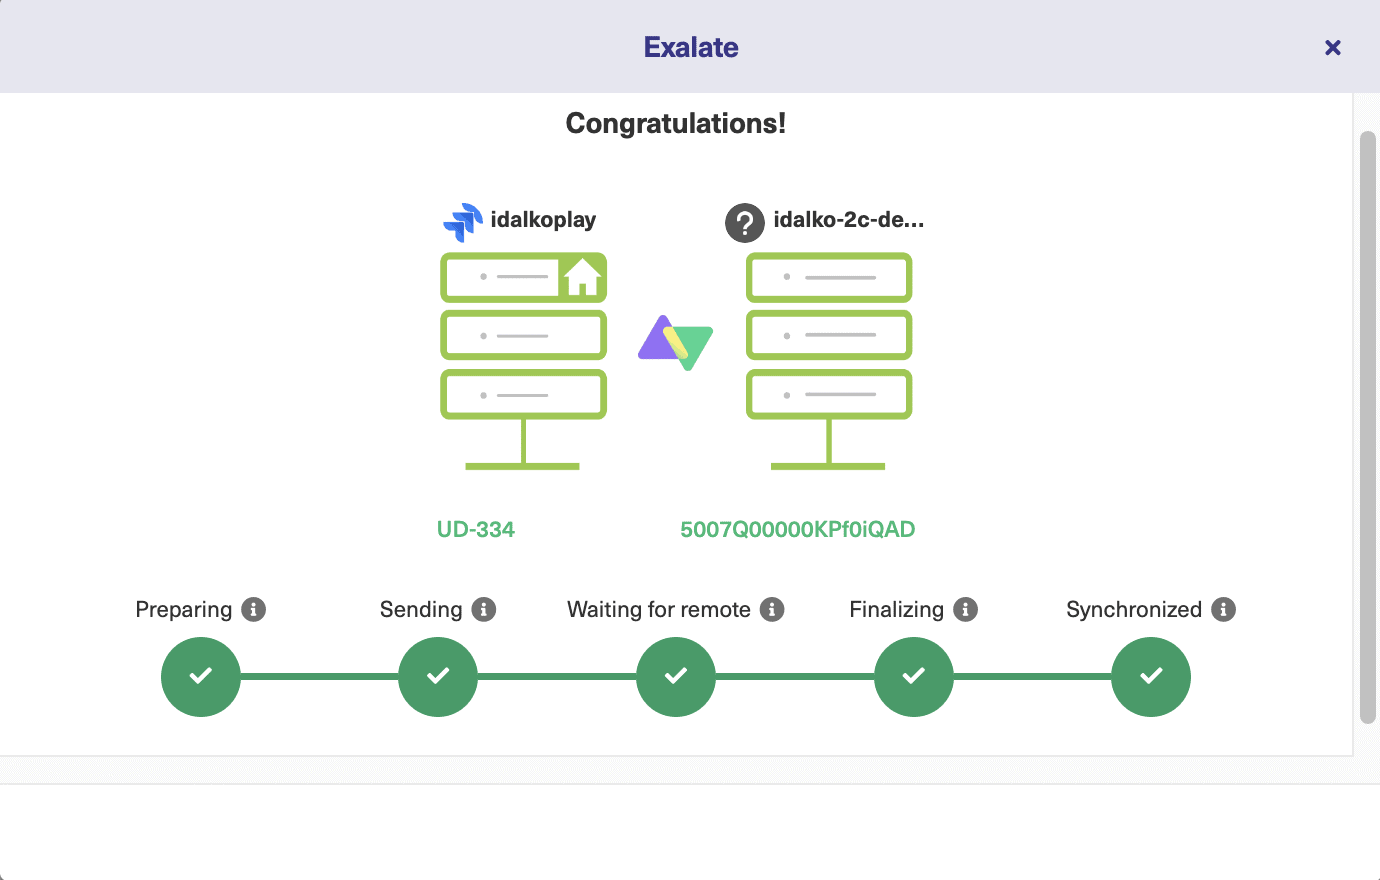
After clicking “Exalate”, wait for some time, the appropriate status messages will be displayed. 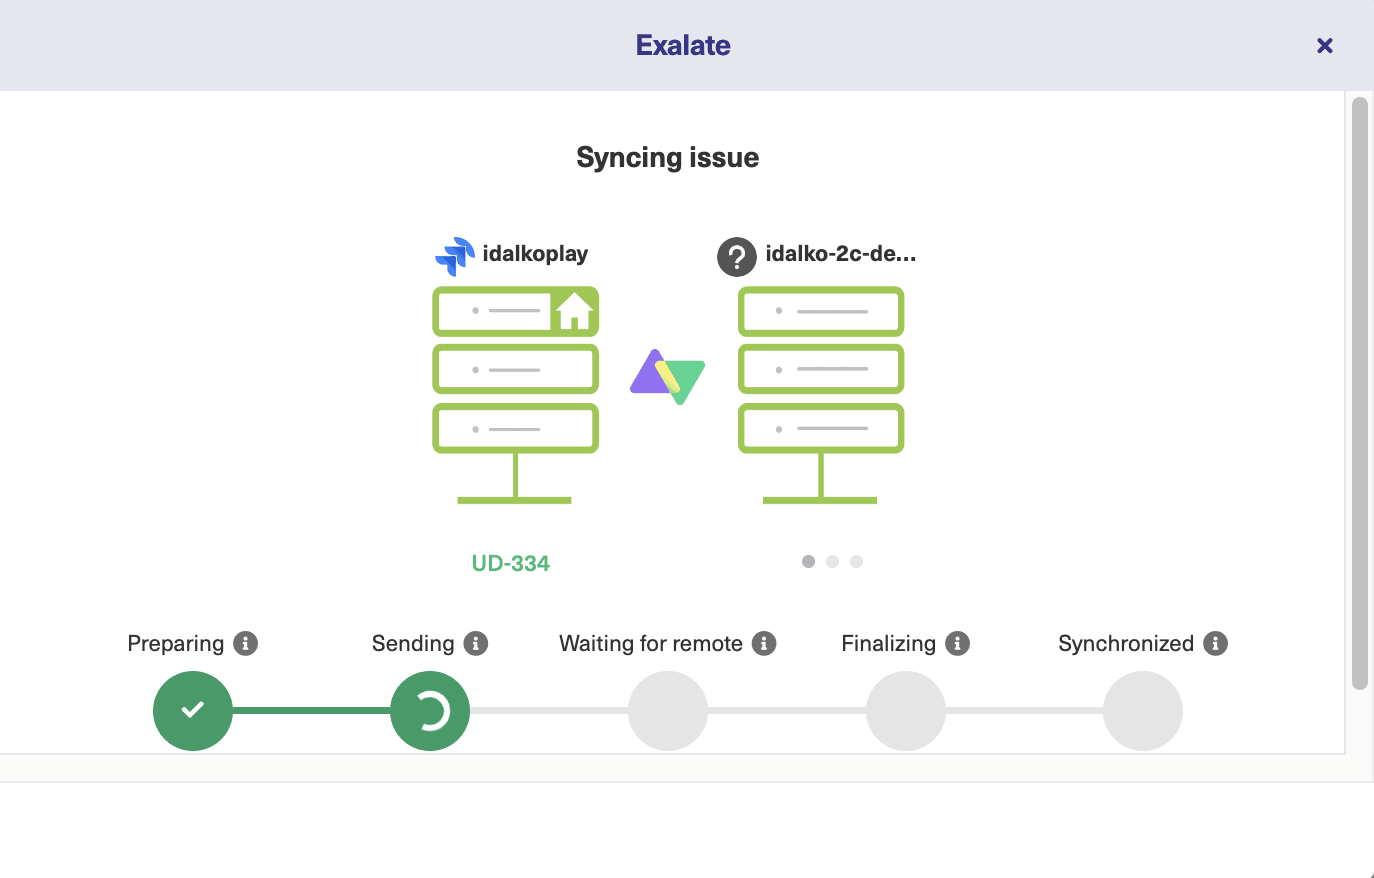
Continue with the Script Mode
If you wish to use the Script mode, then select it and click “Next”. 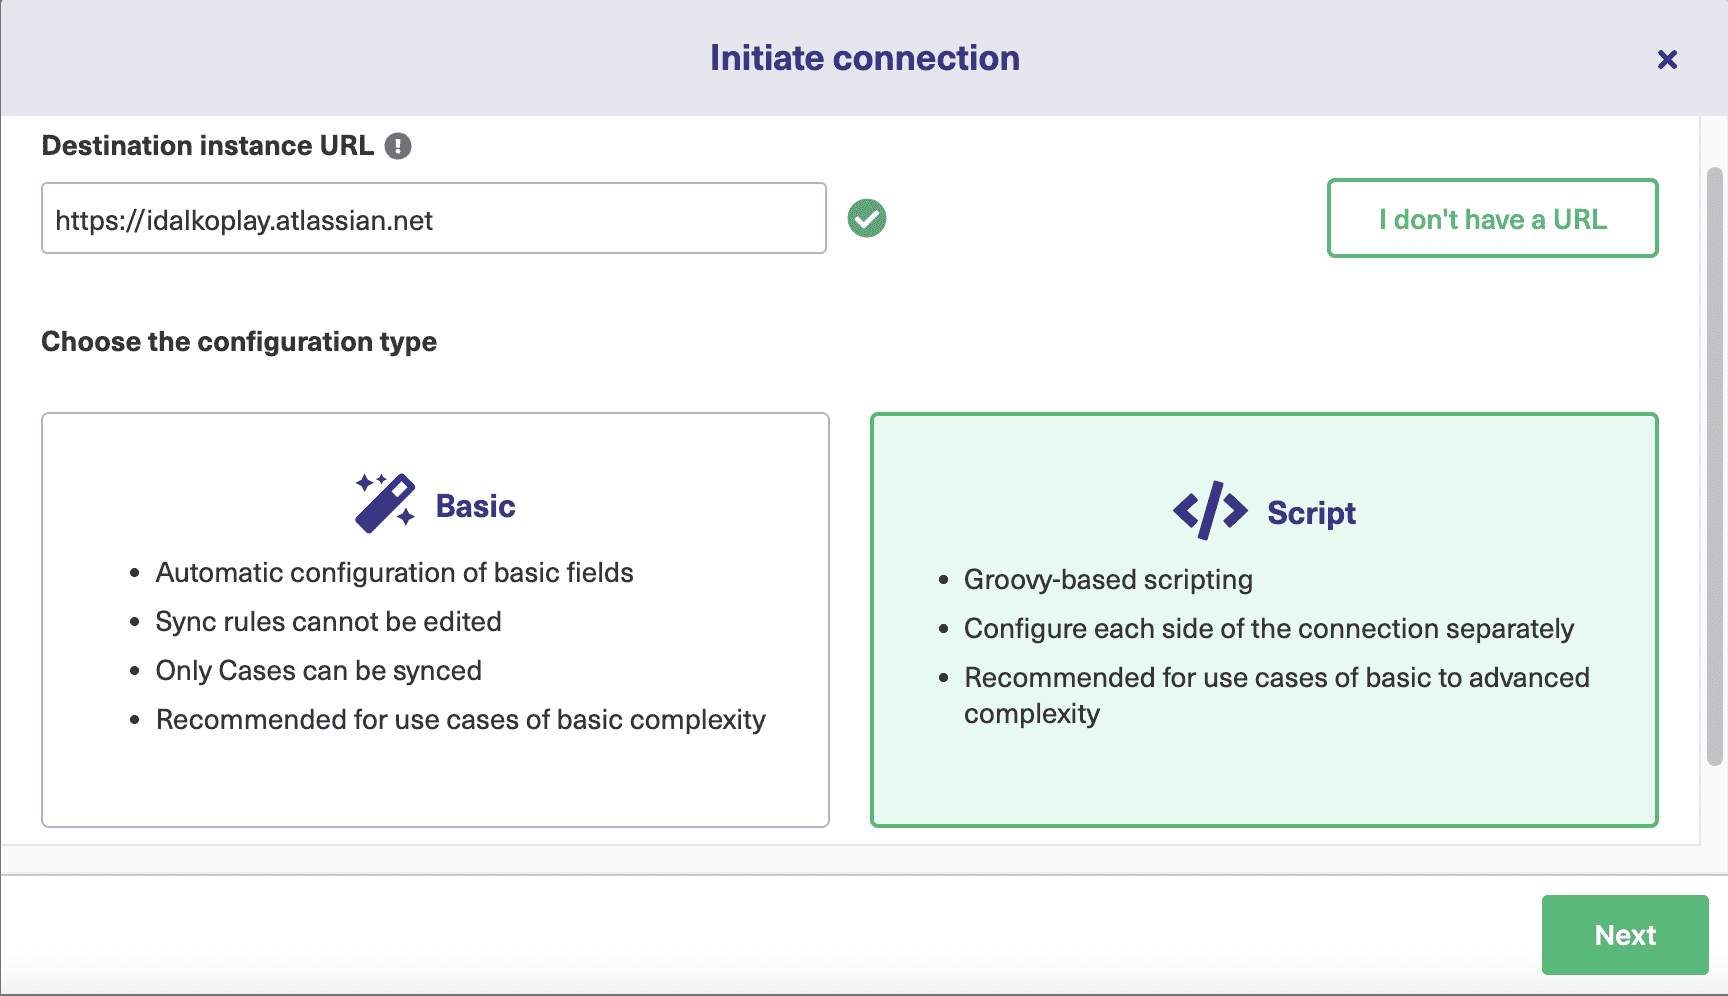
Once you enter the instance names, a connection name will automatically be generated for you, but you can change it if you want. Enter a description stating the purpose of your connection or any other important details. Be sure to elaborate and take your time!
Once done, hit “Initiate”. 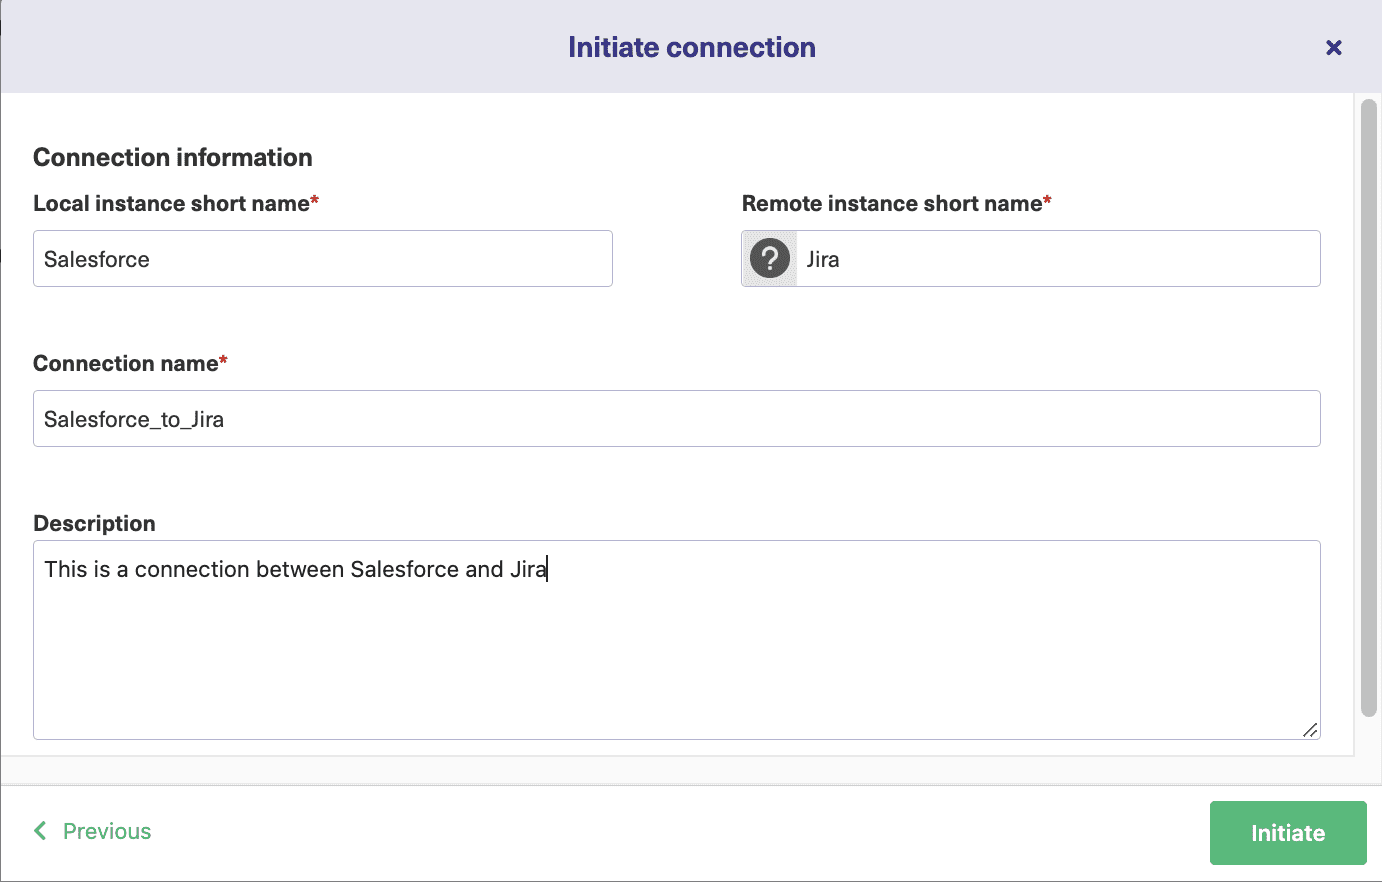
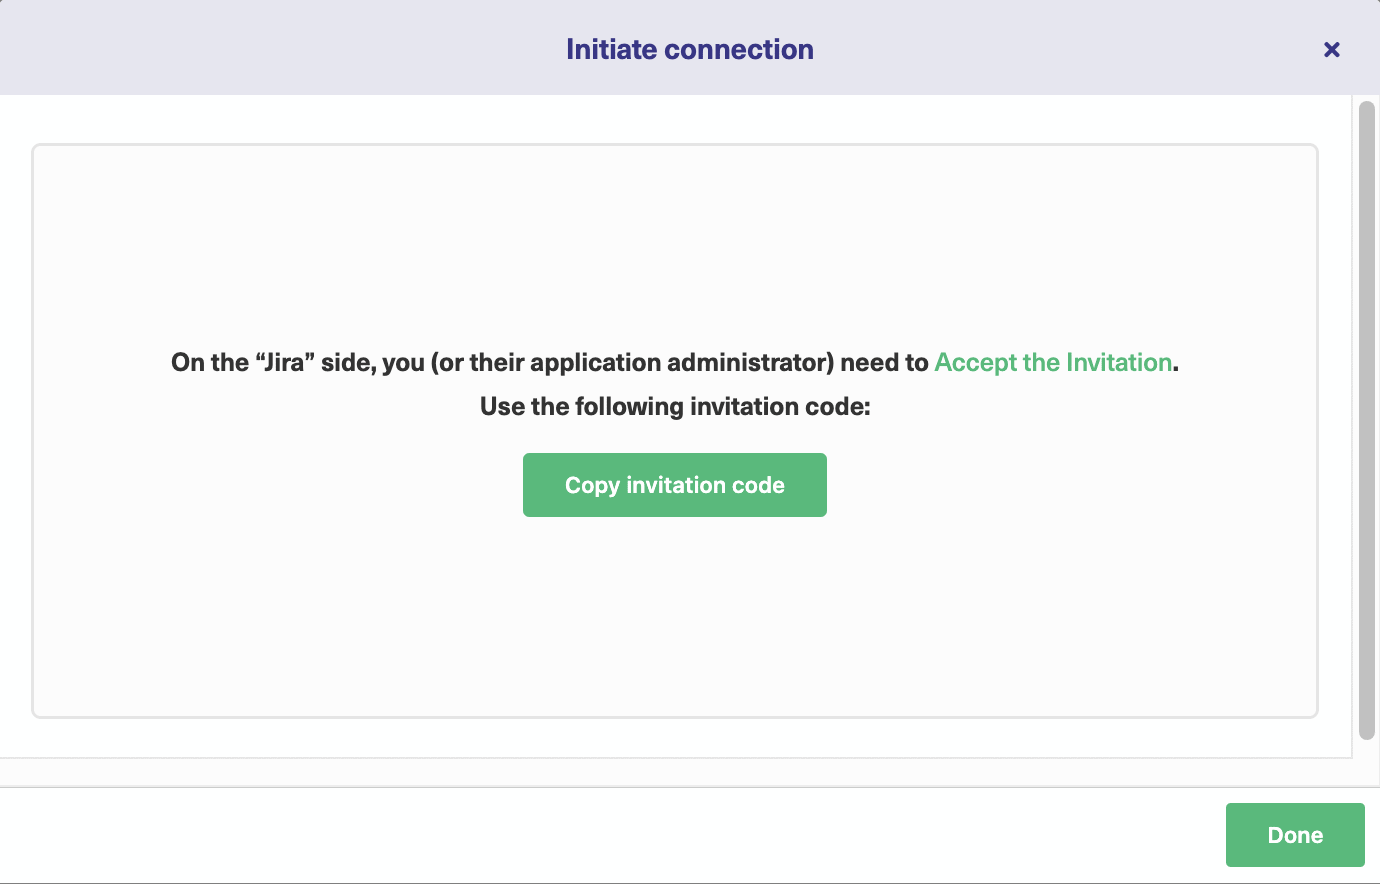
On the Jira side, open up the “Connections” tab in the Exalate Admin console. In case you don’t know where it is, click on “Apps” at the center of the screen, then select Exalate.
On the left-hand submenu look for Exalate. Click “Connections” under it.
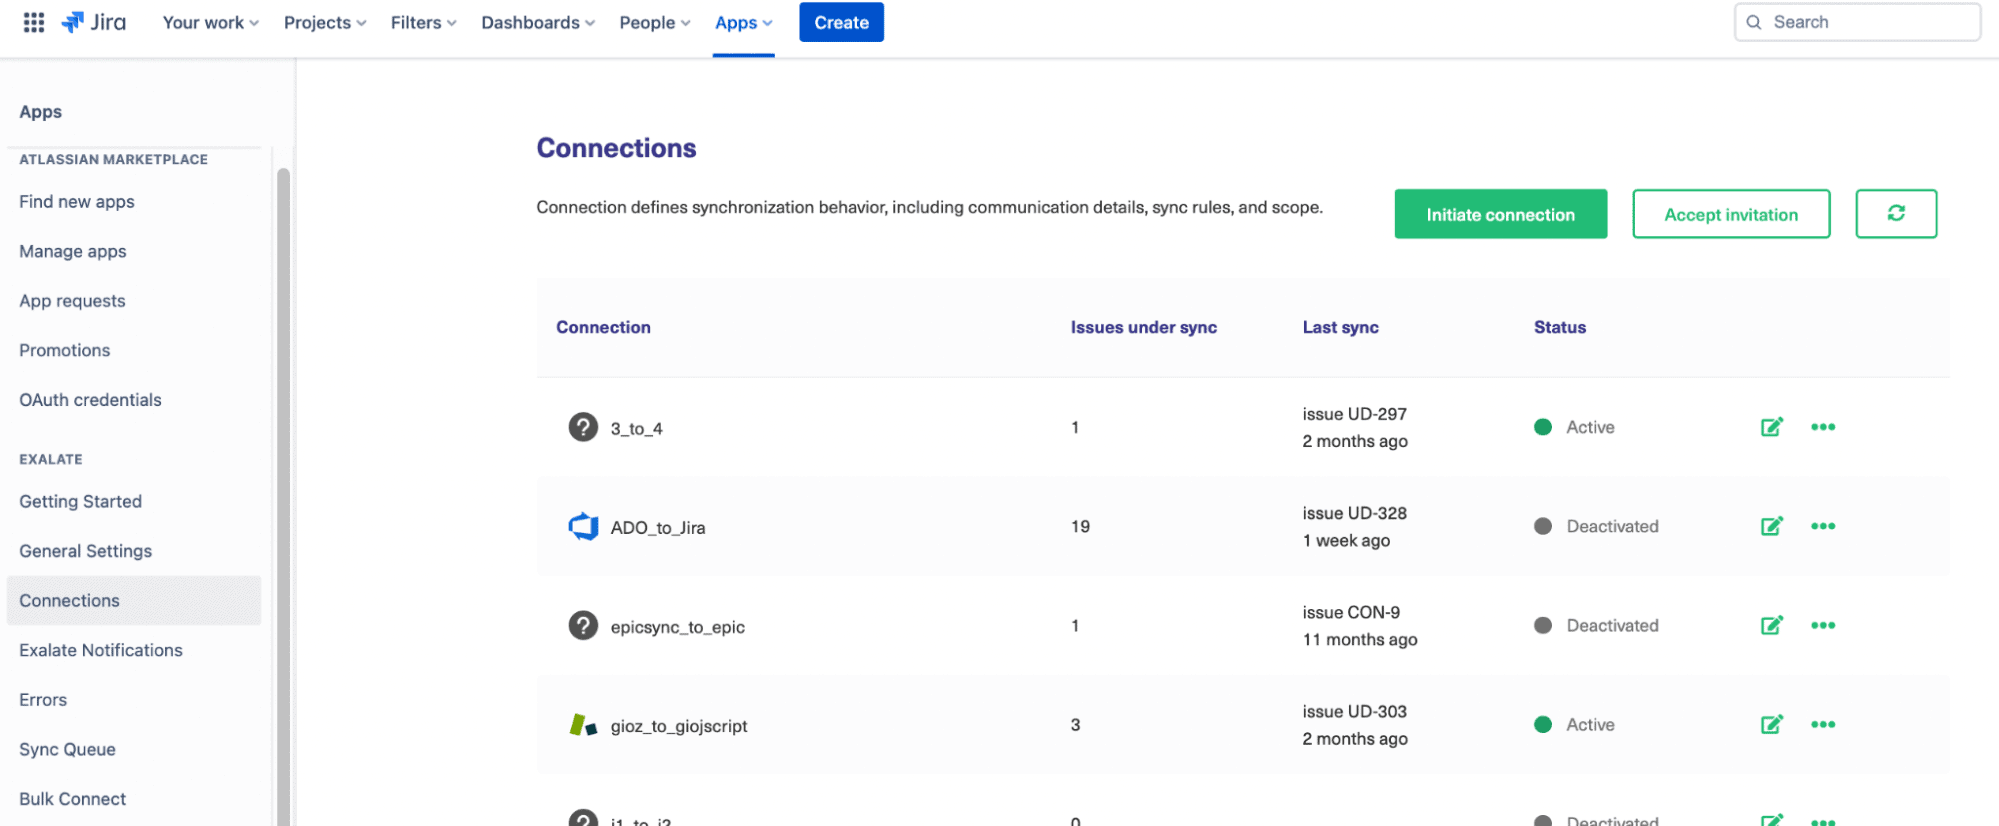
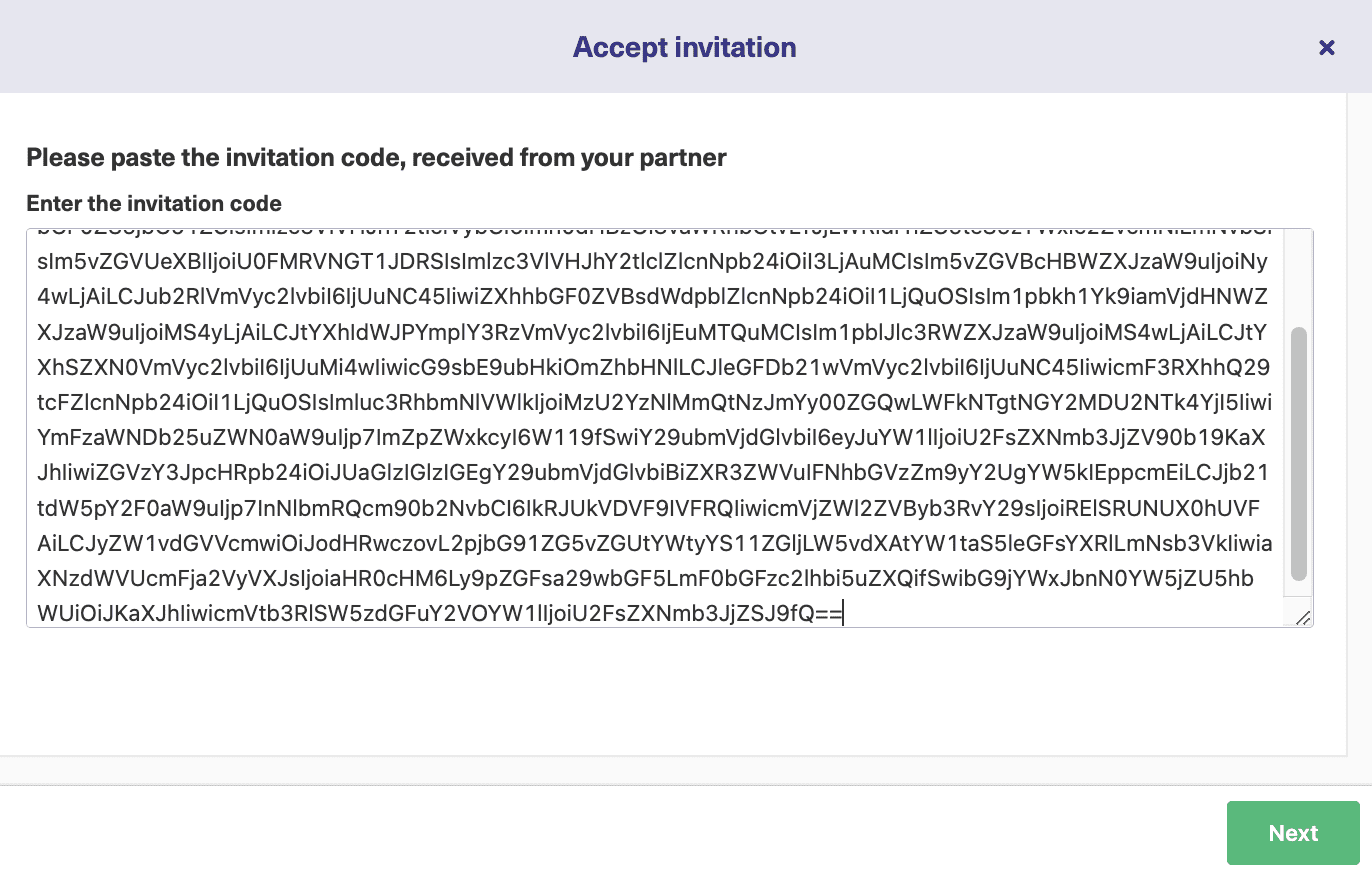
On the “Connections” screen click “Accept the Invitation”. This opens up a text area for you.
Paste the invitation code you just copied here. Then click “Next”.
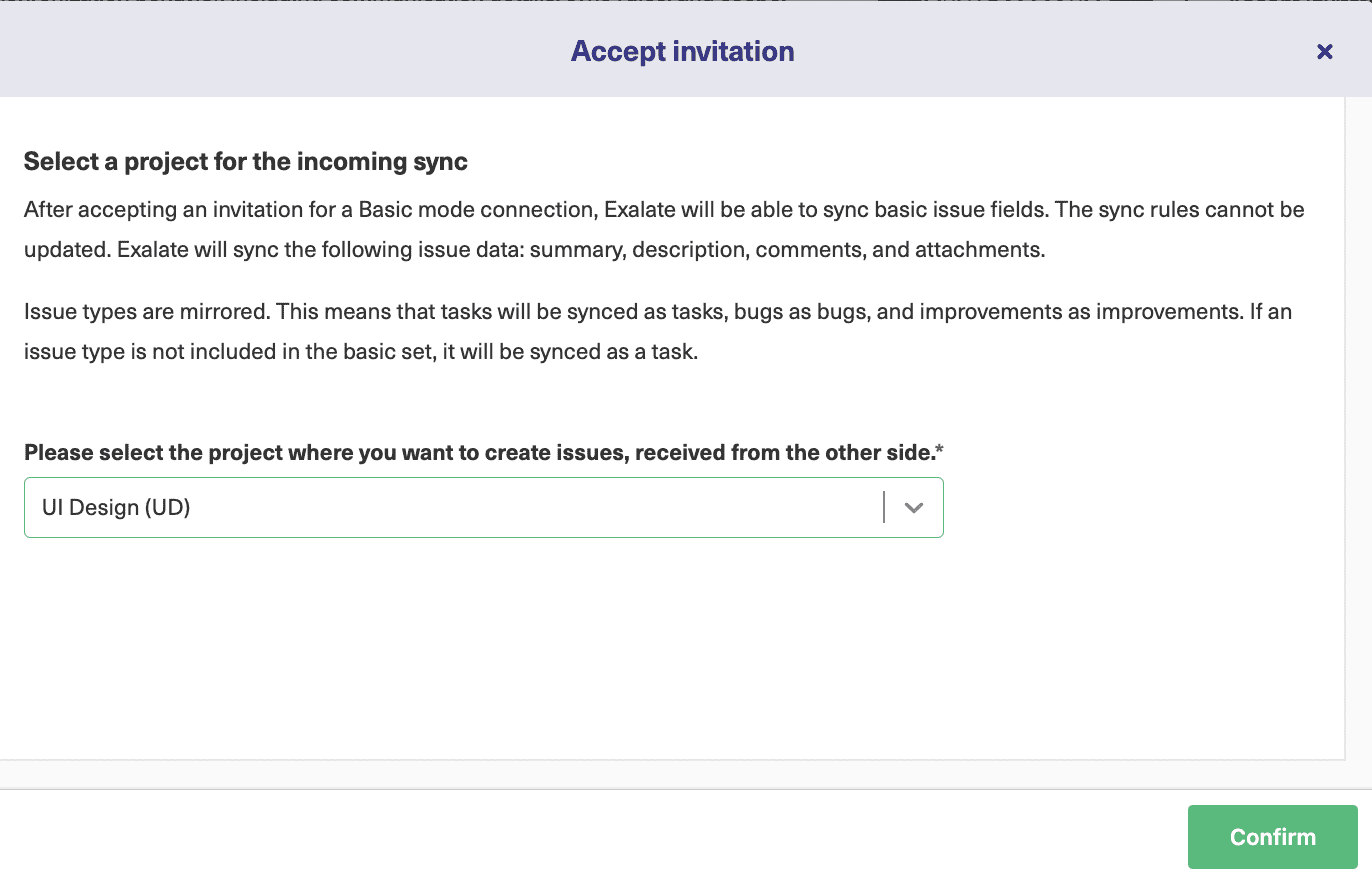
You now need to select the project on the Jira side just like you did for the Basic mode. Select the appropriate one from the drop-down list. Click “Confirm”.
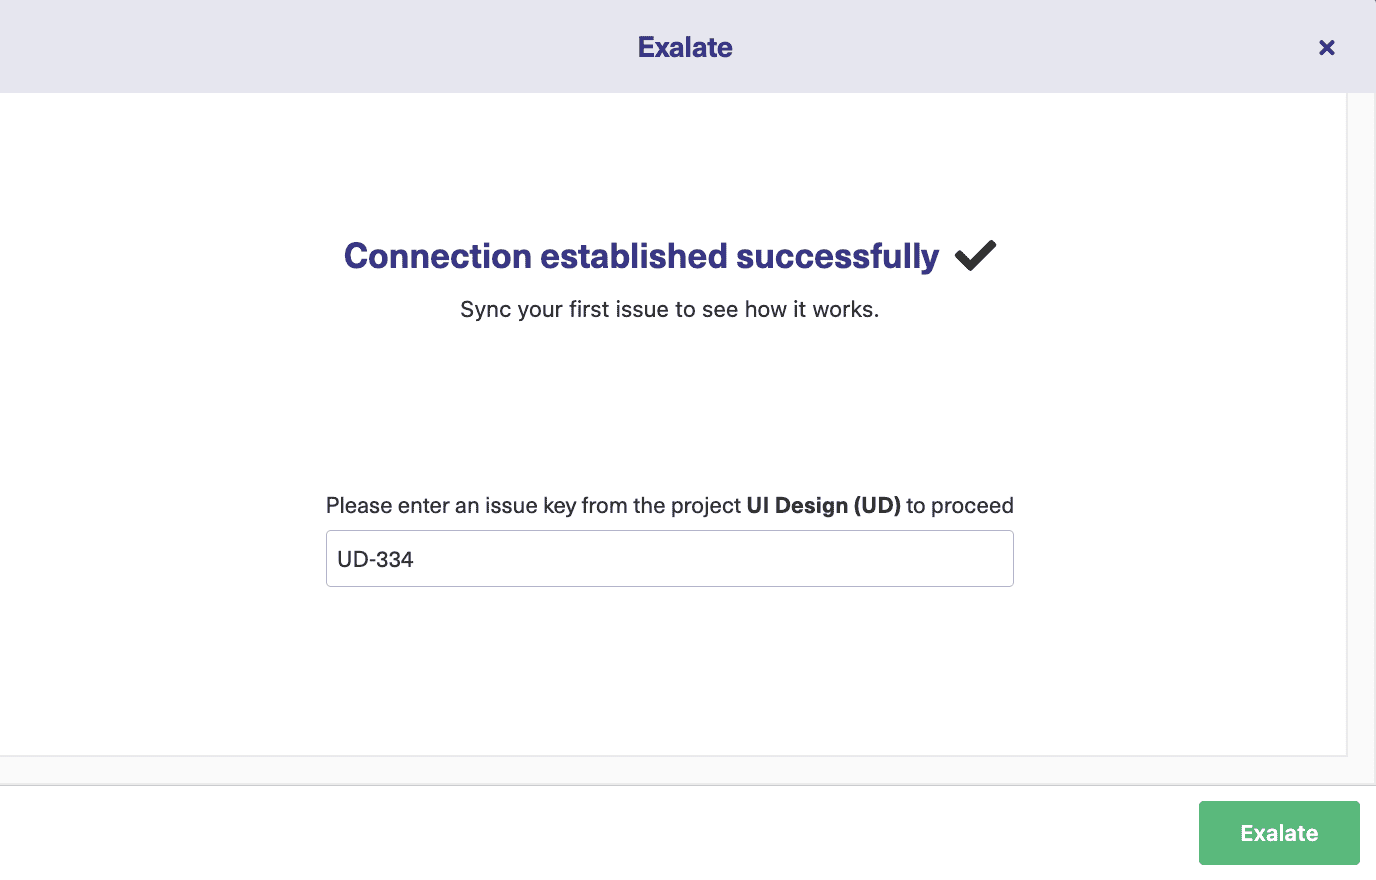
The connection between Jira to Salesforce has now been successfully established.
There are 2 ways to proceed with configuring the connection from here.
You either directly click on the “Configure Sync” button shown below or edit the connection as shown in step 4.
Both of them will redirect you to similar screens. 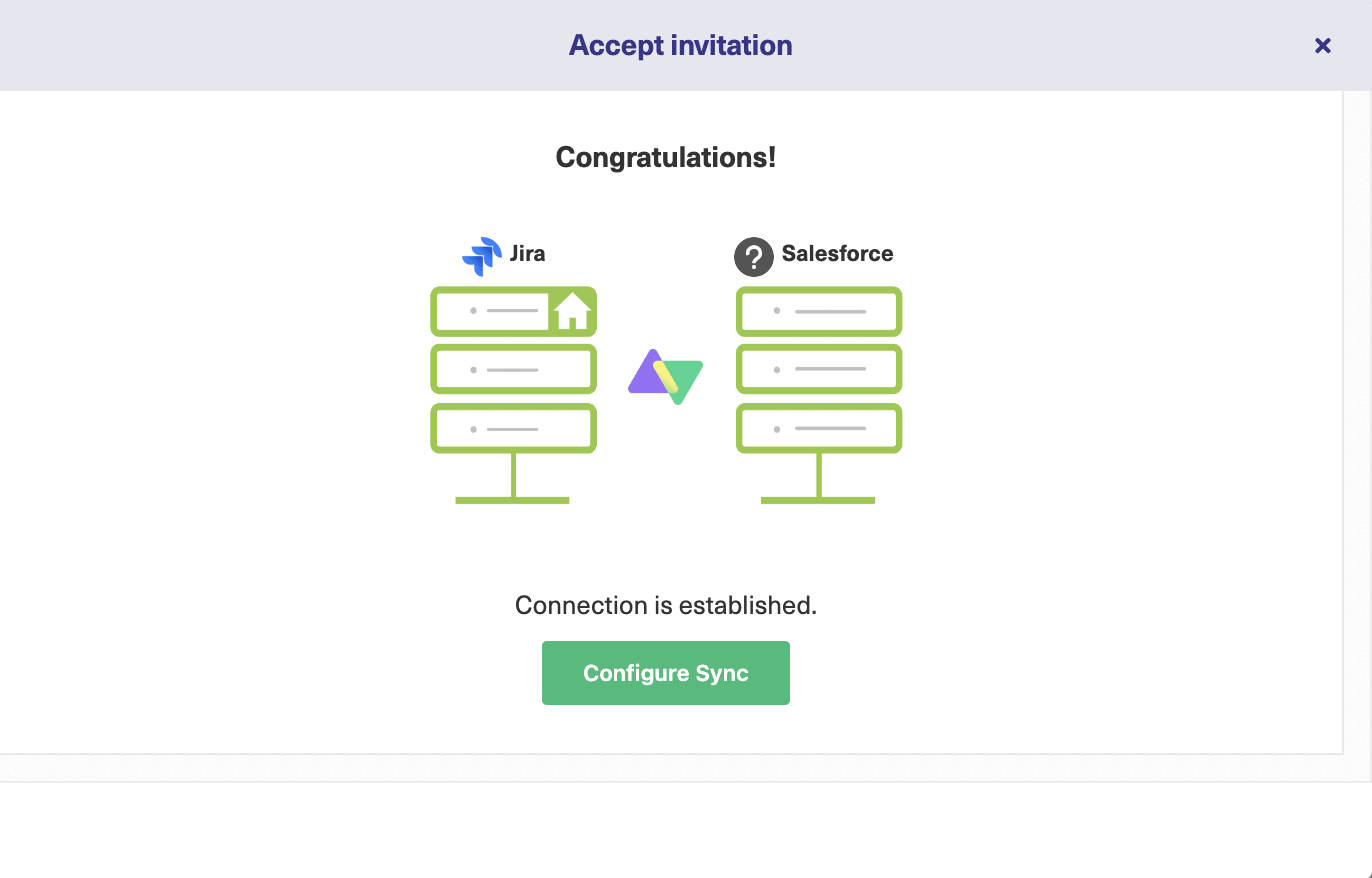
Step 4: Configure the connection to set what information is shared
Once your Jira Salesforce integration is established, it’s time you control what information is sent between Jira and Salesforce.
With Exalate, you can achieve this by configuring the connection. For this, you can go to the “Connections” page in your Salesforce or Jira instance and see your connection listed there.
Click the edit connection icon. 
The first tab is “Rules”, which we will see in this step, the “Triggers” tab will be covered in the next step.
The “Statistics” tab displays the overview of your connection synchronizations like the number of syncs, the date on which you last synced, etc.
The “Info” tab provides some general information about the connection like the name of the connection, the destination instance URL, and the type of connection. You can go ahead and edit the description of the connection if you want here. 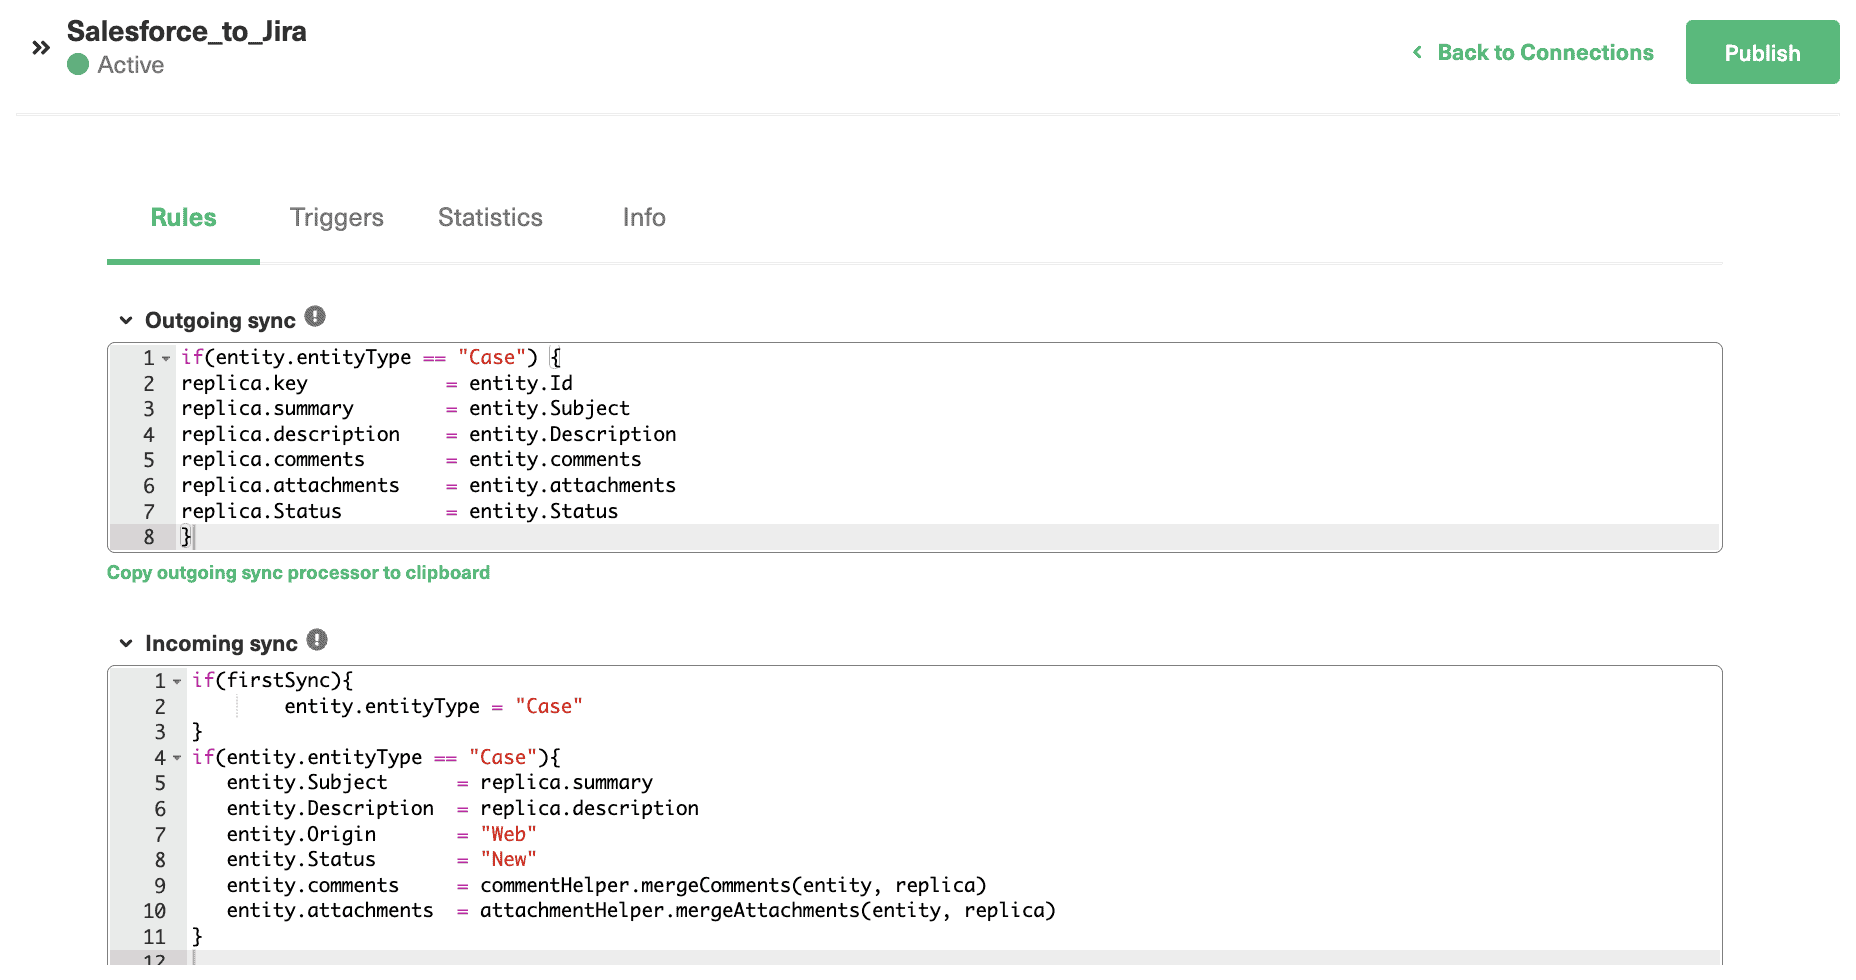
There are “Outgoing sync” rules to decide what you want to send to the other side, and there are “Incoming sync” rules to control how you interpret information coming from the other side.
Both sides of the connection have these rules, but the only difference is the way in which the entities are addressed. They depend on the platform the connection is accessed from. You can straight away edit the rules inside the text boxes, or you can copy and paste them somewhere safe and work on them later.
Here we are seeing the rules on the Salesforce side. As seen in the “Outgoing sync” rules, “replica.description = entity.Description” means the description of the Case(entity) is saved inside a replica.
The replica is just a placeholder working to save the values you want to send to or receive from the other side. Here, it means the description of the Case will be sent out from Salesforce and will be saved under the description of the issue created in Jira.
As such, on the Jira side under the “Incoming sync” rules: “issue.description = replica.description” means the description of the replica(Case from Salesforce) will be copied into the description field of the Jira issue.
Sometimes there is a need to set particular values for entity fields. In this case, you simply replace any of the given values with values inside “quotes”. For example, you can replace replica.description = entity.Description with replica.description = “sent from Salesforce”.
For data you don’t want to share anymore, you can simply delete the corresponding line or comment it, so it’s ignored at the time of synchronization. Attach “//” before the starting of the line you want to comment. This will comment only a single line.
To add a comment for multiple lines at one time add “/*” at the start of the block of lines and then “*/” wherever you want the comment to end. For instance, as shown in the image below if you don’t want to sync the description of the Case with the Jira side you simply add “//” at the start of the line in the Outgoing sync rules. 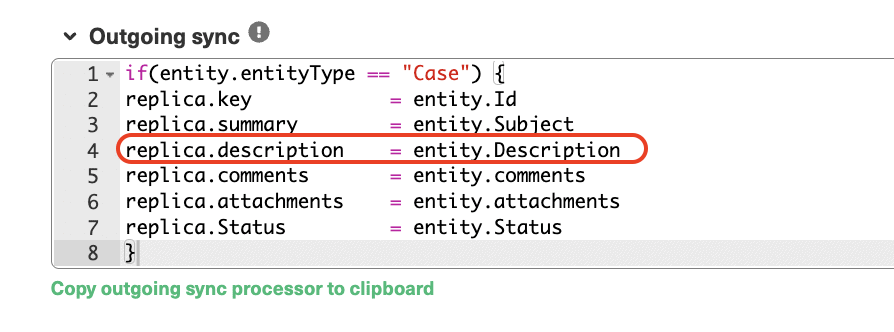
For example, on the Jira side, in the incoming sync rules issue.attachments = attachmentHelper.mergeAttachments(issue, replica) uses a helper to process attachments. This is because attachments are complex and can contain different file types, so using a helper is an easy way out.
You can edit them in the outgoing sync rules section or the incoming one depending on whether you want to make changes to the data sent or received.
Step 5: Set up triggers for automated synchronization
Triggers determine the condition under which Jira issues and Salesforce entities must synchronize. You might want to synchronize an “Account” in Salesforce related to a particular customer with Jira or automatically create an issue whenever a “Case” is created or updated in Salesforce. Whatever the conditions, they can be easily implemented.
The process for creating triggers is the same in both Jira and Salesforce, but the search queries at both ends are platform-specific. For instance, JQL (Jira Query Language) is used for Jira, and SOQL(Salesforce Object Query Language) is used for Salesforce.
Creating triggers is pretty straightforward and intuitive.
You can always learn more about how to set triggers in Jira and Salesforce.
For this step, we will create it on the Salesforce side. If you are following this tutorial step-by-step, you should be on the edit connection screen now.
If you aren’t there, go to “Connections” in the Exalate console and click the edit connection button. On the tabs above, click on “Triggers”.
Alternatively, you can also create a trigger from the left-hand menu of Exalate. Both approaches lead you to similar screens, but the latter one prompts you to select the connection you want to create a trigger for since it is from the general tab. If this is your first trigger, the screen will be empty.
Click on “Create trigger” to get started. You will now be taken to the “Add trigger” screen. 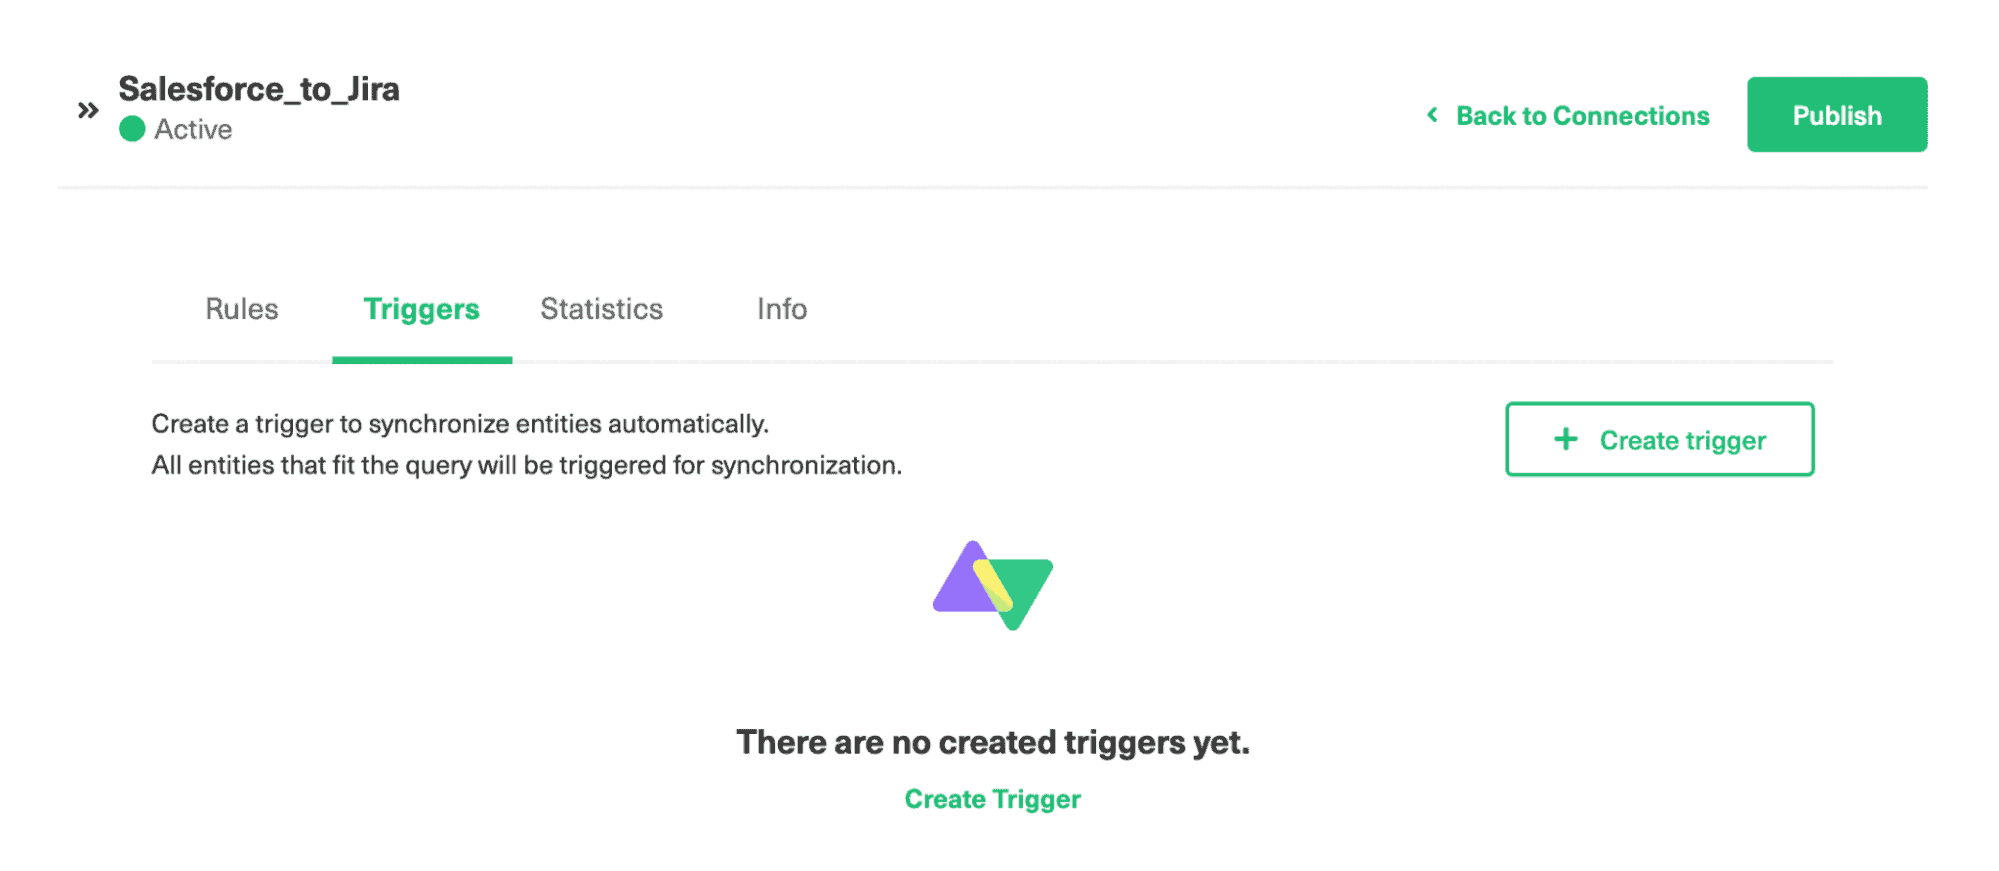
You can create a trigger by entering specific conditions to filter. For instance, if you choose Opportunity from the drop-down list, then you can manually enter the details for it as shown in the screen below. 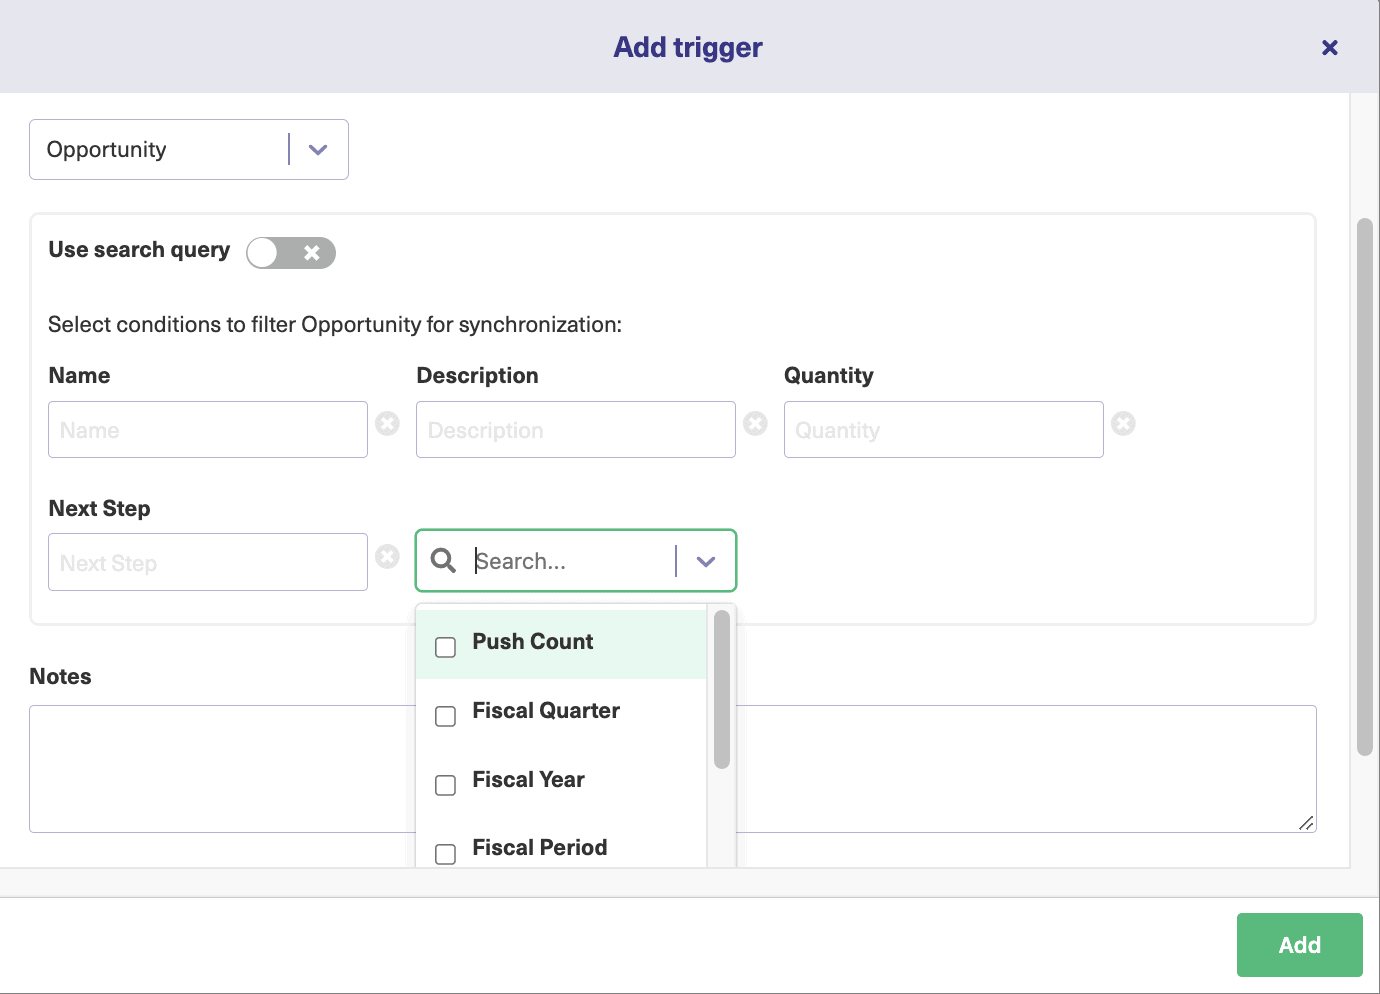
Write the query in the “If” section. Don’t forget to add “Notes”. They will help you to understand what the trigger is created for if you have too many of them. 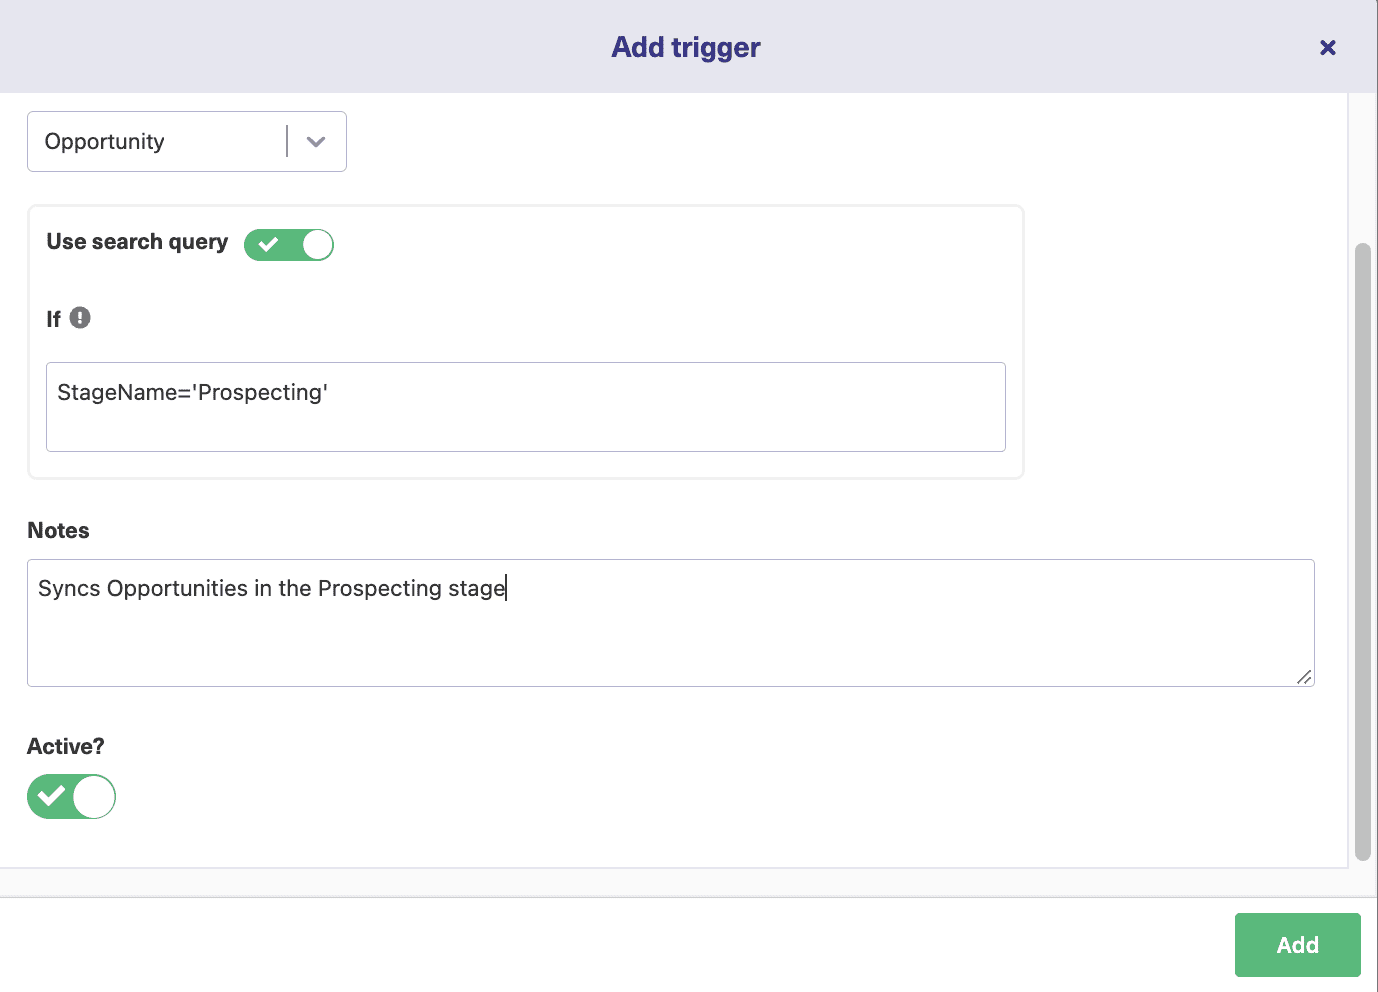
Click “Add” when you are done. 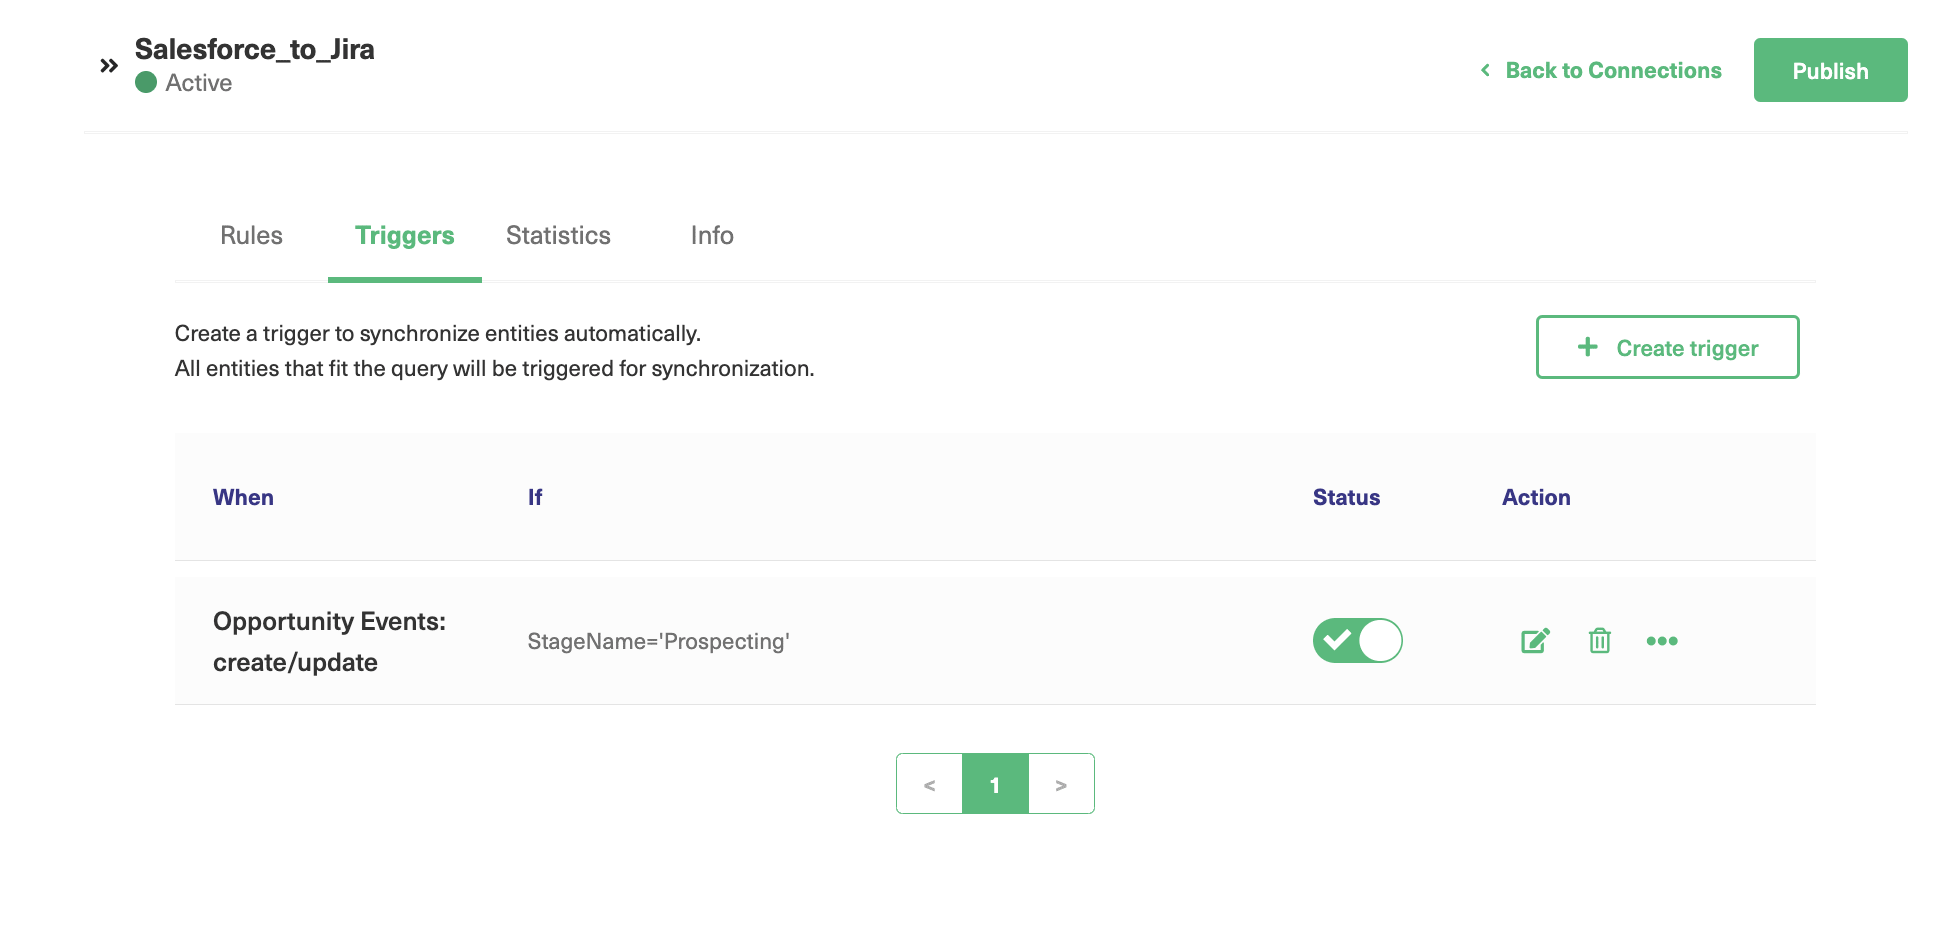
You can activate or deactivate the trigger from this screen by toggling the “Status” button.
You can also click on the 3 dots under “Action” to either edit, delete, or “Bulk Exalate” from the trigger. Bulk exalate allows you to sync existing issues or entities that satisfy the trigger conditions you have set.
Don’t forget to click “Publish” once you have made all the changes.
Step 6: Start synchronizing information
We started by creating a connection between Jira and Salesforce.
For the Basic mode, you can sync by creating triggers or synchronizing several issues or entities together using the “Bulk Connect” option. You can also explore the “Connect” operation that will allow you to sync existing Jira issues to Salesforce.
For the Script mode, once you are done configuring the synchronization the way you want, the issues or entities will automatically be synced when the conditions are met.
Exalate periodically checks for syncs and updates, so if your synchronization isn’t reflected immediately, wait for some time and try again. You can configure and alter the sync rules and triggers anytime to make sure everything is working as you intend it to.
Common Use Cases
Now that we have seen how a Jira Salesforce integration can be set up, let’s explore a few use cases where this kind of integration would be useful.
Sales and Project Management Teams
Your sales and project management teams can benefit hugely from passing information between them.
With a Jira Salesforce integration issue statuses and updates within Jira can be viewed and tracked in Salesforce by the sales team. Say the UI of a project is handled in Jira. The sales team always has all the necessary details about customer feedback or queries in the form of Cases in Salesforce. Some UI-related Cases could trigger an issue in Jira which then is assigned to the correct team member by the project manager.
Comments and status updates of the issue can then be viewed on both the integrated applications so that the sales and the project management teams can always have consistent and up-to-date information delivered automatically within tools they are familiar with.
Sales and Development Teams
With the tools integrated, the sales team can easily escalate bugs and feature requests of key Opportunities from Salesforce. When such a bug or feature request is identified, it automatically creates an issue in Jira and is taken up by the concerned developer. Henceforth the status of that issue and its comments passed back and forth can all be tracked within Salesforce without the sales team having to contact the developers every time they need a status update.
The product updates maintained and tracked by the development team in Jira can also be synchronized to Salesforce so the sales teams know when to expect the next product update their key customer is eagerly waiting for.
Sales and Back-office Teams
If your back-office teams use Jira for generating and managing licenses and handling contracts, and also for tracking sales deal progress, then they might benefit from a Jira Salesforce integration.
Such tasks, if synced with Salesforce, can help them get real-time updates on deals and help them streamline their licensing and contracting tasks without making incessant phone calls and sending emails to the sales team to gather the information they need.
Conclusion
We have seen how the synchronization of information between two powerful tools like Jira and Salesforce can help teams collaborate and streamline communication. It also ensures data transparency across teams and helps everyone stay on the same page. We also saw how a Jira Salesforce integration can be implemented in 6 steps, setting Exalate up on both sides and connecting them afterward. Finally, we walked you through creating triggers in order to customize the synchronization based on your specific requirements. We chose Exalate as a tool for this integration because of its inherent support for distributed architecture and advanced scripting capability.
Recommended Reads:
- Jira to Jira Sync: How to Synchronize Multiple Jira Instances in 8 Steps
- Salesforce to Salesforce Integration: Sync Multiple Salesforce Instances Bidirectionally
- How to Set up a ServiceNow Jira Integration
- How to Set up a Jira Azure DevOps Integration
- How to Set up a Jira HP ALM Integration
- How to Set up a Jira Zendesk Integration
- Salesforce Integrations: Integrate Salesforce and other Tools
- Jira GitHub Integration