

One of the main strengths of Jira is its ability to integrate with other tools to facilitate the development process.
Development and QA can use their own workflows. And your Jira acts as a central repository for information, incorporating all that data into one central hub.
This works best when you set everything up properly so that information flows in and out of your Jira as easily as possible.
Today, we’re looking at some simple steps you can take to better incorporate Jira into your GitHub workflow. We’ve summed up all the steps that can help you go from syncing your work by hand, to fully integrating your Jira and GitHub.
Here’s what we’ll cover in this blog post:
- Why Set up a Jira GitHub Integration in the First Place?
- Aligning Jira and GitHub Workflows
- How to Set up a Jira GitHub Connection
- Use Zapier to Further Integrate Jira and GitHub
- Use Exalate to Sync issues across Jira and GitHub
- Common Pitfalls to Avoid after Setting up the Integration
Why Set up a Jira GitHub Integration in the First Place?
Whether you’re working solo or heading multiple teams of developers, GitHub is great for organizing your thoughts, structuring your code, and tackling the problems of development.
Note: If you’re a fan of Atlassian products like Jira, Bitbucket might actually be the better option for you. Here’s why Bitbucket is better than GitHub.
Many people are fine with just using GitHub issues to track problems with their code.
Often, however, people start out using GitHub issues and then transition to Jira as their project becomes more complicated and they need the advanced features Jira provides. Such as complex fields on issues or integrations with third-party tools.
If you’ve just started using Jira, perhaps you just need a way to sync issues in Jira with actions in GitHub. If you’re managing a huge team, you might have bigger plans for making sure multiple workflows jive with each other.
Either way, it’s important to go in with an idea of what you want to accomplish.
Note: Learn more about Jira here.
Before you see the different ways in which you can set up a Jira GitHub integration it’s important you prepare some groundwork. Along the lines of aligning your Jira and GitHub workflows and chalking out the requirements of the integration beforehand. This is an important step to gain maximum value out of the integration.
Aligning Jira and GitHub Workflows
Design your Jira Workflows with GitHub in Mind
Jira Workflows help you encode your process into each Jira ticket. Getting your workflow right for your organization is an important part of using Jira effectively.
If you’re integrating with GitHub, you can make sure that your workflow is designed to match up to how GitHub pushes you to work.
GitHub has a great guide on how best to work on their platform.
Every issue gets a branch. And every branch gets a peer review before getting merged and deployed. Why not make those the steps on your Jira workflow? Whenever an action happens on GitHub, you can transition to the next state in Jira.
This can get a little tricky, so just make sure you’ve thought things all the way through.
If you have a development and a master branch along with your feature branches, when do you mark things as complete? When do they land in master, or on the main development branch? Likewise, if you have nested branches, when are they completed?
I’ve found the best way to answer these questions is to look at what your actual development practices are.
Every organization is different, but the great thing about Jira is that it lets you identify what works for you, formalize it into a workflow, and make sure you’re all on the same page.
Design Your GitHub Workflow with Jira in Mind
As with Jira, GitHub provides some great tools for power users trying to get the most out of their platform.
For each pull request, you can assign reviewers and assignees. Why not develop a policy to align your reviewers in GitHub with your reporters or watchers on Jira? Making sure interested parties know where to look for code changes they need is a great way to push to get things done.
Another important point is to make sure you’re using branches and stories properly.
My favorite workflow is to make one new branch per story (with the ticket id in the branch name), and have sub-items within that story be sub-branches that merge into the main branch. That lets me coordinate all the work on one ticket into one final pull request on GitHub.
How to Set up a Jira GitHub Connection
GitHub for Jira/ Jira Software + GitHub: the Native App
In order to get the most out of your integration, you need to ensure you choose the right tools.
Jira and GitHub made this even easier by redesigning their integration workflow and coming up with a native app to integrate these tools. It’s listed both on the Atlassian and GitHub marketplaces.
The App needs to be installed on both Jira and GitHub and the process is pretty straightforward. You can visit the respective marketplaces for this.
Adding the integration is free, and allows you to share data between your Jira and your GitHub repo.
The new integration is the way to go if you’re using Atlassian Cloud.
If you’re hosting Jira on your own server, you’ll have to go through a more manual process to connect. The process is simple, we’ll generate an OAuth token on GitHub, and enter it on our Jira instance so they can interact.
Connect Jira and GitHub together
Note: Follow the directions on Jira’s documentation site to allow your Jira to see what’s going on in your codebase.
We will discuss the steps to connect Jira Cloud and GitHub here.
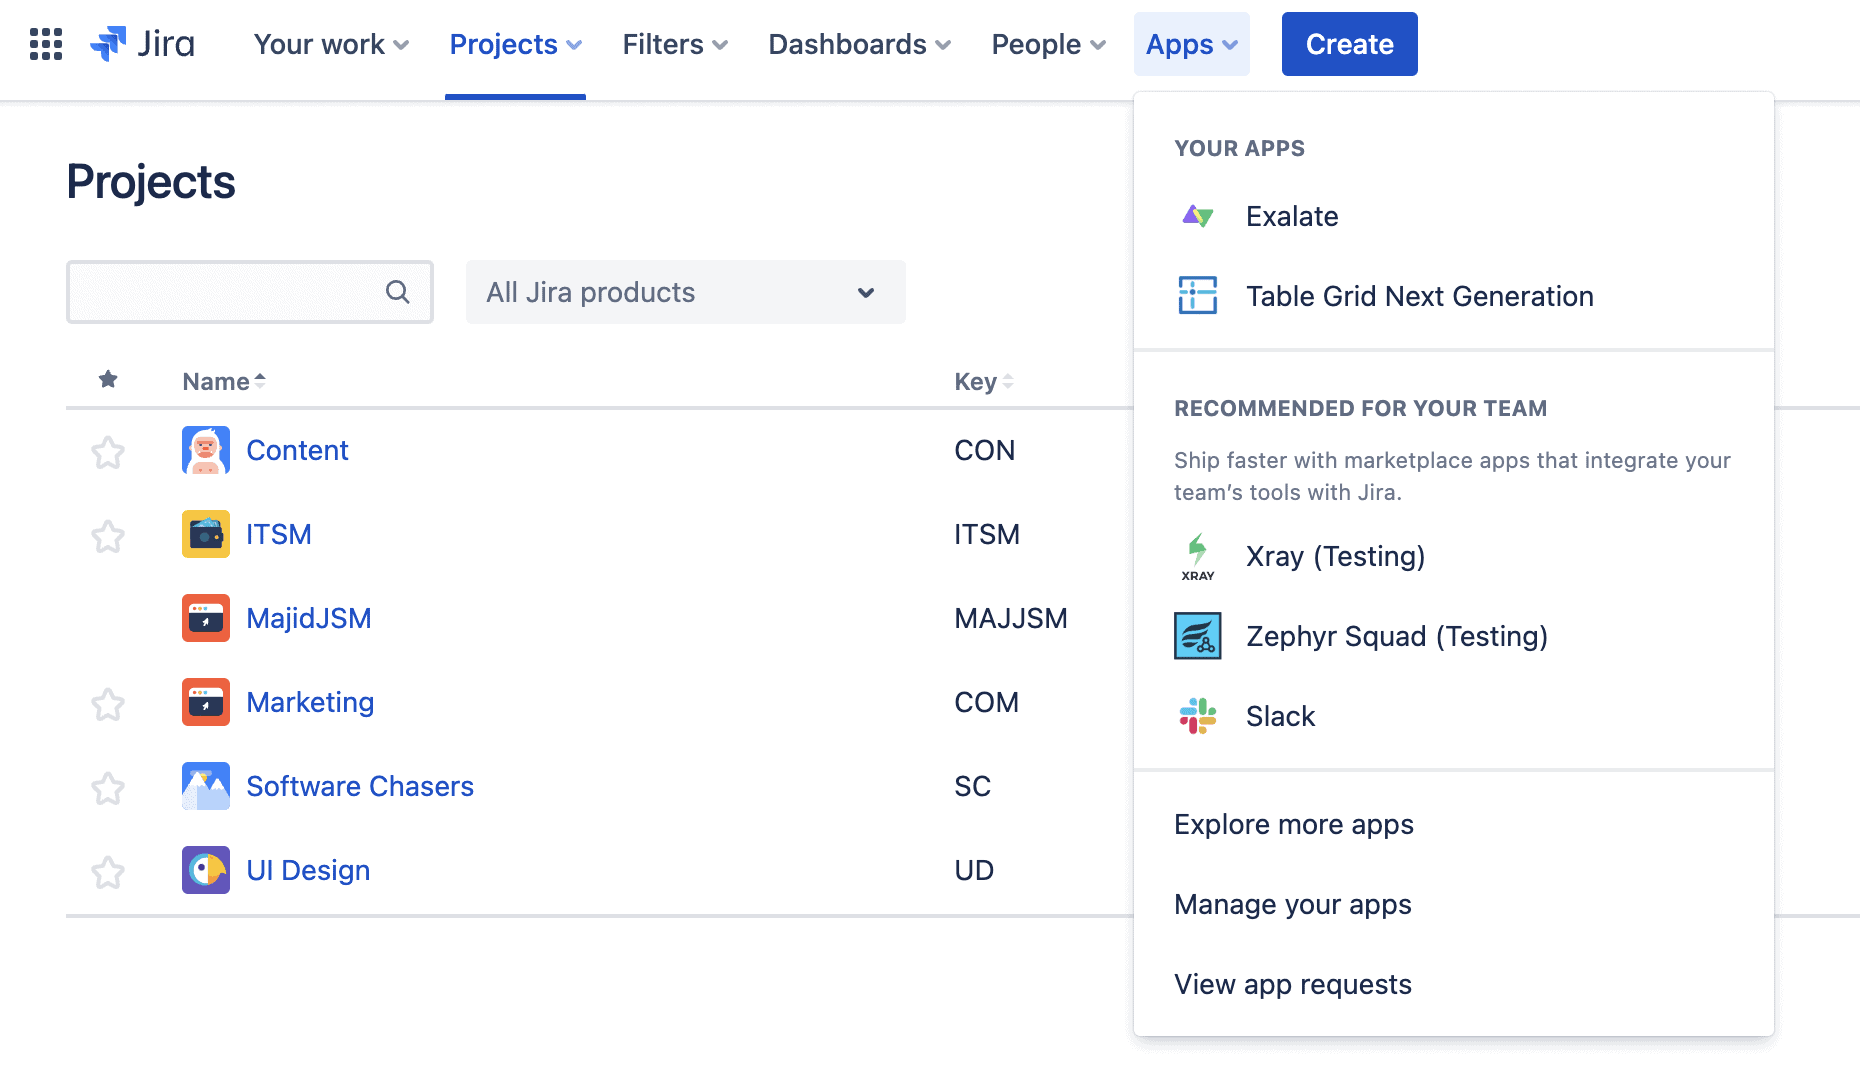
To install the App click on “Apps” in your Jira Cloud instance. If the app is already installed, you will find it listed under “Apps”. If not, click “Explore more apps”.
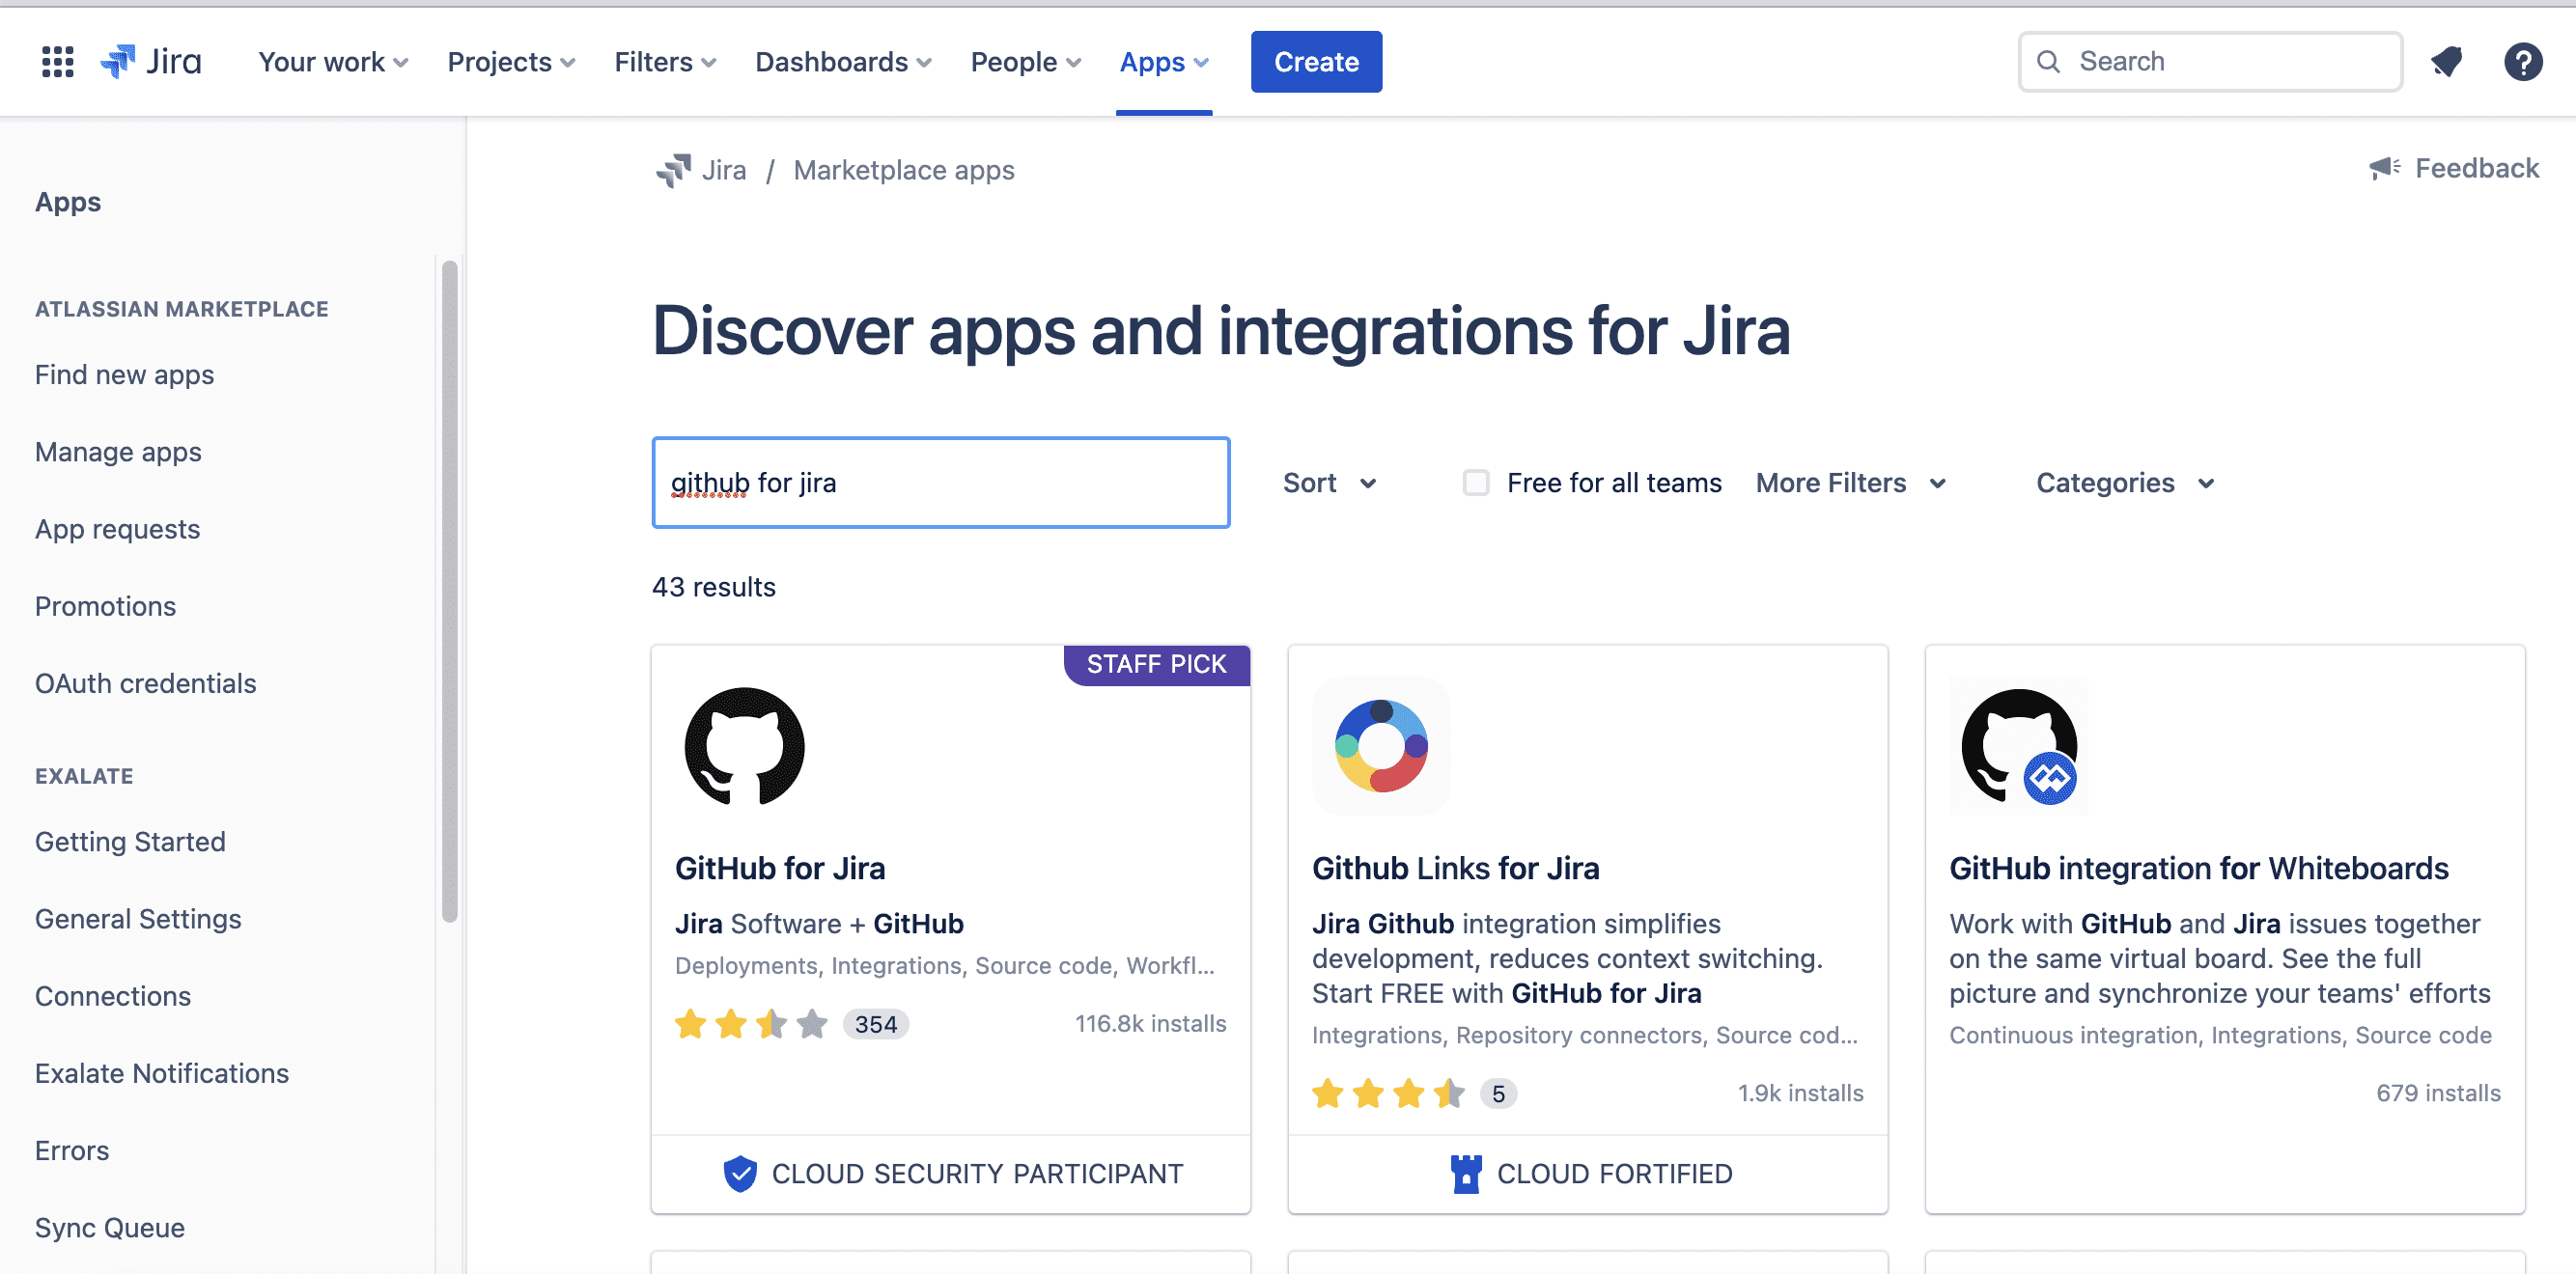

And then “Get it now”. Wait for some time till the app gets added.

Once installed, we need to configure the app to use it. So click “Get started”.
It opens up a GitHub configuration page. This is the page where you can connect particular organizations and repositories to Jira.
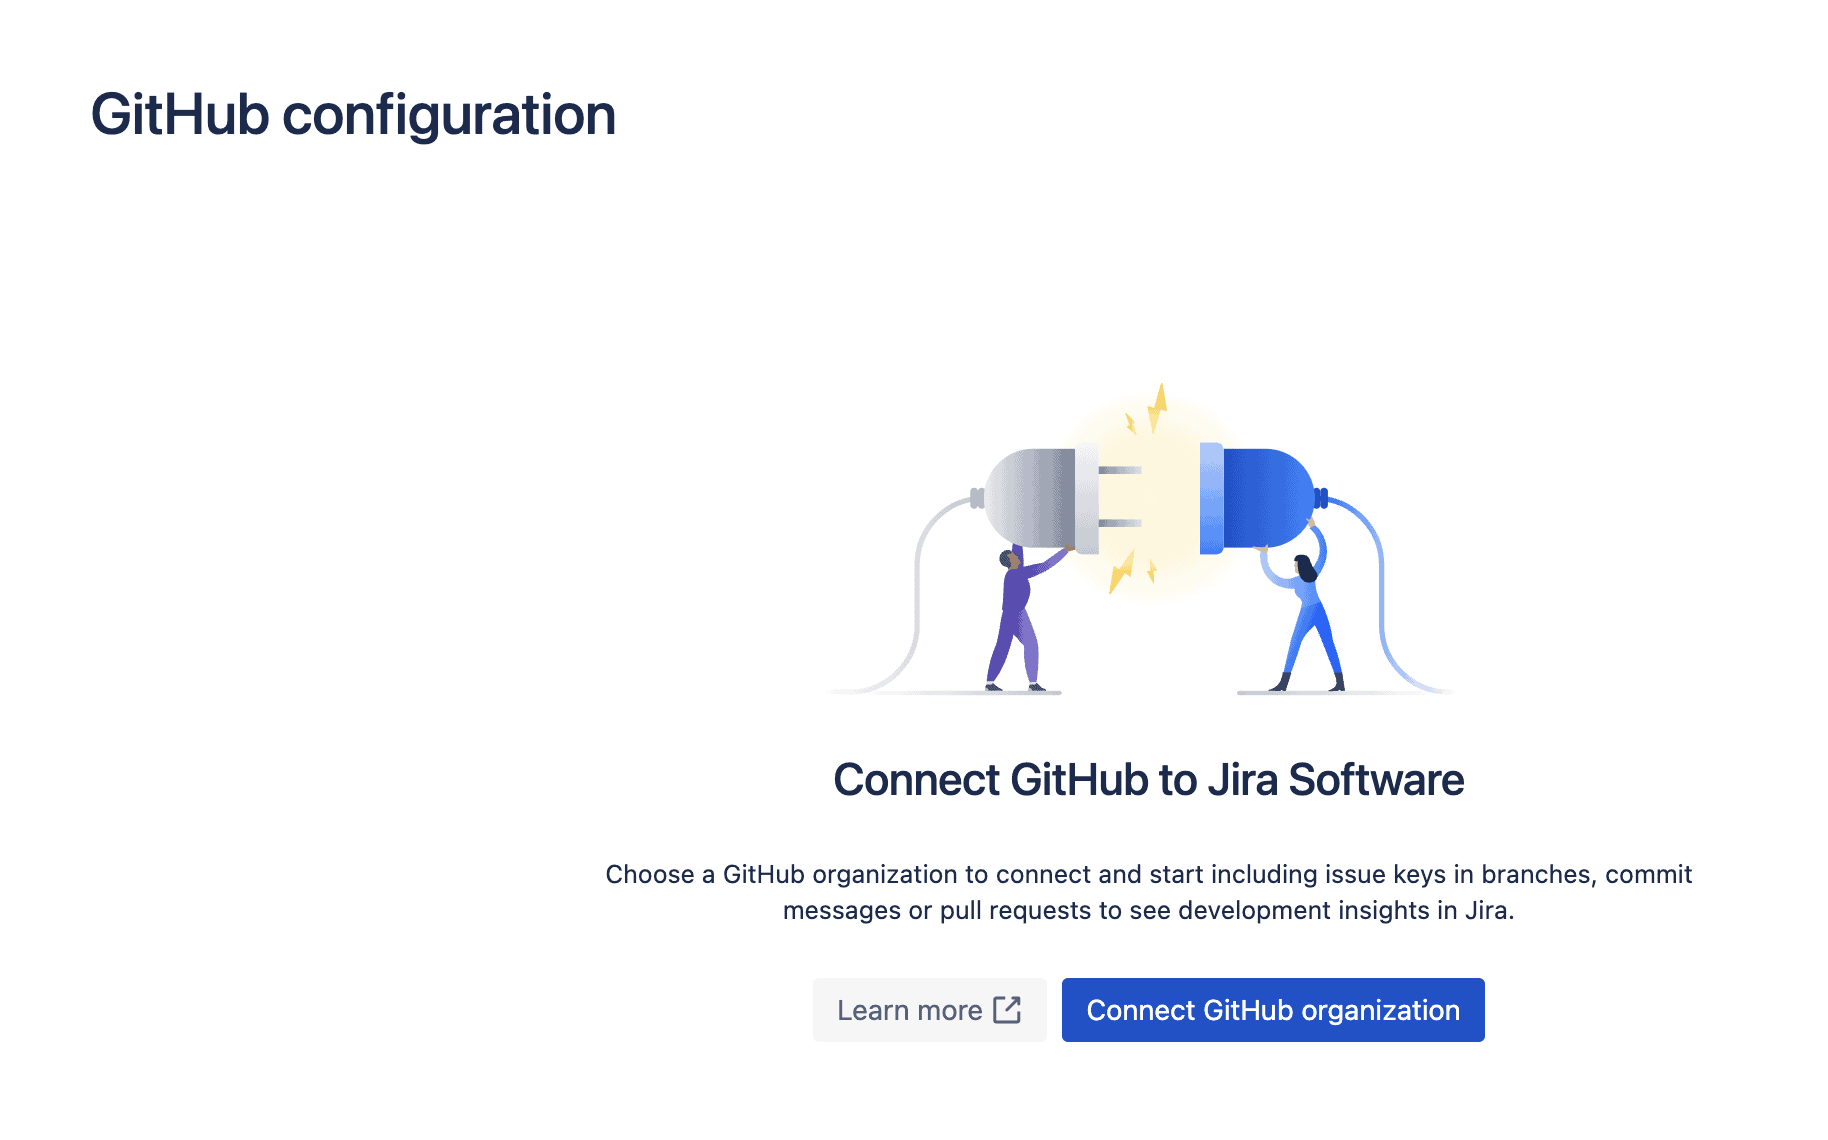
Click on “Connect GitHub organization” and then authorize the app.
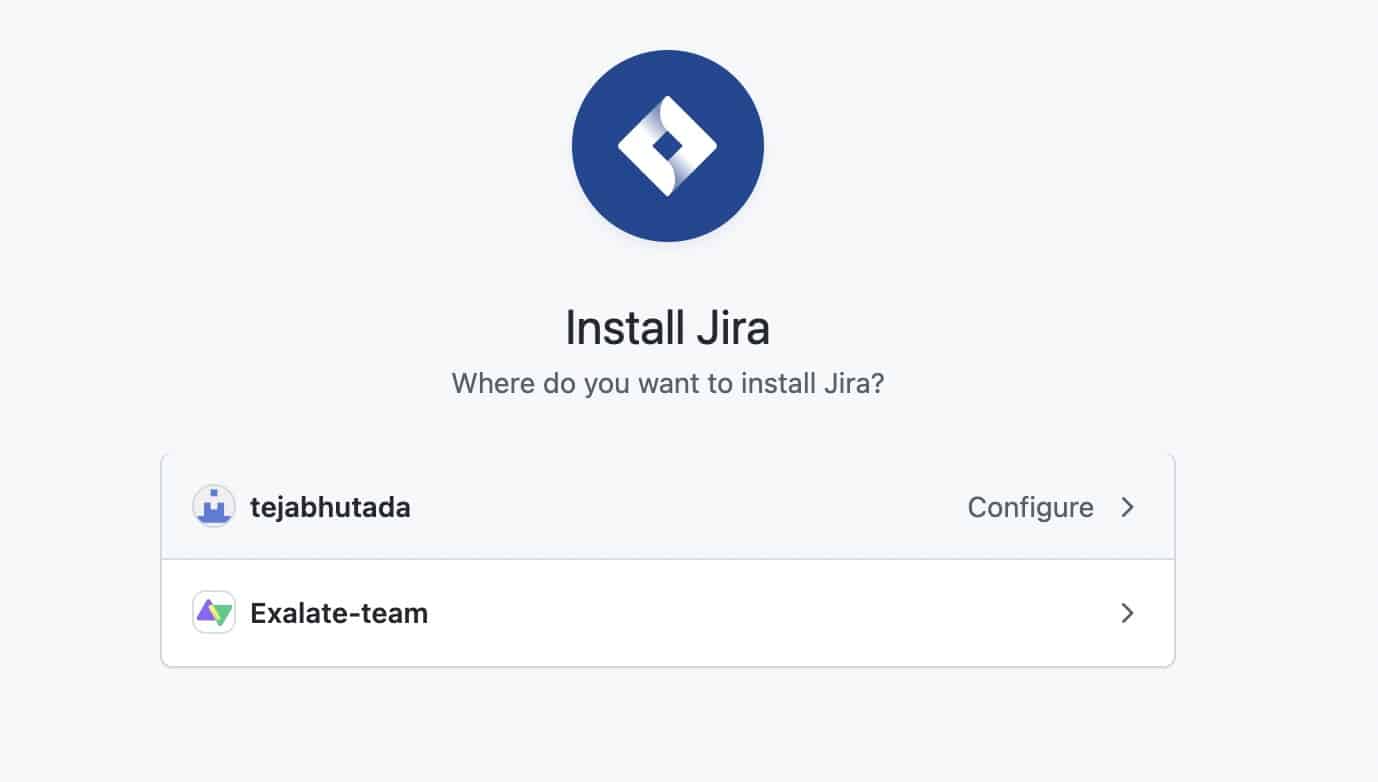
Then connect your GitHub organization to your Jira site. You can choose an existing GitHub organization that is already connected to Jira or you can install it for a new organization altogether.

If you choose to install it for a new organization then choose the correct one.
You can also decide to install it for selected repositories or all of them. 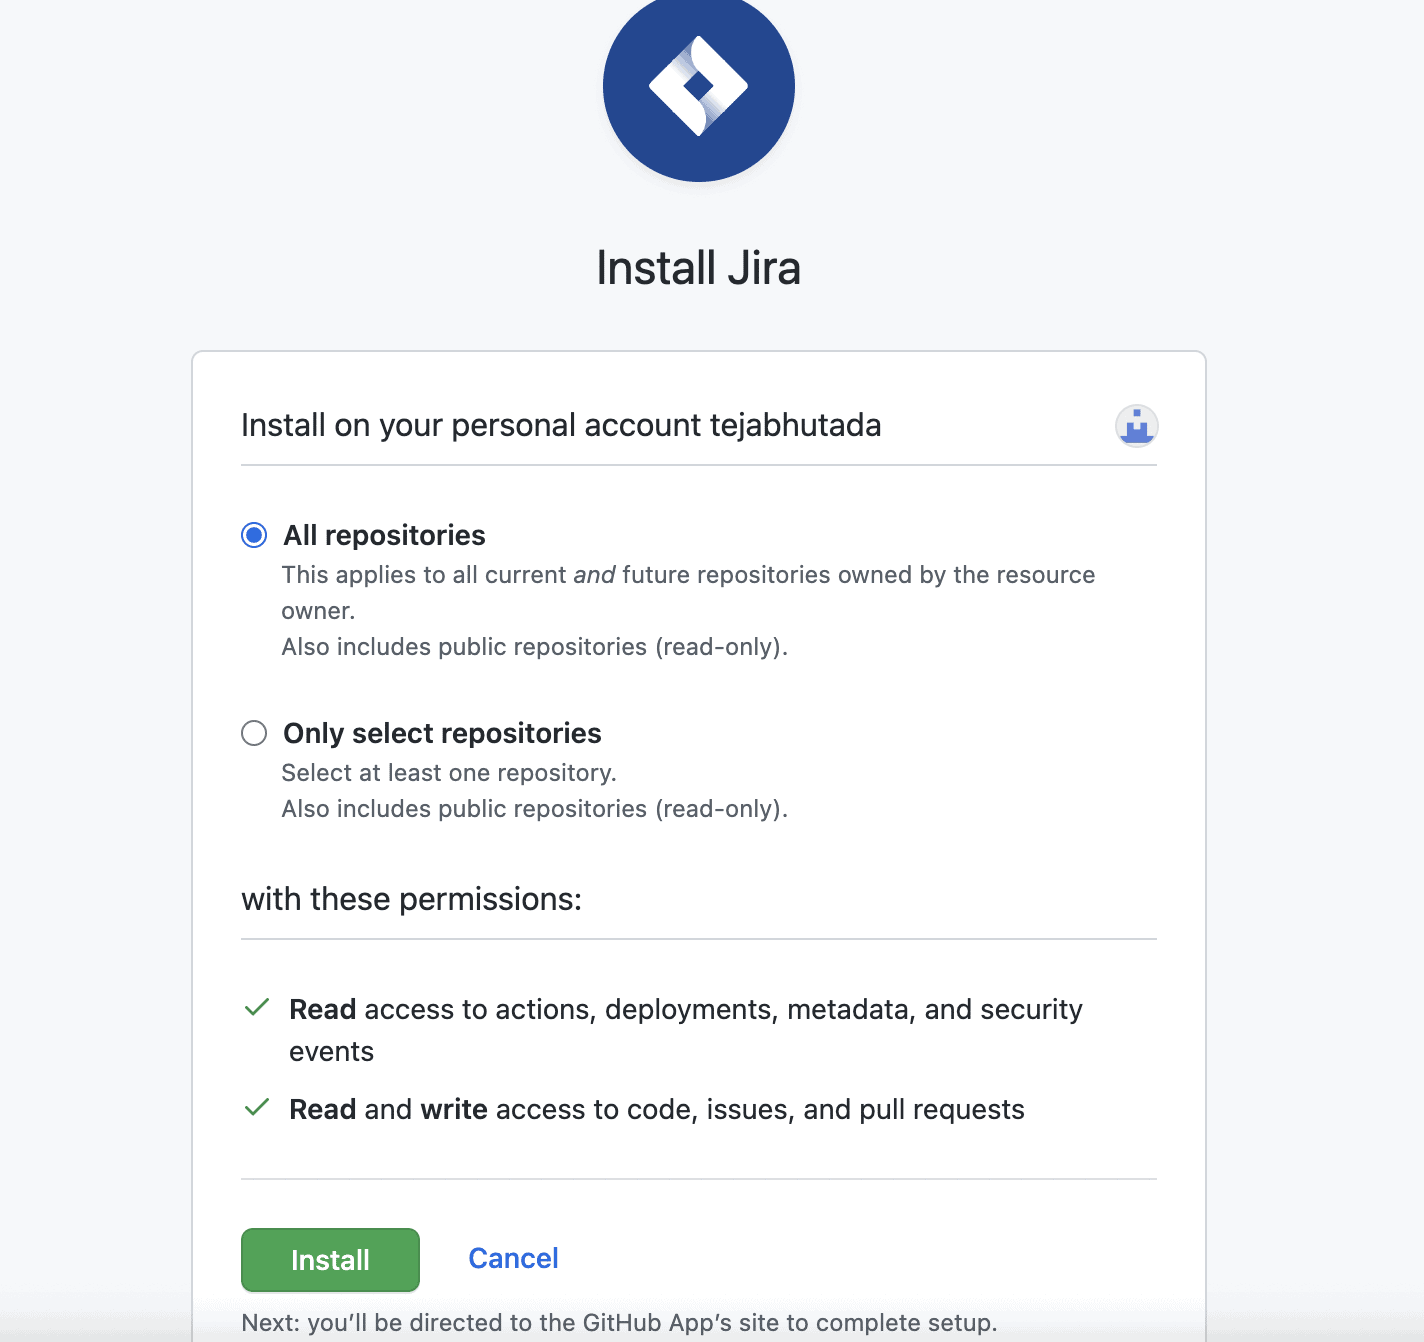

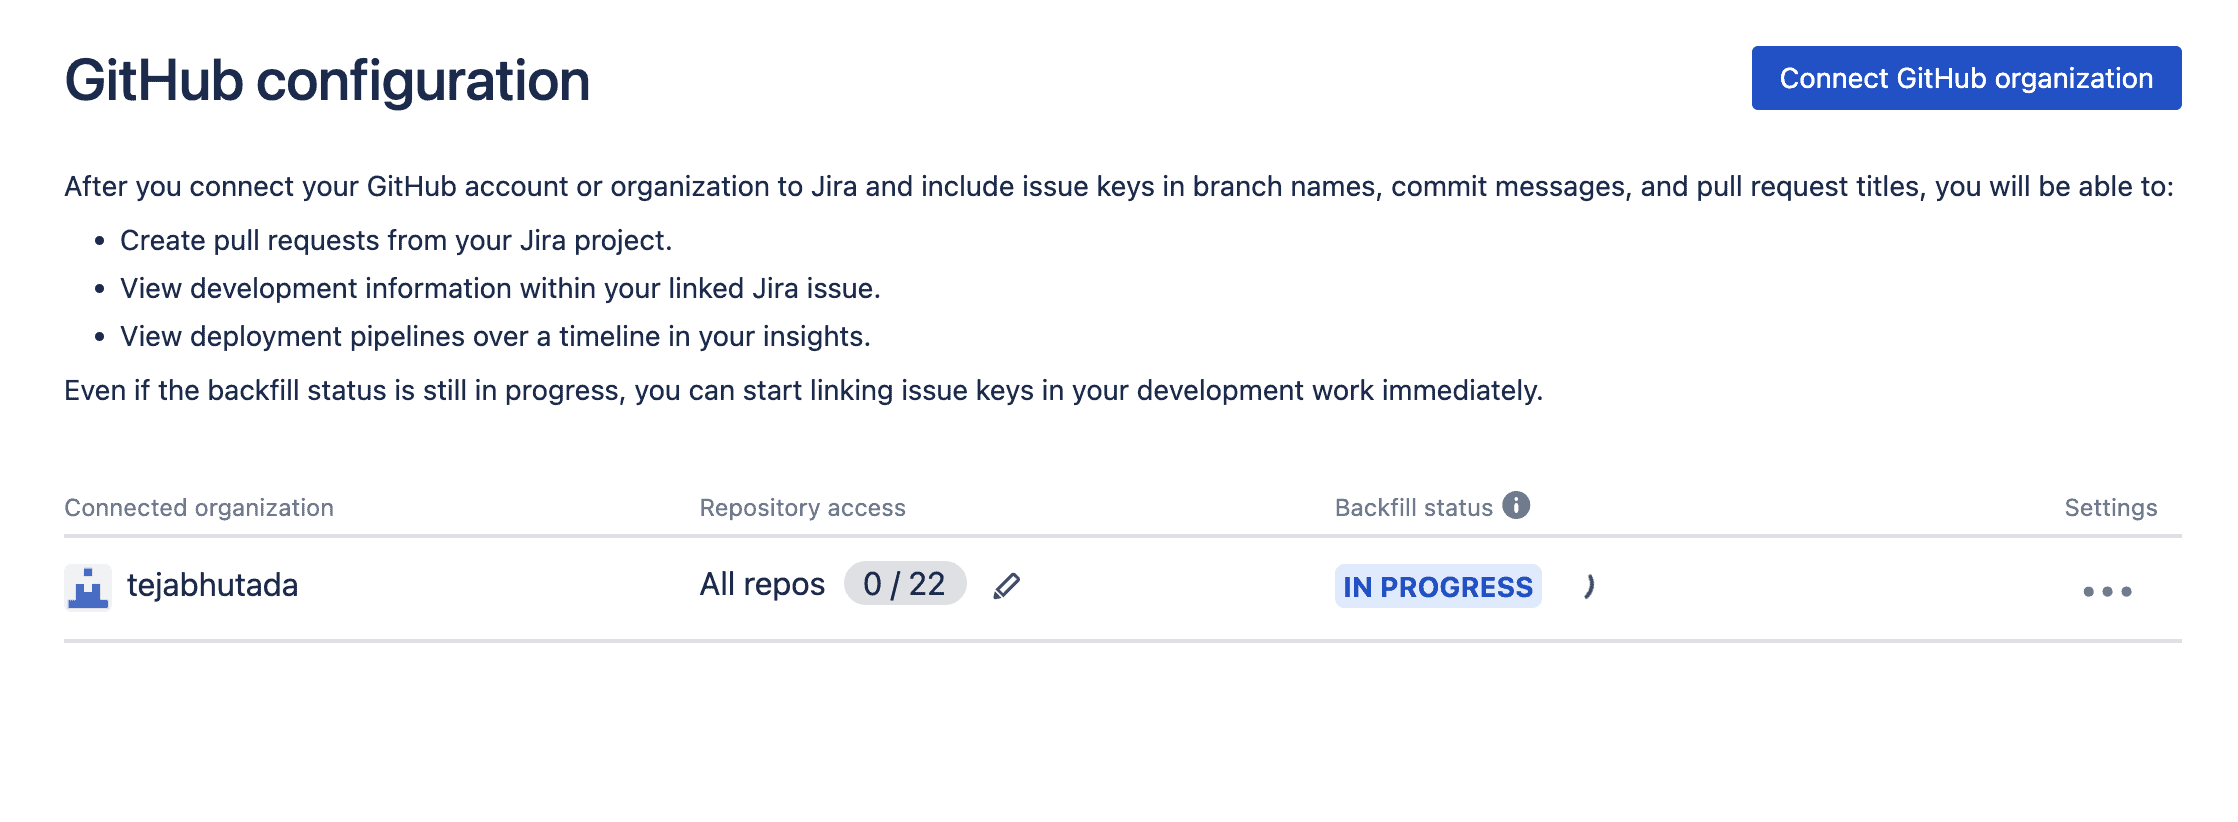
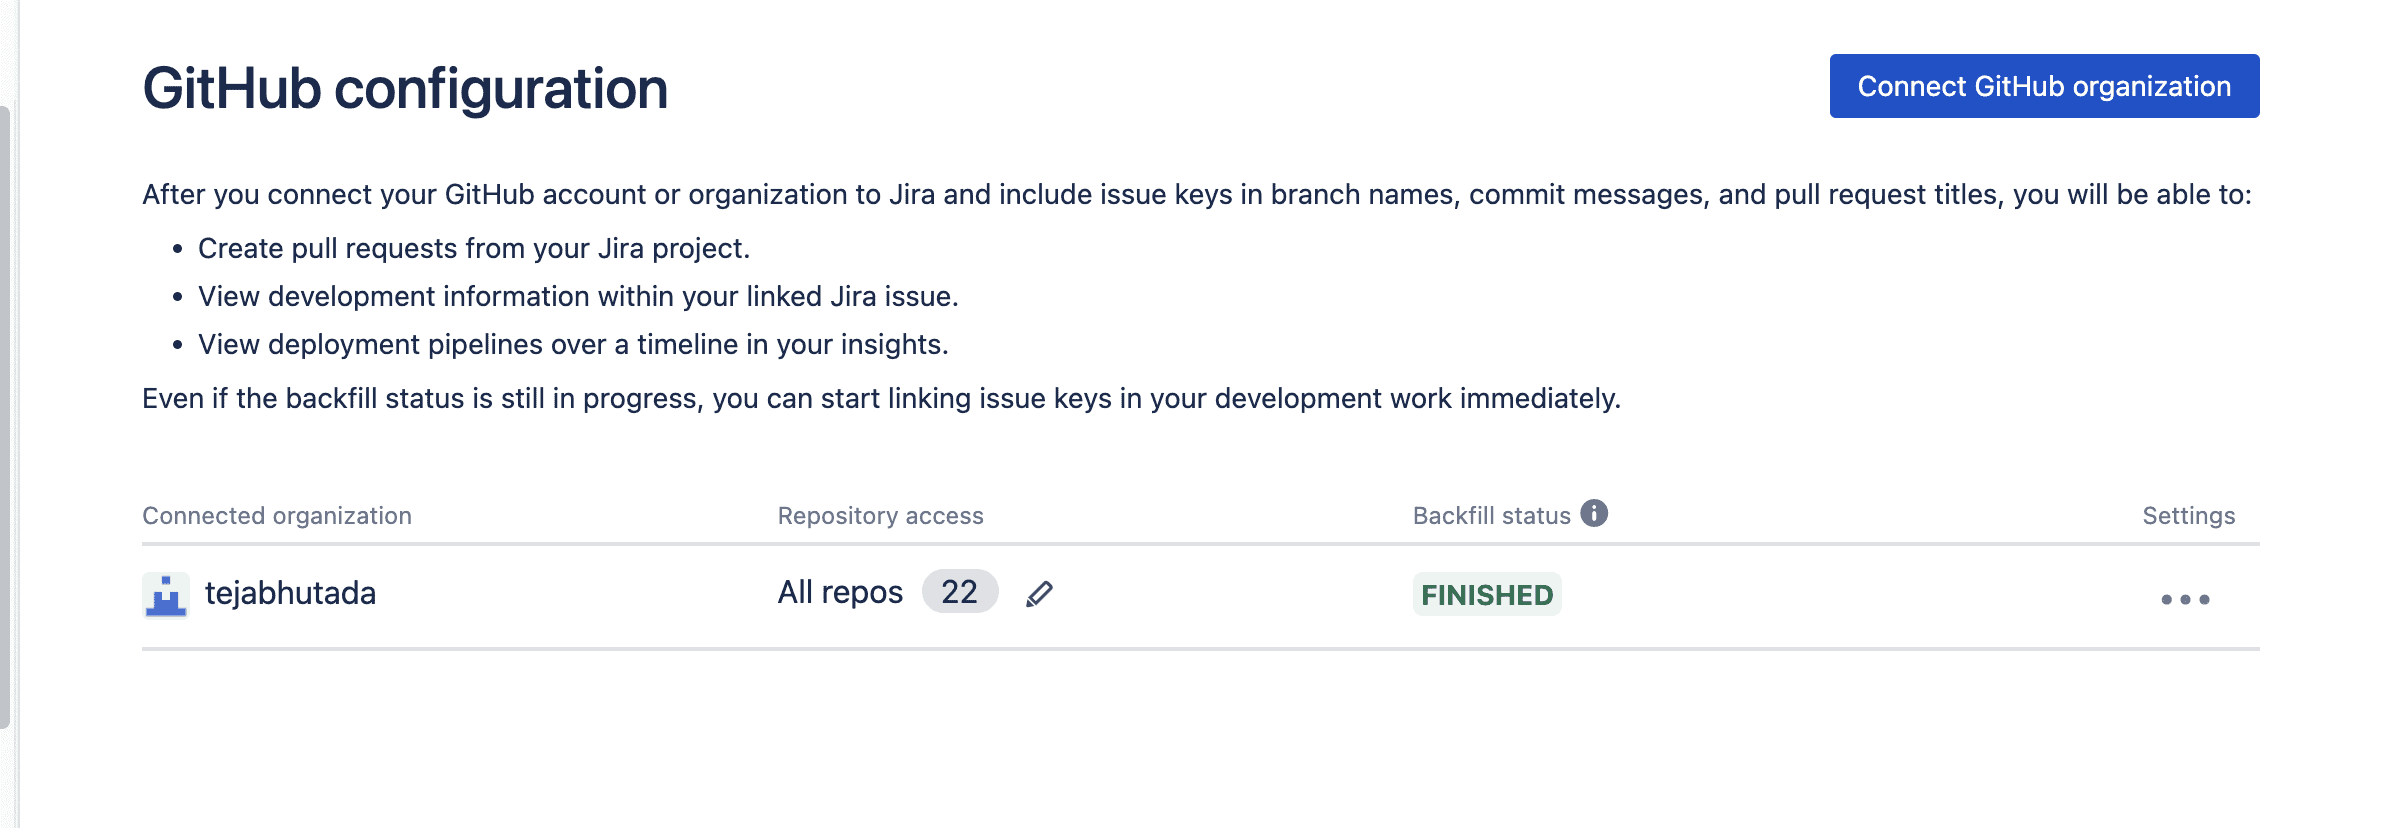
Head over to your Jira instance. Within the issue view, you can see all the development-related data coming in from GitHub.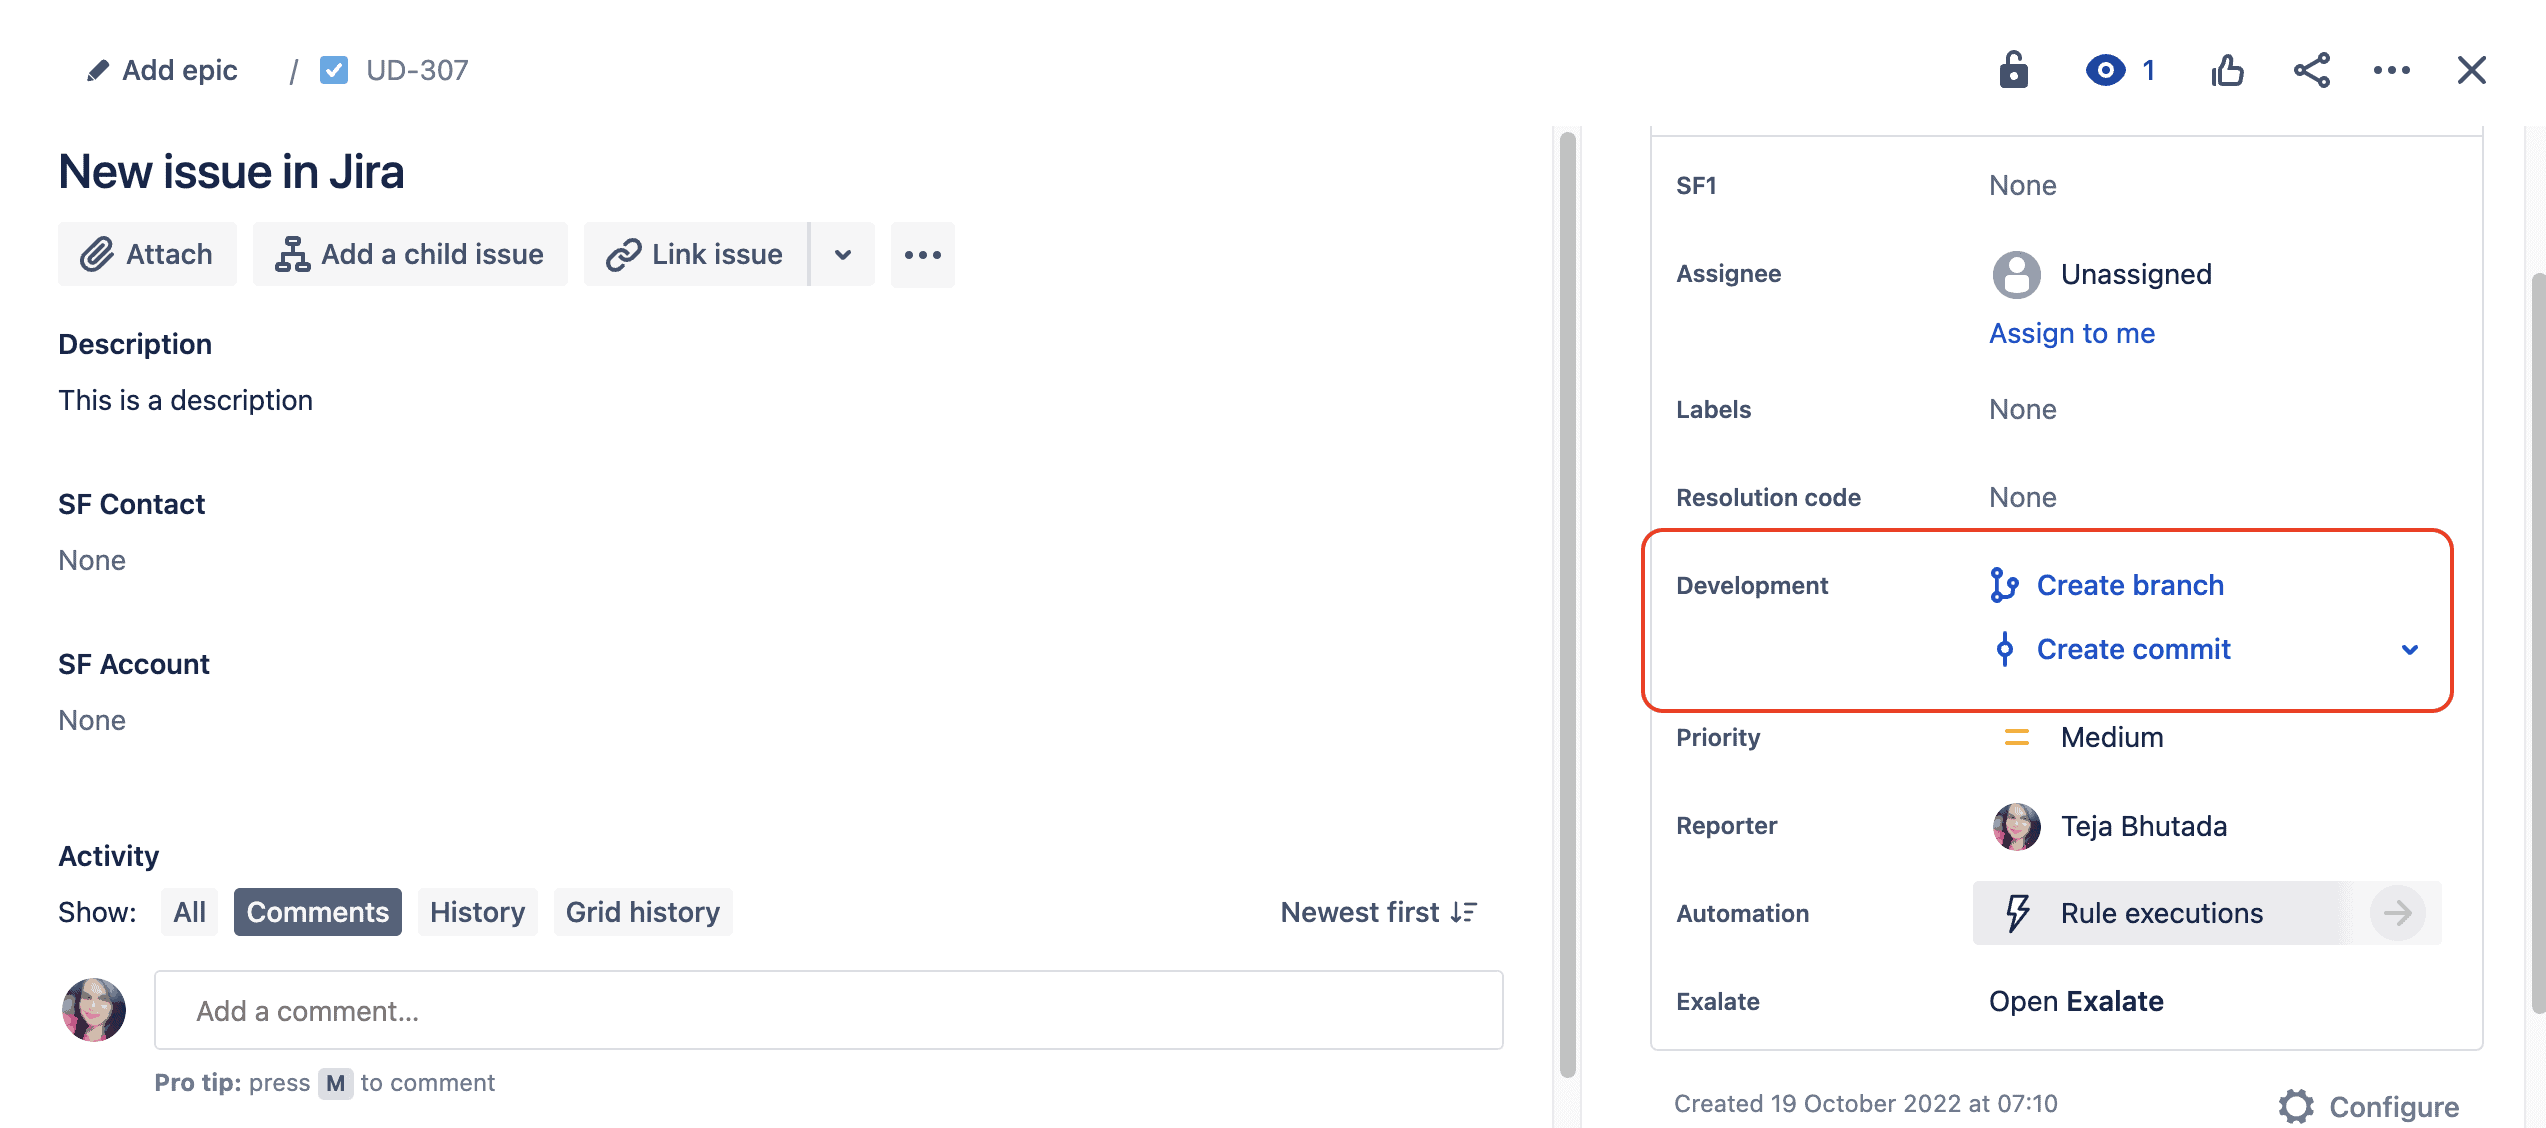
Here on, the commits, pull requests, branches all of this data can be exchanged and viewed within the respective Jira and GitHub instances.
Use a Pre-Commit Hook
Git can be very powerful, but only if you remember to use it properly.
If your commit messages just say vague notes like “more work in progress” or if you’re trying to change your behavior, you need to use a pre-commit hook.
A hook is a script that Git runs whenever you make a commit. It can prompt you for more information and edit your commit message for you. For example, a great hook script can prompt you for what Jira issues you’re working on and add that as part of your commit message.
For Jira, we like this open-source project that provides a helpful commit hook with a useful message. It uses a .jirarc configuration file to connect to your project, check your issues, and confirm that each commit includes a message that Jira understands.
Using 3rd-Party Integration solutions
We saw the native way to integrate Jira and GitHub and honestly, a lot of things can be achieved by it.
But then there are also a lot of 3-rd party applications on marketplaces that support a Jira GitHub integration and we can’t help but wonder the reason behind it. There is already a native way so why use a different solution?
Let me make it a little easier for you.

There are certain important points you must consider while choosing an integration solution. Integration is a project that adds value to your workflows and it must be well thought out. Even the solution you choose must be given due consideration.
The following can be a possible checklist you might want to consider:
- Centralized vs. Decentralized Approach
Almost the solutions available in the market today have a centralized approach. So there is one common interface that helps control the integration requirements. Now, there is nothing wrong with this. But what it doesn’t provide is enhanced control over your integration.
With a decentralized integration both Jira and GitHub users can control the information, they want to send and receive to one another independently. This can happen without consultation with each other, once the initial set-up is done. Thus there is less likelihood of admins on both these platforms messing up each other’s sync.
An additional benefit here is that it increases the security of your integration. Since you can choose to not send or receive a particular piece of information independently at your end and prevent unauthorized access to shared information.
Systems within such integration are inherently loosely coupled. So there are lesser dependencies between them which leads to increasing scalability. They also become less of a hassle to be maintained.
- Ease of use
Perhaps one of the most important points in today’s fast-paced world is to hit the road as fast as you can. Meaning that the integration solution must be easy to set up and furthermore easy to use.
It must also support a variety of users: business and technical users alike.
- Flexibility
Integrations can be huge and often have complex requirements. They can also change with time. An integration solution must be able to adapt to these requirements naturally with minimal tweaking.
- Reliability
Downtimes and system failures are also basic things your integration must expect. Having the solution handle such scenarios automatically without manual intervention is important. In case synchronization stops when the systems don’t work, it is necessary to resume operations from the point of interruption.
There are a lot of solutions that can help you with a Jira GitHub integration. I will discuss 2 of them here: Zapier and Exalate.
Use Zapier to Integrate Jira and GitHub
Just by using native integration tools like GitHub for Jira/ Jira Software + GitHub, you can accomplish a lot.
However, there are some things you can’t do from within Jira. Like, delete branches after their issue closes, or sync issue comments between GitHub issues and Jira.
Enter Zapier.
Zapier lets you use webhooks to add additional connections between your tools.
Zapier has hooks for common Jira actions. So you can trigger events whenever people comment on issues or mark them as closed.
Zapier also defines actions that it can perform in Jira or in GitHub. Looking to do something complicated? Like, make a Jira ticket for someone to review a pull request whenever someone creates one in GitHub? Zapier lets you do that.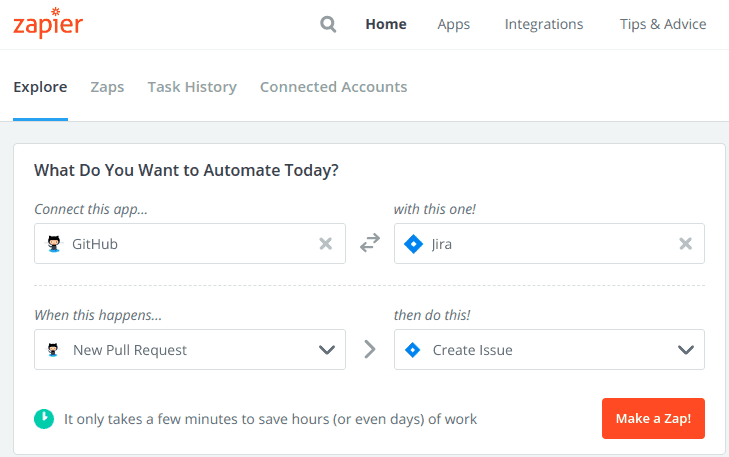
Use Exalate to Sync issues across Jira and GitHub
Exalate is a synchronization solution that allows for the integration of issue trackers. This includes Jira (Cloud and on-premise) and Github.
So, if for example, you’d like to raise issues on GitHub and get them fixed on Jira, you’ll be able to have the issue data synchronized. Obviously, this would also work the other way around.
Would you rather watch a tutorial than read a guide? Then check out this video:
Or follow this step-by-step Getting Started documentation on how to set up a GitHub Jira sync using Exalate.
That means, if you’re working with multiple teams, each team can continue to work in its own environment and still have its data synchronized.
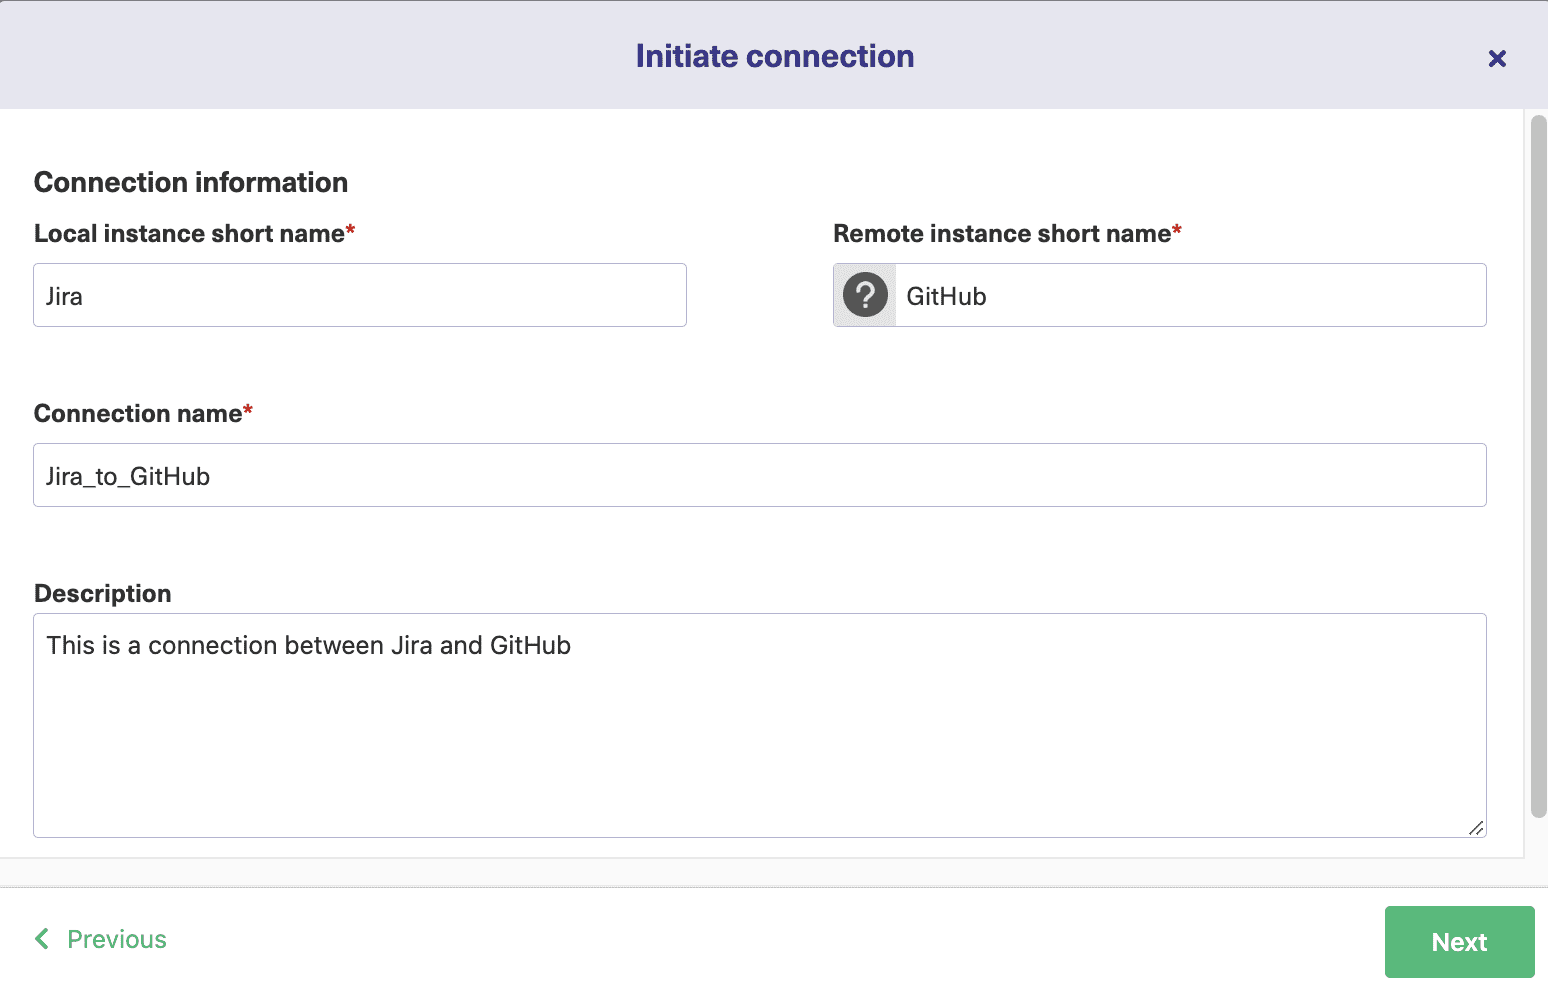
Exalate is the only synchronization solution that has a distributed architecture (aka decentralized integration) so each side can configure what it shares and receives independently without involving the other side in the process. There are outgoing and incoming sync rules written in Groovy-based scripting language for doing precisely this. This also ensures that the tool is flexible, so you can customize the synchronization any way you’d want and set up many advanced integration cases.
Exalate comes in 2 modes: the Basic and the Script mode. So it caters to both business and technical users.
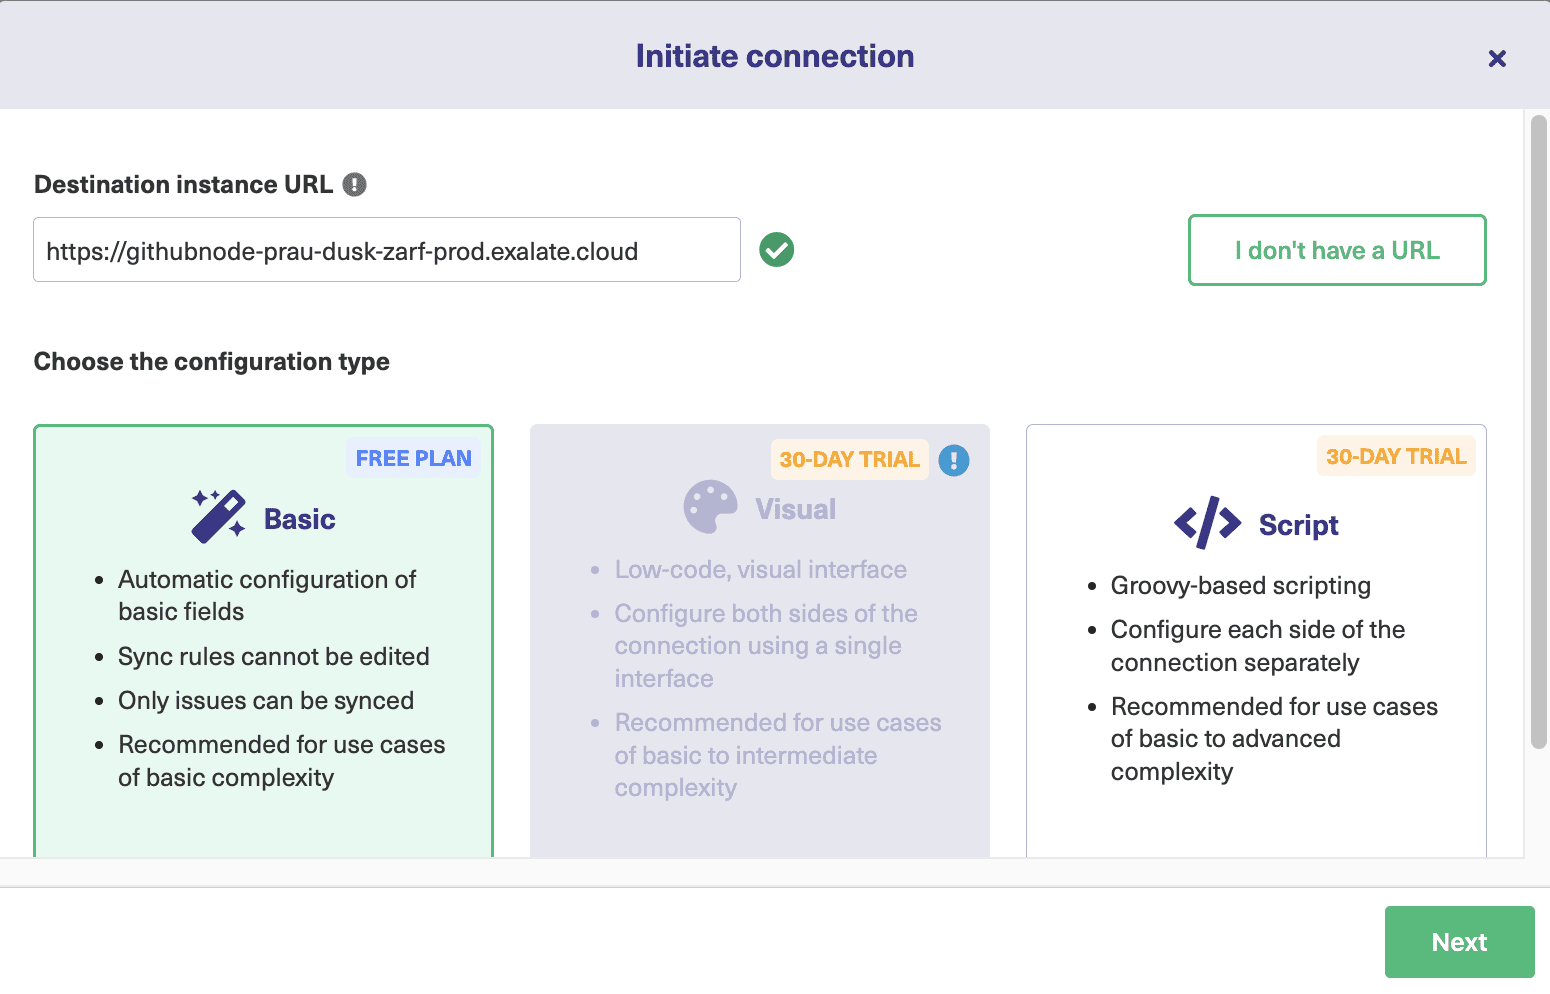
The Basic Mode
The Basic mode uses in-built mappings between Jira and Github issues. It uses a drag-and-drop interface.
You can use this mode for simple integration use cases. It also comes with a Free Plan that offers up to 1000 free monthly syncs.
The ease with which you can get started with this mode makes it so appealing.
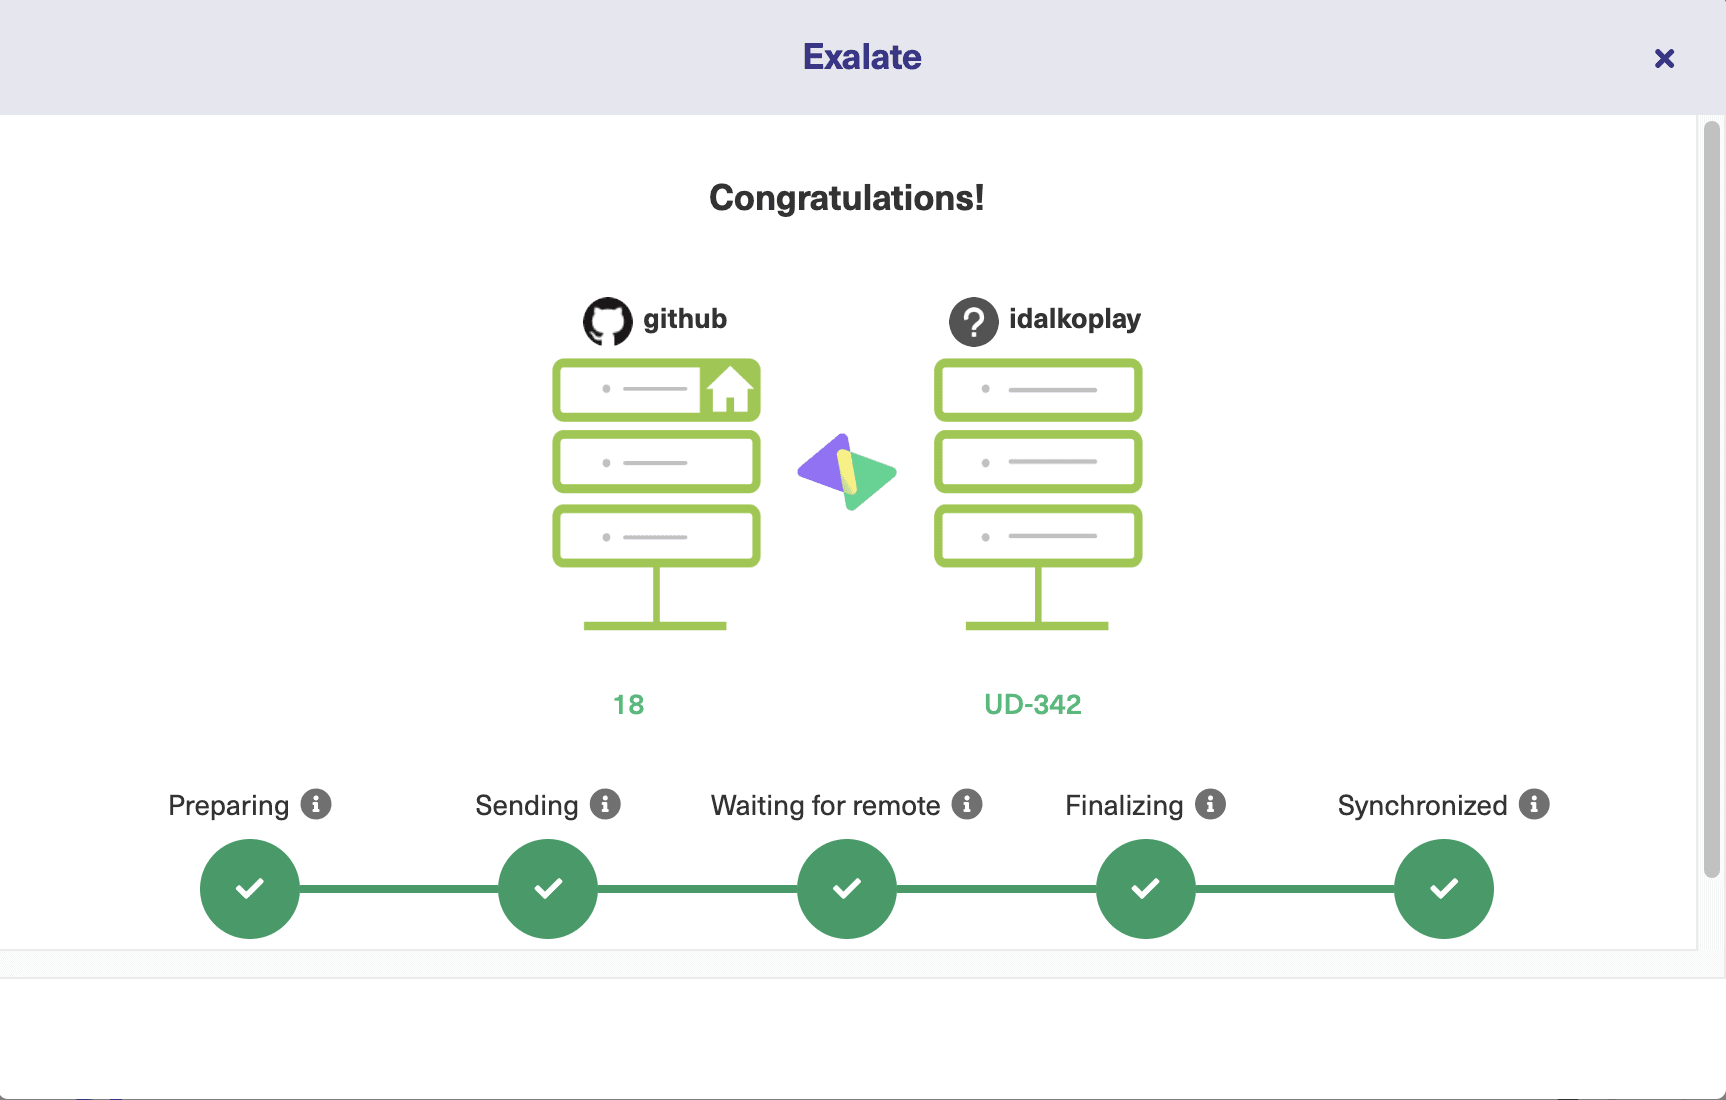
You can set up instant syncs between your issues using this mode by entering the issue key you want to sync and clicking on “Exalate” as shown on the screen below.
The Script Mode
To configure the connection between Jira and GitHub using advanced scripting, you need to use the Script mode.
With this mode, you can add scripts to the outgoing and incoming sync rules to send or receive new information. Or you can stop sending and receiving certain information by deleting or commenting on the sync rules.
Outgoing and Incoming syncs are present on both Jira and GitHub. The Outgoing sync on Jira denotes what information must be sent from Jira to GitHub while the Incoming sync on Jira decides how to map the information coming in from GitHub. The same is present on the GitHub side only in a reverse manner.
You can take the help of script helpers to guide you with this process.
This way you can use Exalate to sync almost any kind of information with the other side.
You can even set automated synchronization triggers that allow you to synchronize issues when the condition you have set is satisfied. To sync existing issues in bulk you can use the “Bulk Connect” option.
Find out more about Exalate here.
Note: this is not about integrating GitHub as a code repository with Jira. This only works if you’re looking to integrate the issue tracking.
Common Pitfalls to Avoid after Setting up the Integration
When working well, integrations are a great way to make sure you have the information you need right at your fingertips. When they’re working poorly, however, it can get really annoying.
Mismatching the Purpose of the Tools
Tools work best when you’re using them as designed. GitHub integrates with code and is designed for code-centric workflows. Likewise, Jira is built around tracking issues. Use Jira as a source of truth for issues, and GitHub for code. That will help avoid problems like the following point.
Not Knowing Where to Put Information
If you’ve got a comment on an issue, should it be on the Jira ticket, on the GitHub pull request, or attached as a comment on a Git commit?
Jira and GitHub let you add information and metadata in a lot of places, but just because you can put a comment somewhere, doesn’t mean you should.
To ensure information doesn’t disappear into a black hole, make sure you have a policy in place about where it should go.
I’ve worked with teams that used Jira as our single source of truth. And with teams that had policies where code comments went to GitHub and issue comments went to Jira.
As long as everybody knows where to put information and where to look for it, you should be OK.
Messaging Overload
After you’ve integrated your Jira and your GitHub, there’s one really common pitfall.
Picture this.
You finish working on an issue and merge the pull request after review. Then suddenly, your phone lights up with 4 new emails.
Jira says your ticket is closed, GitHub says your pull request is finished, another email says your branch was deleted, and your merge commit left a comment on your Jira issue.
Having your tools talk to each other is great. Having them all talk to you is less good.
Once everything is set up properly, take a minute to make sure your actions only trigger the right number of emails, slack messages, or Jira comments.
Trust me, the peace of mind is worth it.
Conclusion
The great thing about Jira and GitHub is that they’re both excellent tools that make the development process simpler and easier to manage. That’s doubly true when they’re integrated. The combination lets you make your GitHub repository more detailed and your Jira more in sync with the state of your code.
Whether you’re a project manager, a developer, or in-between, a lot can be gained from having your tools work together to make your process easier.
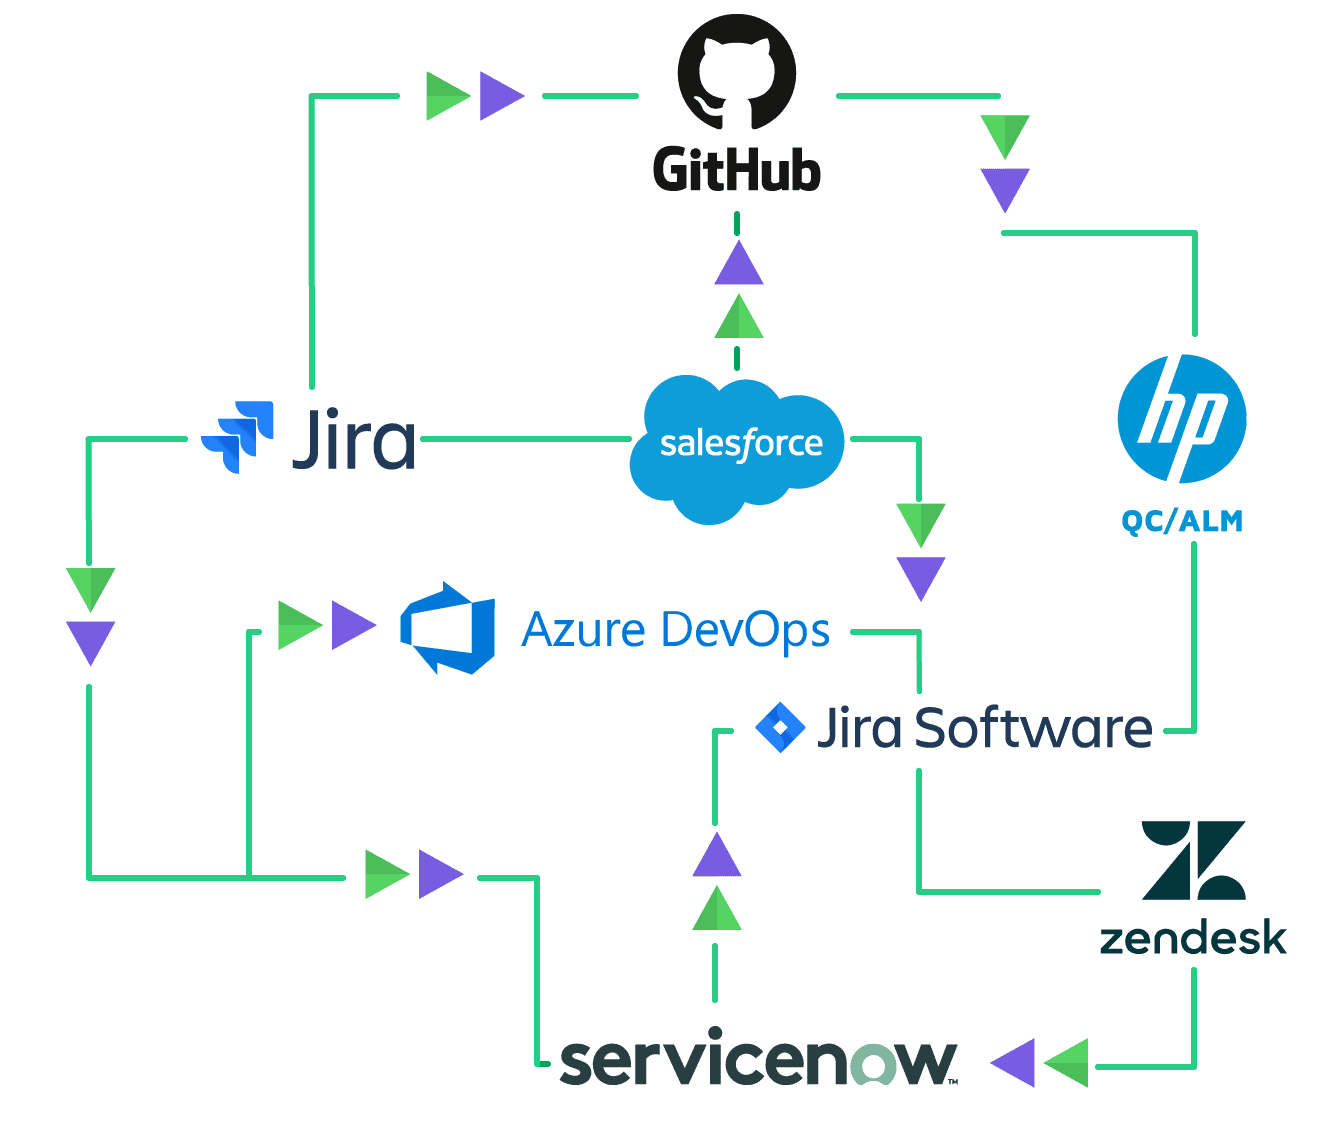
Recommended Reads:
- How to Set up a Jira Salesforce Integration
- How to Set up a Jira Azure DevOps Integration
- How to Set up a ServiceNow Jira Integration
- How to Set up a Jira Zendesk Integration
- Why Jira is better than Trello, even for non-developers
- GitHub Salesforce Integration: How to Set up a Sync in 6 Steps
- 10 Expert Tips to 10x your Productivity in Jira