

This article was written by Jean-Baptiste LEMAIRE, an Atlassian Engineer at iDalko.
Jira is a powerful tool for tracking and managing tasks. A big part of this power is the ability to easily look up and access information whenever you need it. And this is where filters in Jira come in useful.
In this guide, we’ll explain exactly how to create, edit, manage, and share filters in Jira, and how they can make Jira an even more powerful platform for your use case.
Here is what’s covered in this article:
- When to Use Jira Filters
- How to Create Filters in Jira
- Finding Jira Filters
- Sharing a Filter in Jira
- Subscribing to Jira Filters
- Editing Filters in Jira
- Best Practice Tips for Filters in Jira
- Improve Your Search and Filters with Apps
When to Use Jira Filters
Jira filters allow you to save a search, so you can initiate it at the click of a button and without having to reconstruct the search query. What’s more, you can set filters to deliver alerts; and you can connect them elsewhere in the system (such as using dashboard widgets) to effortlessly drill down to the precise information that you need.
In fact filters make sorting and segmenting issues a breeze – and you can go as granular as you need to. In fact you can limit the list of issues called up so that you only see issues:
- Of a certain type (Task, Bug, Story, Epic, Service Request, Incident, etc.)
- Based on assignee (e.g. assigned to you)
- With a specific priority
- Including only open (or only closed) issues
This means that you can easily access information about the most important issues for you, as well keeping your team up-to-date with progress.
How to Create Filters in Jira
Before we get to creating filters in Jira, we first need to execute a proper search in Jira.
Running Searches in Jira
To run a search, click on “Issues” on the main menu bar at the top of your screen.
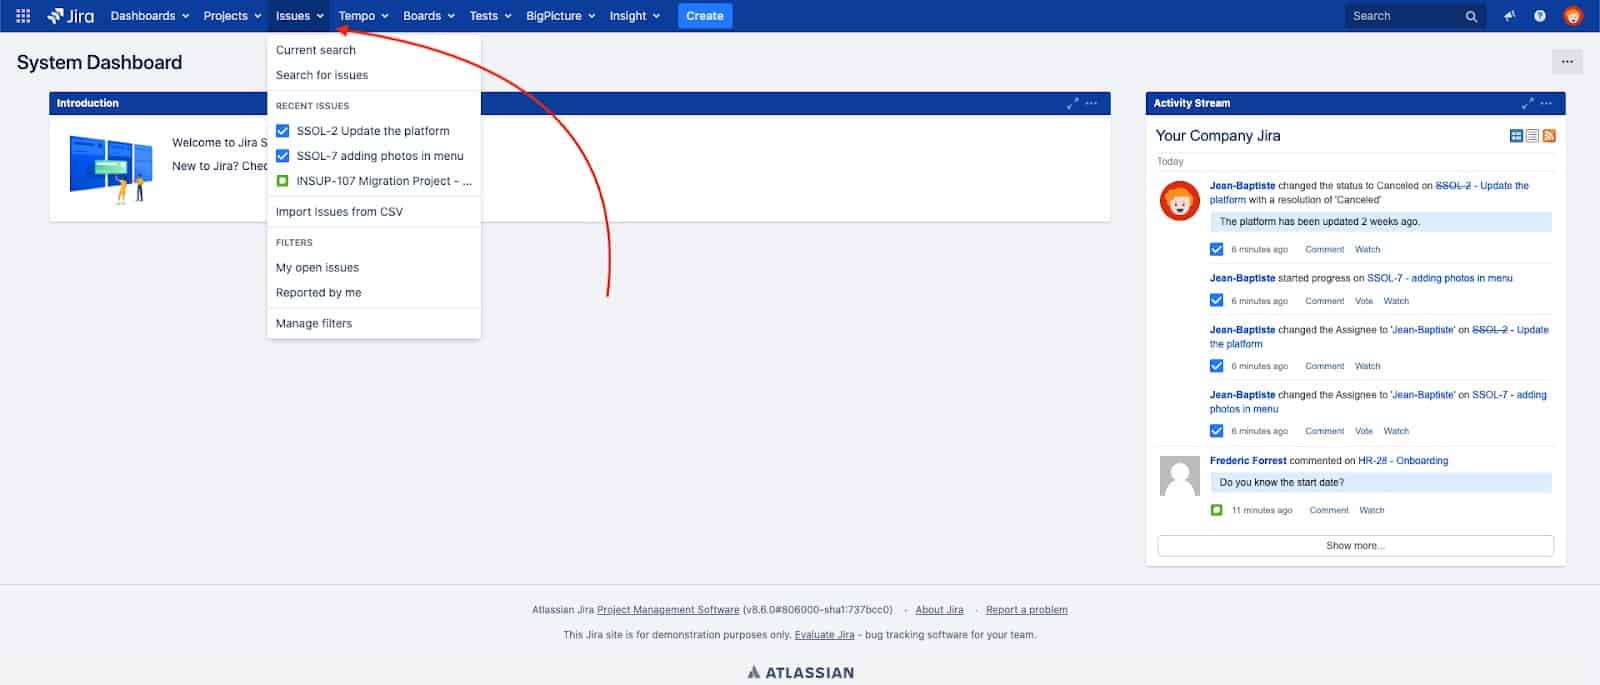
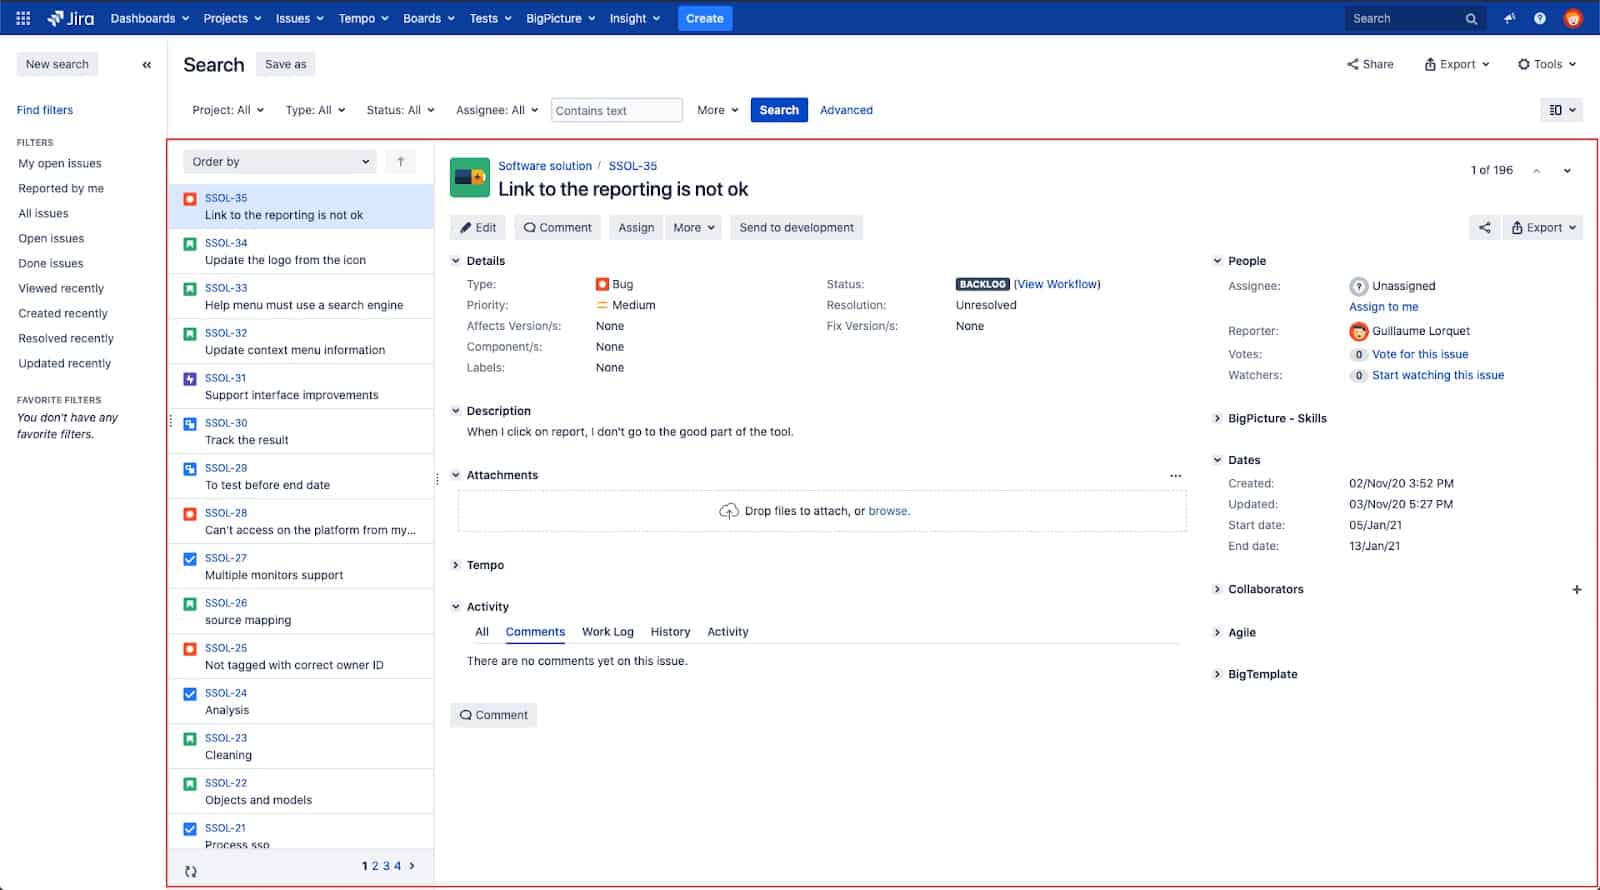
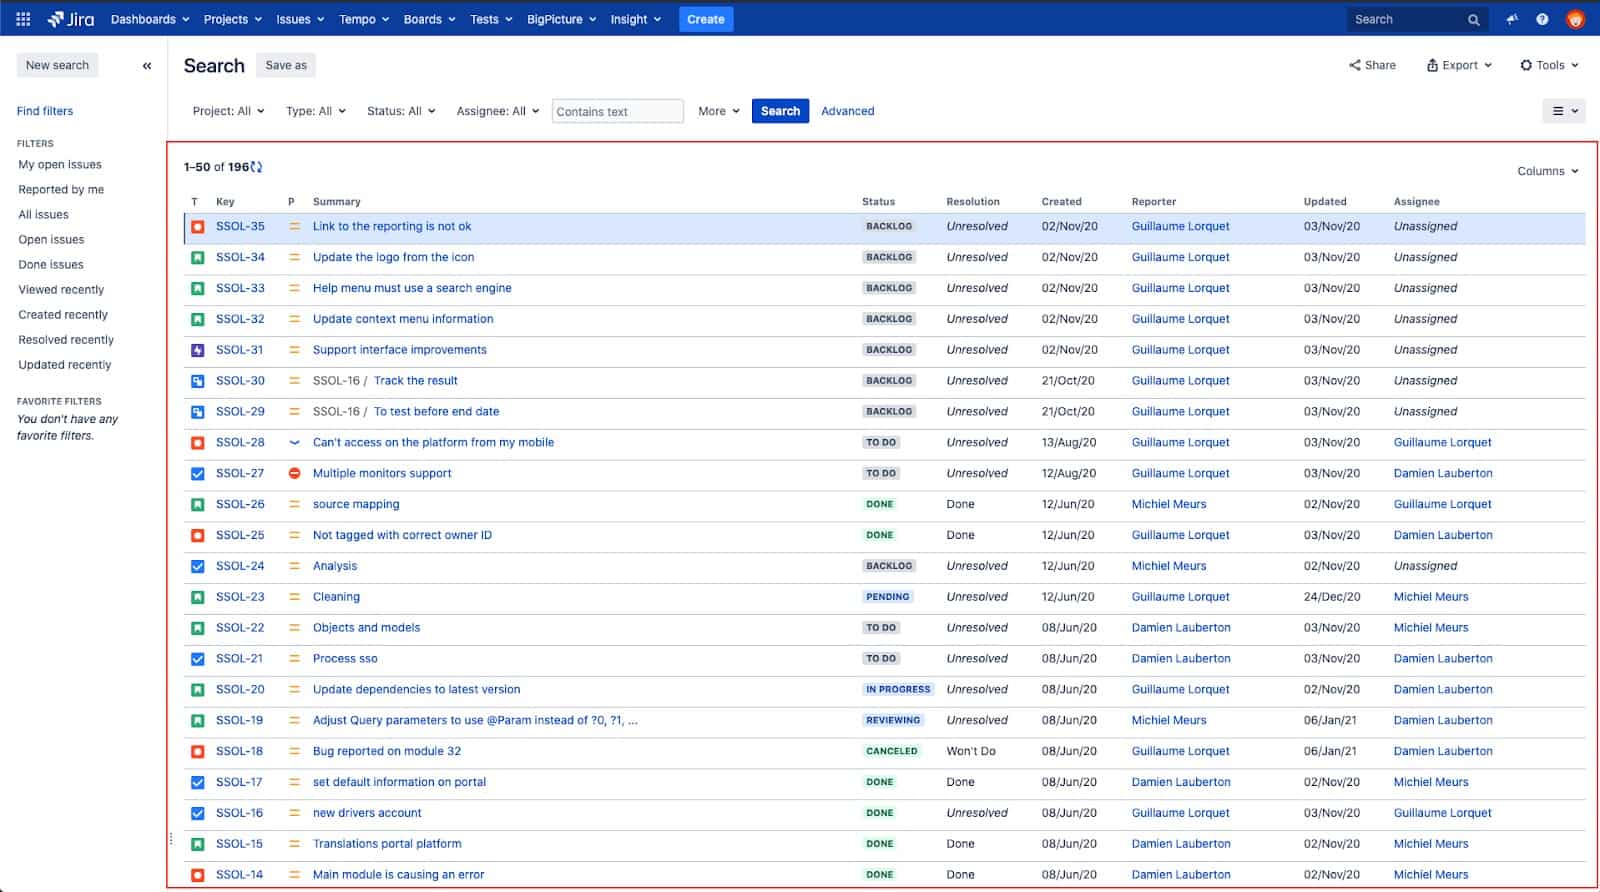
Then click on “Search for issues”. You can choose between a “Detail view” and a “List view”.
- “Detail View” lets you see issues, with all the relevant details displayed.
- “List View” gives you a broader and more customized view. List view is normally used for larger-scale tasks or for precision work (with options available to only display specific columns and to control the order that they appear in).
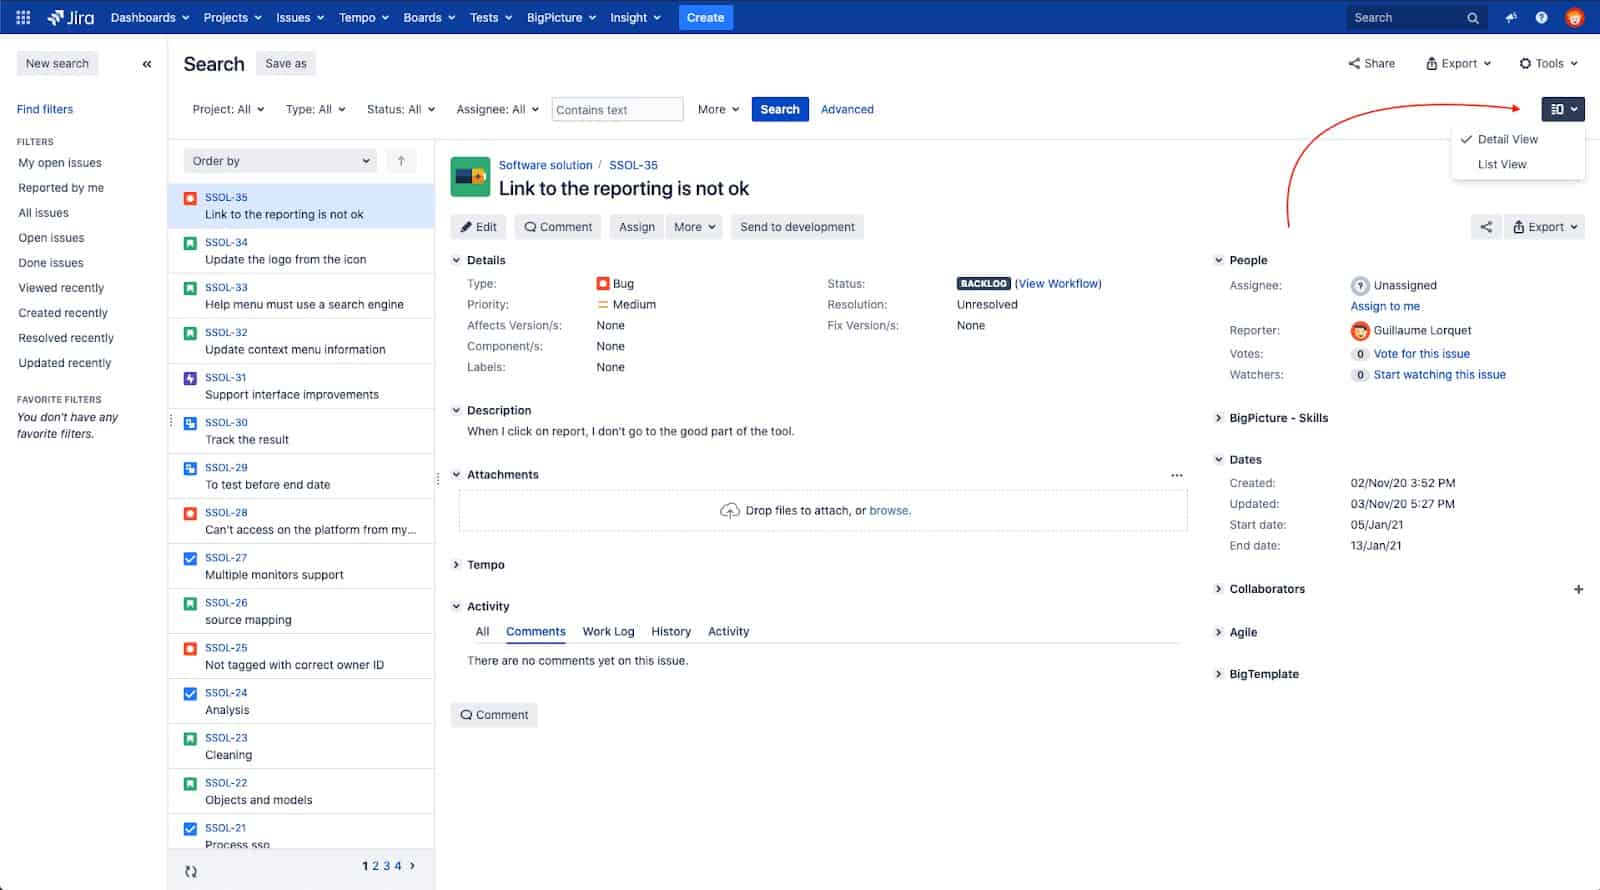
Here’s how a “Detail view” look like:
And here’s a “List view”:
There are two ways to use the Jira search engine: “Basic” and “Advanced”. Just click on the “Advanced” or “Basic” button at the end of the filter selection to select what you want.

Using the “Basic” search system, you can enter the relevant criteria for your search. Here, for example, we have selected a project to filter the search results to only display issues relating to that project.
To see issues from a specific project, you can search for the project in the “Basic” search list:
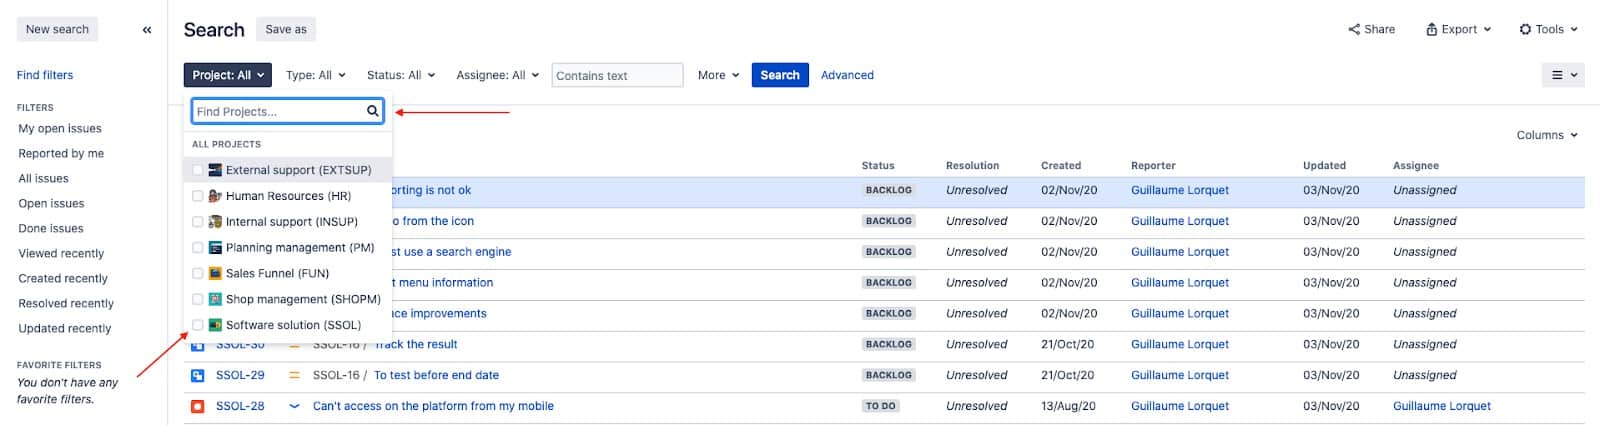
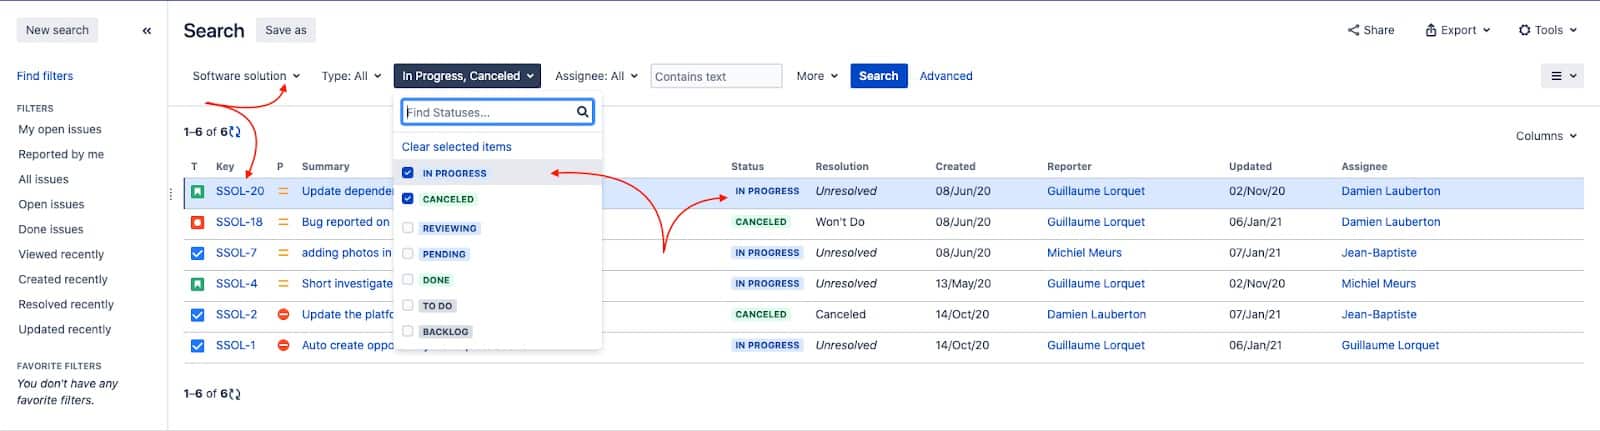
You can then further configure your Jira filter by adding additional search criteria. For instance, you can filter on the basis of specific statuses – but you can also select values linked to users, dates, issue descriptions, and so on.
In fact, you can search for most of the fields using the “More” menu, which allows you to select the field you want to base your search on.
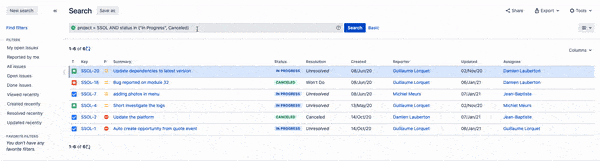
And you can also use the “Advanced” mode.

The “Advanced” mode allows you to create more structured queries than the “Basic” mode by using JQL (Jira Query Language) such as:
- Using the operators “OR”, “AND”, etc.
- Sorting queries in ascending or descending order more precisely than in the Basic mode
- Handle complex dates
- In some scenarios, you can also configure a filter based on past items with “WAS” and “CHANGED” (e.g. status history)
You can see our complete guide to advanced JQL here.
The advanced mode may seem daunting but the system offers support by providing suggestions, which may help you to find what you’re looking for.
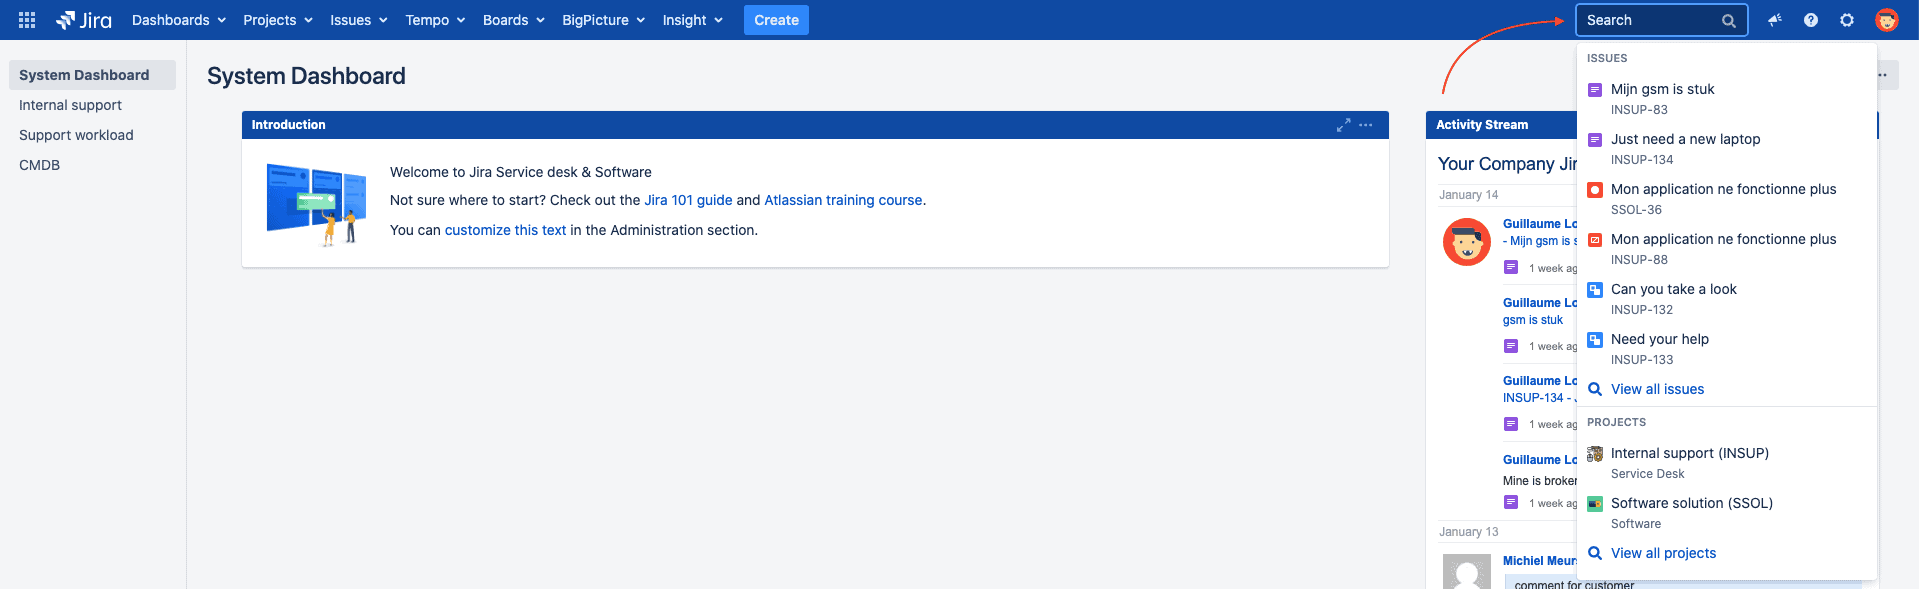
You can also execute a basic search by simply using the search box in the top right of the screen, as seen below.
Atlassian also provides some tips & tricks in the documentation (Jumping to an issue, searching as you type, free-text searching, smart querying, etc.).
Creating Filters in Jira
Once you’ve entered the relevant search, you just need to save it to create a filter. All you need to do is to click “Save as”.
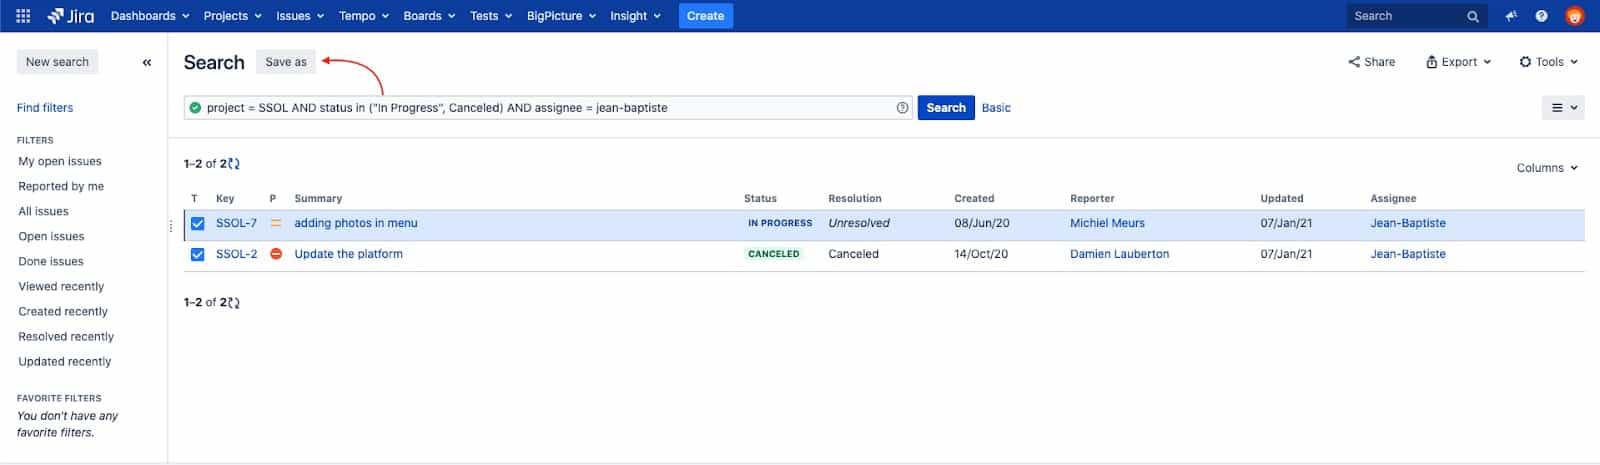
Then name your new filter.
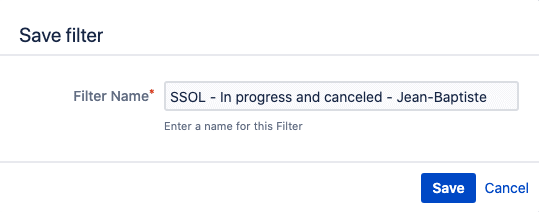
It’s as simple as that! When naming your new filter, we recommend using a consistent filter name so you can retrieve it easily later when searching for widgets and other tools. Our approach is to:
- Use the key(s) of the project(s) concerned
- A description of the result of the filter
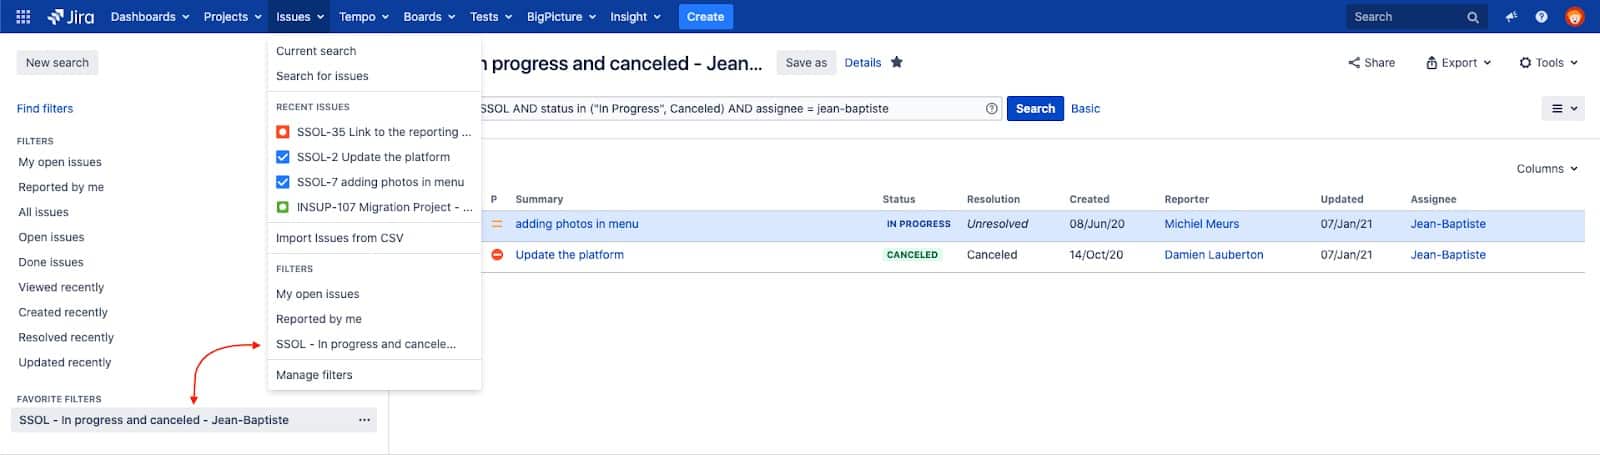
At this point, you can also add and remove the filter from your list of favorites by clicking the star icon next to its name. Your list of starred/ favorite issues can provide a shortcut for your most important and most frequently used filters.
Once you have at least one filter in place, you can also create a new filter by going to Filters (on the dropdown menu) > View all filters > Create filter.
That would be rather confusing, though, if you haven’t created any filters yet. You’ll need to make a search before you can access them as, by default, there’s no option to make a new filter from the “View all filters” page.
Finding Jira Filters
To find the filters you’ve already created, go to Issues > your favorite issues and the option to “Manage filters”. Alternatively, you can go to the Filters dropdown to select starred filters or to “View all filters”. To call up new results for your filter, just navigate here and click on the filter’s name.
If you need to search for a filter, head to “Manage filters” / “View all filters”. Here you can retrieve filters using the left-hand menu:
- Favorites: displays only filters marked as favorites
- My: displays filters where you are the owner
- Popular: displays the most popular filters, i.e. those that have been selected as a favorite by one or more users
- Search: allows you to carry out a filter search based on criteria

You can add and remove filters from your favorites list on this page using the star icon.

If you cannot find your filter in the main menus, then you can carry out a search by:
- Searching for a term in the filter name or description
- Querying for the owner of the filter
- Querying based on sharing settings
Note: If a filter hasn’t been shared with you, you won’t be able to find it.
Sharing a Filter in Jira
Having created your filter, you can now share it with whoever you need by customizing its sharing settings. As well as saving on doubling-up work, this means the system won’t become overburdened with replicas of the same filters. To do this:
- Go to your filter > Choose Details > Edit permissions
Or
- Go to the Filters dropdown > select the “…” button for the filter you want to share > Edit
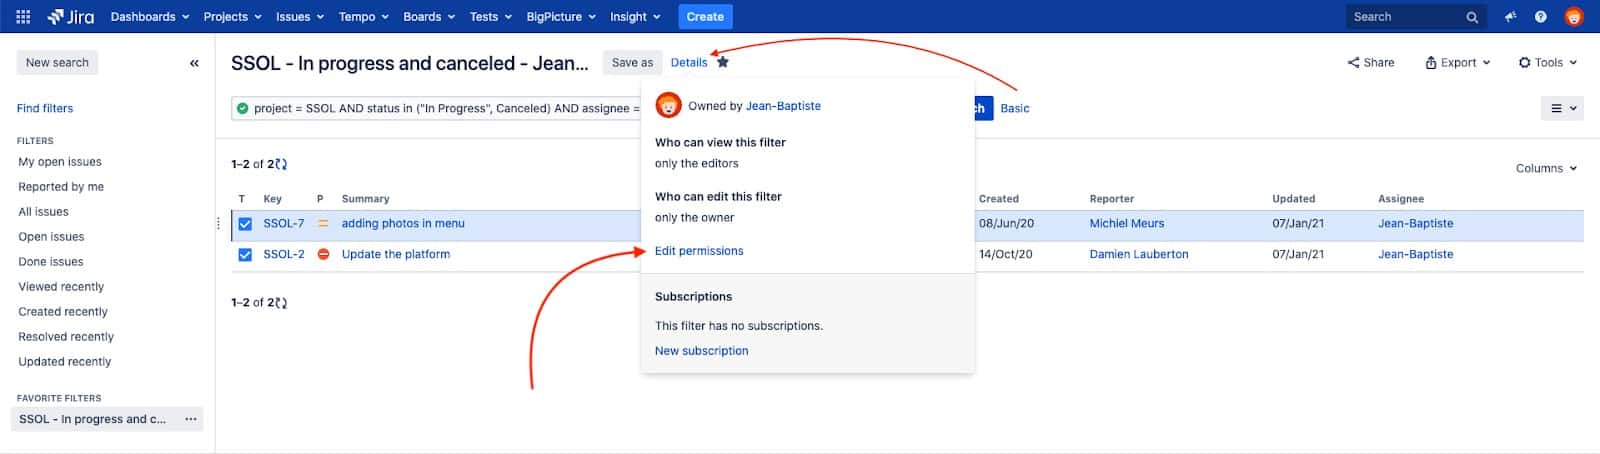
In this new window, you can edit details such as the filter name, the filter description and favorites settings. You can also edit the sharing settings.
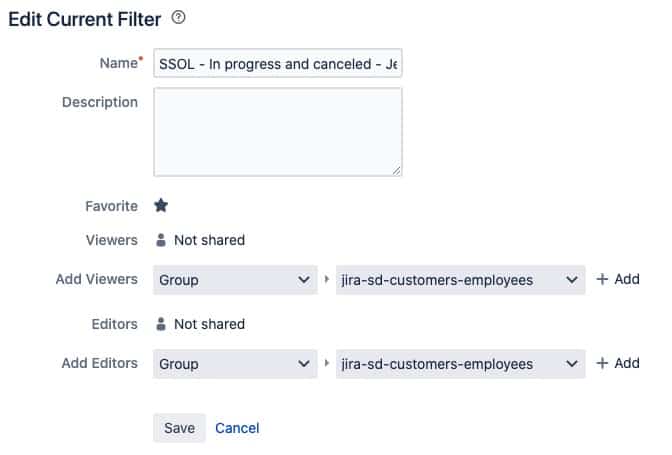
You can share the filter in read-only mode with viewers to:
- A group .
Note: you’ll only be able to see groups you’re a member of. - A project: All members or members with specific project roles working on one or more projects.
Note: you’ll only be able to see roles for projects you have access to. - Everyone: Any logged-in user on your Jira instance.
Once you have made your selection, you can use the “Add” button to add users with read-only permission based on your criteria. If you have several criteria, you can repeat the operation.

“Edit a Filter” enables the selected users to edit the filter’s configuration.
You can also share the filter in edit mode based on the same criteria as above, choosing to give access to a group, a project or a single individual user (in the last case, replacing the option to give access to all users).

Note: If your filter concerns a particular project a group, we recommend sharing it directly with them as a minimum and asking your users to check whether a filter that meets their requirements already exists.
Administrators can also view certain filters and will therefore be able to help you tailor them by acting as editors or simply replacing the owner of the filter if necessary.
If someone adds groups/roles you don’t have access to, then you may get an error message and will have to undo the operation before you can tailor it to your needs.
Once your work is complete, you’ll see the list of users who can access the filter in read-only or in edit mode. All you have to do is save the operation.
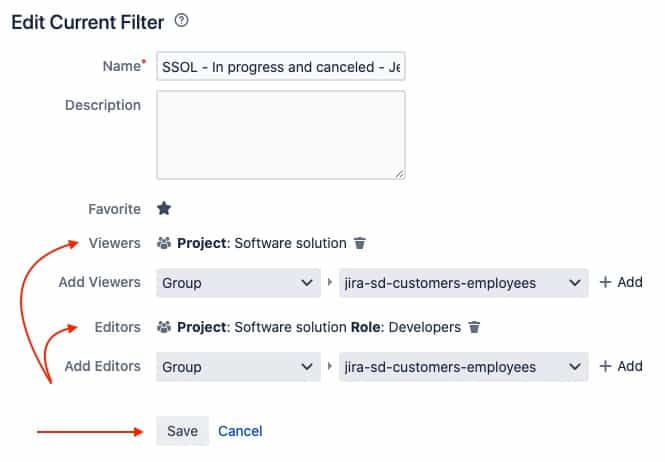
When you click on “Details”, you’ll see the result.
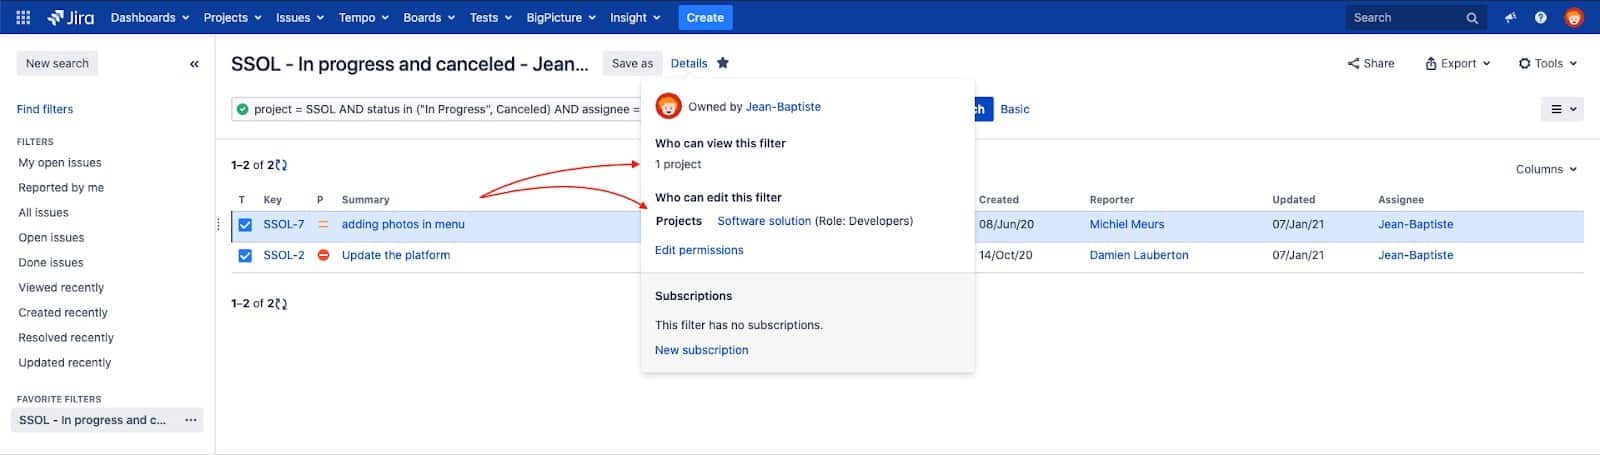
You can also share the filter directly with users by sending them a link, but they will still need to meet the sharing rules to access it.

Subscribing to Jira Filters
You and your teammates can also subscribe to filters so you get regular notifications of the updated results for a specific search query. This could be used to flag critical issues that haven’t been resolved, for example, or to keep track of all the open issues assigned to you, which could include anything from “All resolved issues for a particular project every week” to “All issues managed for invoicing at the end of every month”.
To get an email subscription to a filter
- Open your filter and click “Details”
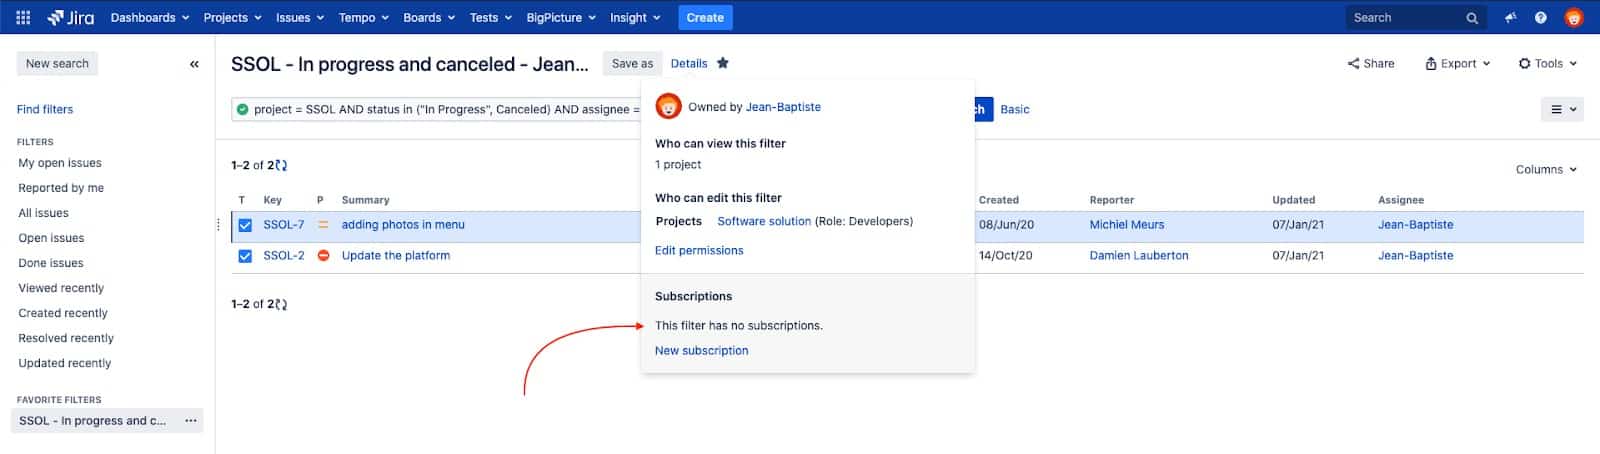
- Then click “New subscription”.
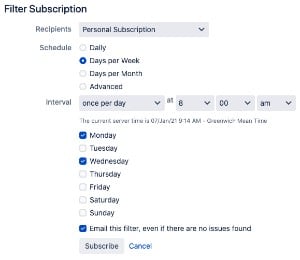
This new configuration window allows you to define how you want to manage the subscription:
- Who is linked to the subscription: personal or shared via groups (only including groups of which you are a member)
- Frequency of delivery: daily, for a specific day of the week, for a specific day of the month or advanced
- Interval of delivery:
- Daily: once a day, every x hours, etc.
- Weekly: once a day, every x hours, etc. on a given day
- Monthly: selection of a particular day and time
- Advanced: you can configure with a cron expression
- You can also decide whether you want to receive an email even if the filter does not have any results
For instance, you could choose to receive an alert two days a week at 8am and to receive an update even if the filter doesn’t have any results. Do note, though, that the subscription will only deliver the first 200 results from the filter.
The subscription system is extremely useful because it enables a scheduled system of updates. But if the result of the filter changes after the notification is sent, then you won’t be informed of these changes.
Because of this, dashboard widgets are generally preferred. They are more dynamic, as they display content extracted directly from the tool.
There are also a number of options to export your filter results:
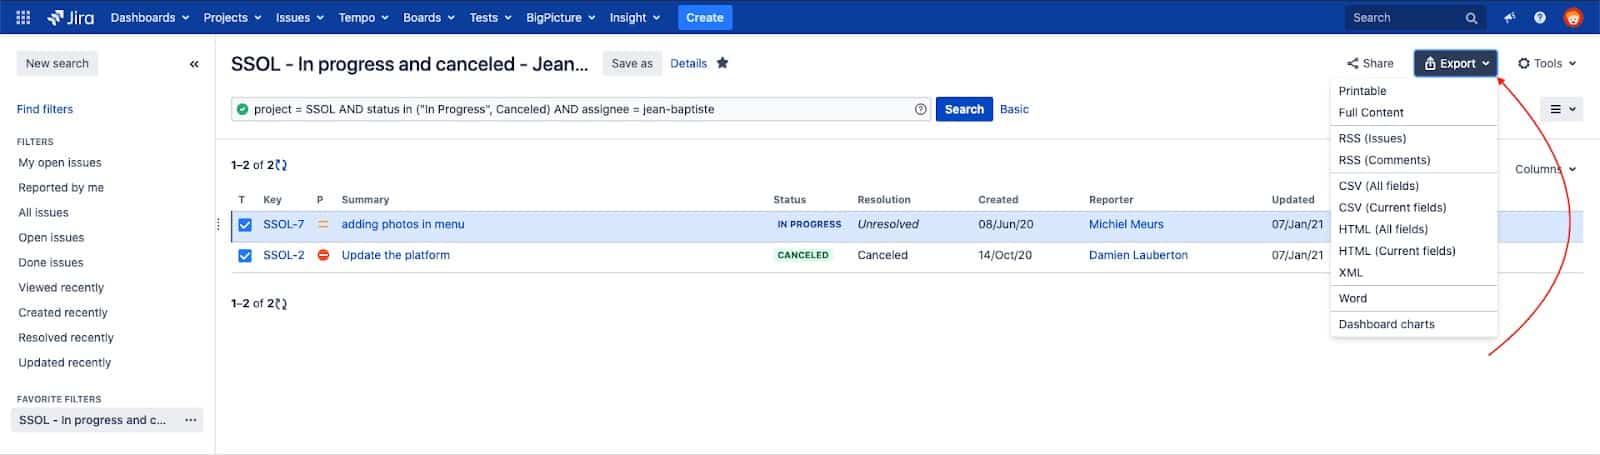
To get an RSS subscription to a filter
- Open your filter and click “Export”
- You can then select to export an RSS feed or an RSS feed, with comments; these can then be added to an RSS reader
To use the filter to populate a dashboard gadget
- Open your filter and click “Export”
- Choose “Dashboard charts”; then choose the gadget you want to use to display the results
- Then select the dashboard and click “Save to Dashboard”
Using the same dropdown, you can also export a CSV, which enables you to get your filter results and either export all fields or only specified columns. The export is normally limited to 1,000 issues at a time for security reasons, but Atlassian’s documentation offers a workaround for this.
Editing Filters in Jira
Once a filter is created, you can edit its name and description, whether it’s starred and who it’s shared with.
To do this, as above, go to your filter > Choose Details > Edit permissions or go to the Filters dropdown > select the “…” button for the filter you want to edit > Edit.
You can also edit the filter’s search criteria by running it, then updating the filter’s search criteria and clicking “Save”. If you want to avoid the changes, click the arrow that appears alongside the save button and choose “Discard changes”.
If you want to make changes to a filter that has been shared with you (but you don’t own it) then you’ll need to copy it, so you can then make edits to your own version. In exceptional circumstances, you might also ask your Jira admin to make you the owner of the filter.
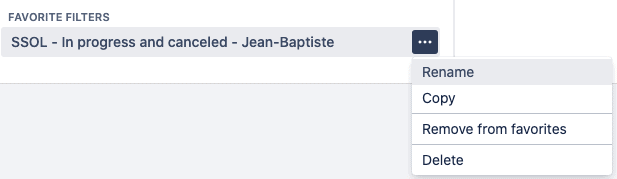
To copy a filter, go to the Filters dropdown > select the “…” button for the filter you want to copy > Copy filter. Then name your new filter and save it.
To delete a filter that you own, go to the Filters dropdown > select the “…” button for the filter you want to delete > Delete.
Best Practice Tips for Filters in Jira
Keep things simple
If you don’t need to regularly get an update on a specific search, or if it would be trivial to recreate it, then consider whether it’s really necessary to create a filter for the search. Having too many filters will likely create clutter and get in the way of the things that you actually need to keep track of.
Consider the impact of edits
One of the most powerful features of filters is that they can be plugged into gadgets and exported. Because of this, if individuals across your team or organisation are using your filter then you need to be wary of making changes to it, as this will have an impact on everyone who’s using it.
Keep things consistent
When sharing filters across a group, it’ll pay dividends to ensure that you’re using a consistent naming convention. This will make filters easier to find, prevent the creation of duplicates and ensure that your teammates have access to and make use of the tools available.
It will also make sense to ensure that the search terms saved as filters are approached consistently, so it’s easy to understand exactly what they’re querying and why.
Improve Your Search and Filters with Apps
It’s entirely possible to make use of filters without downloading apps from the Atlassian Marketplace – but there are a number of offerings available which seek to enhance and optimize the utility of search and filters. Here are two!
ScriptRunner for Jira
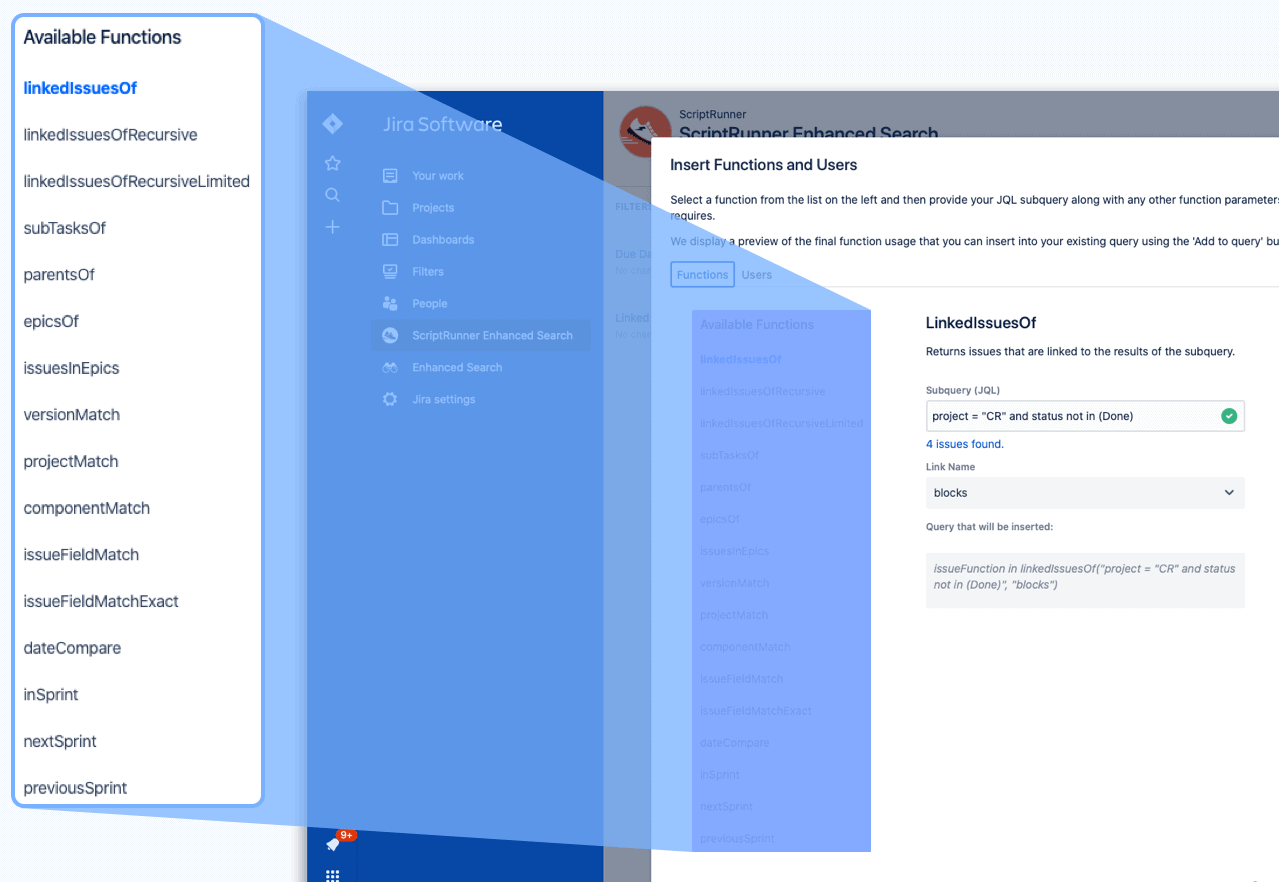
ScriptRunner allows you to automate Jira with off-the-shelf and custom scripts to automate workflows and extend your use of the platform. It also enables smarter search with a range of new JQL functions (such as hasComments, hasAttachments, hasLinks, lastUpdated, workLogged, dateCompare, hasSubtasks, parentsOf, among many more). This can, of course, feed into delivering some extremely useful filters – providing valuable new insights into activity on your instance.
This app has versions for Cloud, Server, and Data Center and a free trial is also available.
Find ScriptRunner for Jira in the Atlassian Marketplace here.
Custom Charts for Jira
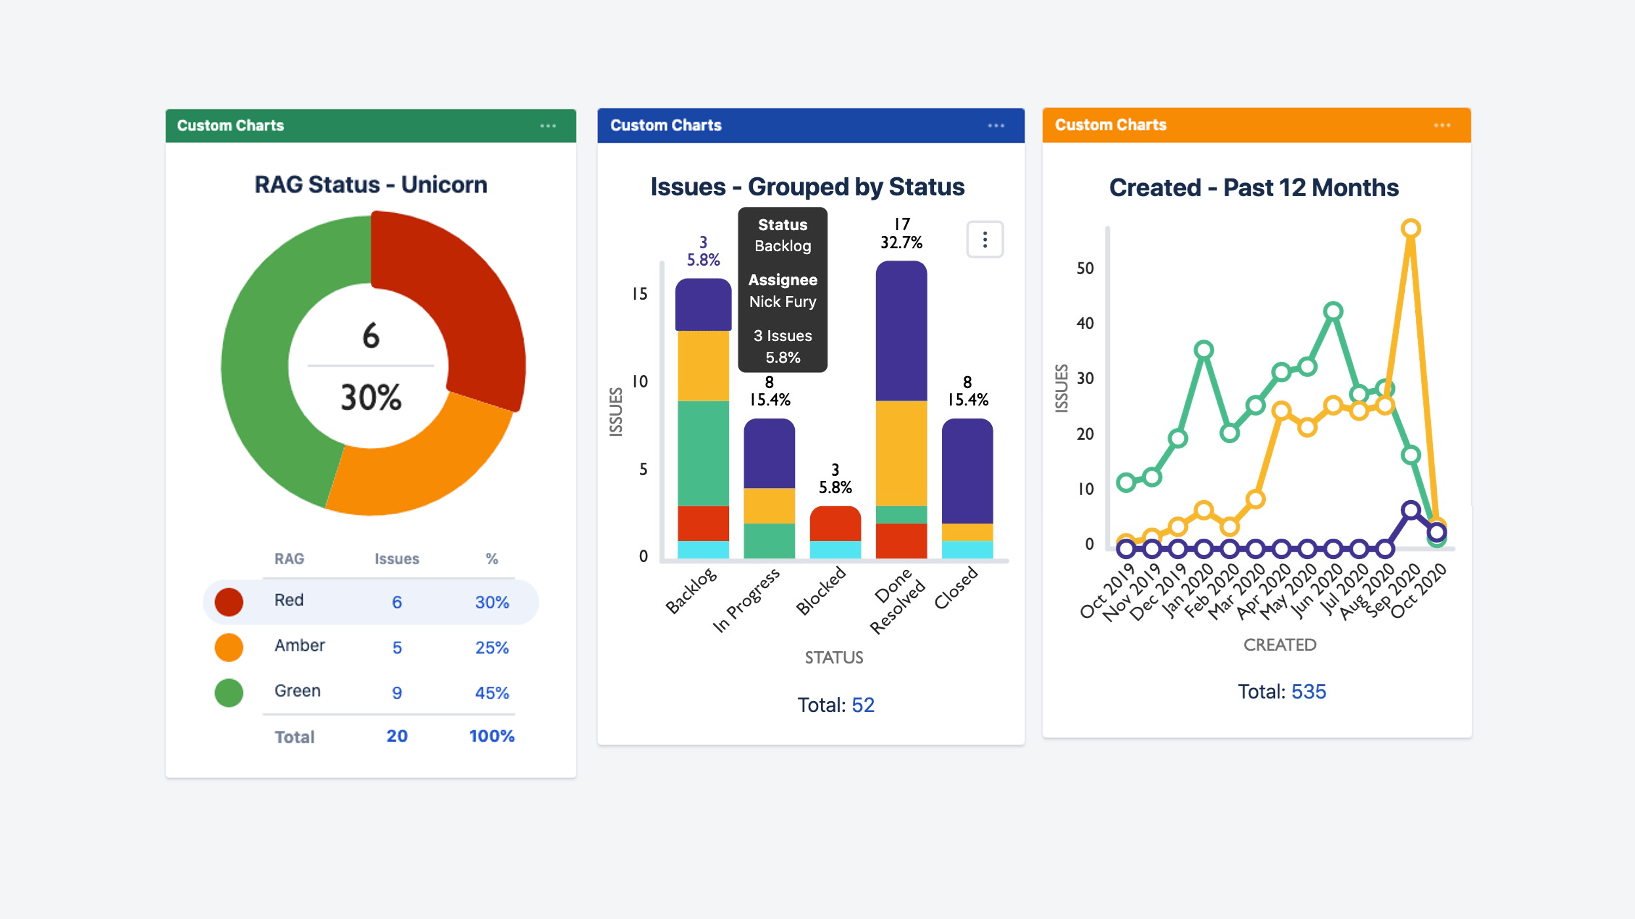
This app enables you to quickly and easily create visually engaging charts, reports and dashboards in Jira, using a really user friendly interface with a drag-and-drop system. Significantly, Custom Charts allows you to create charts (including pie charts, line charts and bar charts) from custom JQL requests and saved filters – adding a radical new dimension to what you can do with your filter results!
The app has versions for Cloud, Server, and Data Center and comes with a free trial.
Find Custom Charts for Jira in the Atlassian Marketplace here.
Conclusion
Filters may seem simple, but if used right, they’re the perfect way to keep track of issues and to stay up-to-date with everything that’s important to you on your instance. In this piece we’ve explored how to create, track and manage your Jira filters, as well as how to share and edit them – so you can make the most of this invaluable tool.
Recommended Reads: