

Jira is one of the best task-tracking tools out there. And what makes it particularly powerful is that almost everything about it can be customized. Because of this, you can build workflows specifically for your scenario.
The platform is famously popular with the dev community and one of the most fundamental challenges that these teams face is fixing software bugs. In fact, Jira was originally built as a bug tracker. So, only naturally, the platform comes with a whole range of options to pick from when building a workflow to tackle bugs. But you might still be left with some questions about the best approach to take.
In this guide, we’ll explore everything you need to know about building an effective bug-solving workflow in Jira for your organization.
Basics and Broad Principles for Building a Jira Workflow for Bug Tracking
The most effective bug tracking workflows will enable your team to identify, record and track bugs. And to access the issues from a single view, combined with your other tasks.
The first question to ask about customization, though, is why you shouldn’t just take an off-the-shelf workflow. The answer is that you can, of course. And Jira’s default Bug workflow is a great starting point
Nevertheless, you may also want to add steps to insert reviews and approvals to ensure that the process meets the standards and requirements of your organization. And that’s where customization comes in.
We’ve created a comprehensive guide to creating workflows and best practices for customization, which you can find here. It will help you whether you want to adapt a workflow or start from scratch. If you need details on creating new statuses or transitions, that’s where to check first.
What are the Stages to Incorporate into your Bug Workflow?
So what are the stages you’ll need to incorporate into your bug tracking workflow? We’ve broken it down into:
- Reporting a bug and creating an issue (with the relevant details)
- Prioritizing the issue
- Assigning and resolving the issue
- Reopening it if need be
- Carrying out work, reporting progress and closing the issue
One approach is to have multiple tasks covered within a single issue using sub-tasks. These can then be tracked and assigned separately. And you can even set blocking conditions to prevent the issue from moving through the workflow until all the sub-tasks are resolved.
However, the most effective approach is generally to add additional steps to the workflow.
This means that you aren’t restricted by sub-task issue types. And it makes it much easier to visualize and locate the issue within the workflow.
At each point, the issue can then be assigned to different users.
Depending on the assignment model used by your organization, these individuals might be responsible for directly doing the work themselves or they might delegate the task to the most appropriate member of their team (you can read more about best practice when it comes to assigning here).
Notifications can then be used to keep team members up to speed with issues, informing them as soon as items are ready for review.
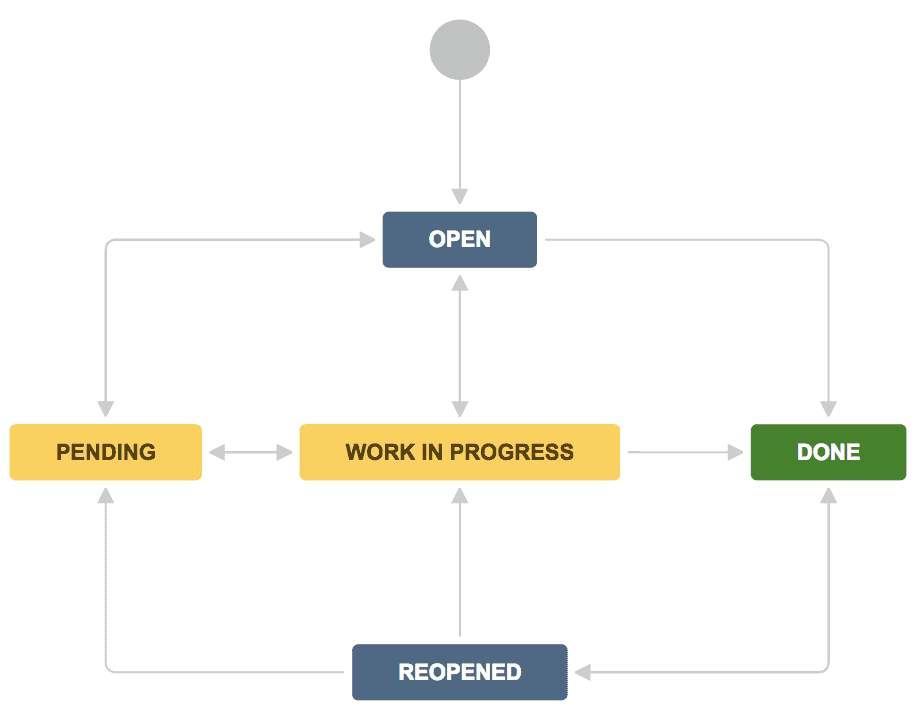
The following is a fairly common workflow that moves bugs onwards towards resolution:
- On Hold
- In Progress
- Fixed
- Under Review (by QA)
- Approved
- Deployed
- Closed
What is a Good Step-by-Step Jira Workflow to Handle Bugs?
Step 1: Reporting Bugs
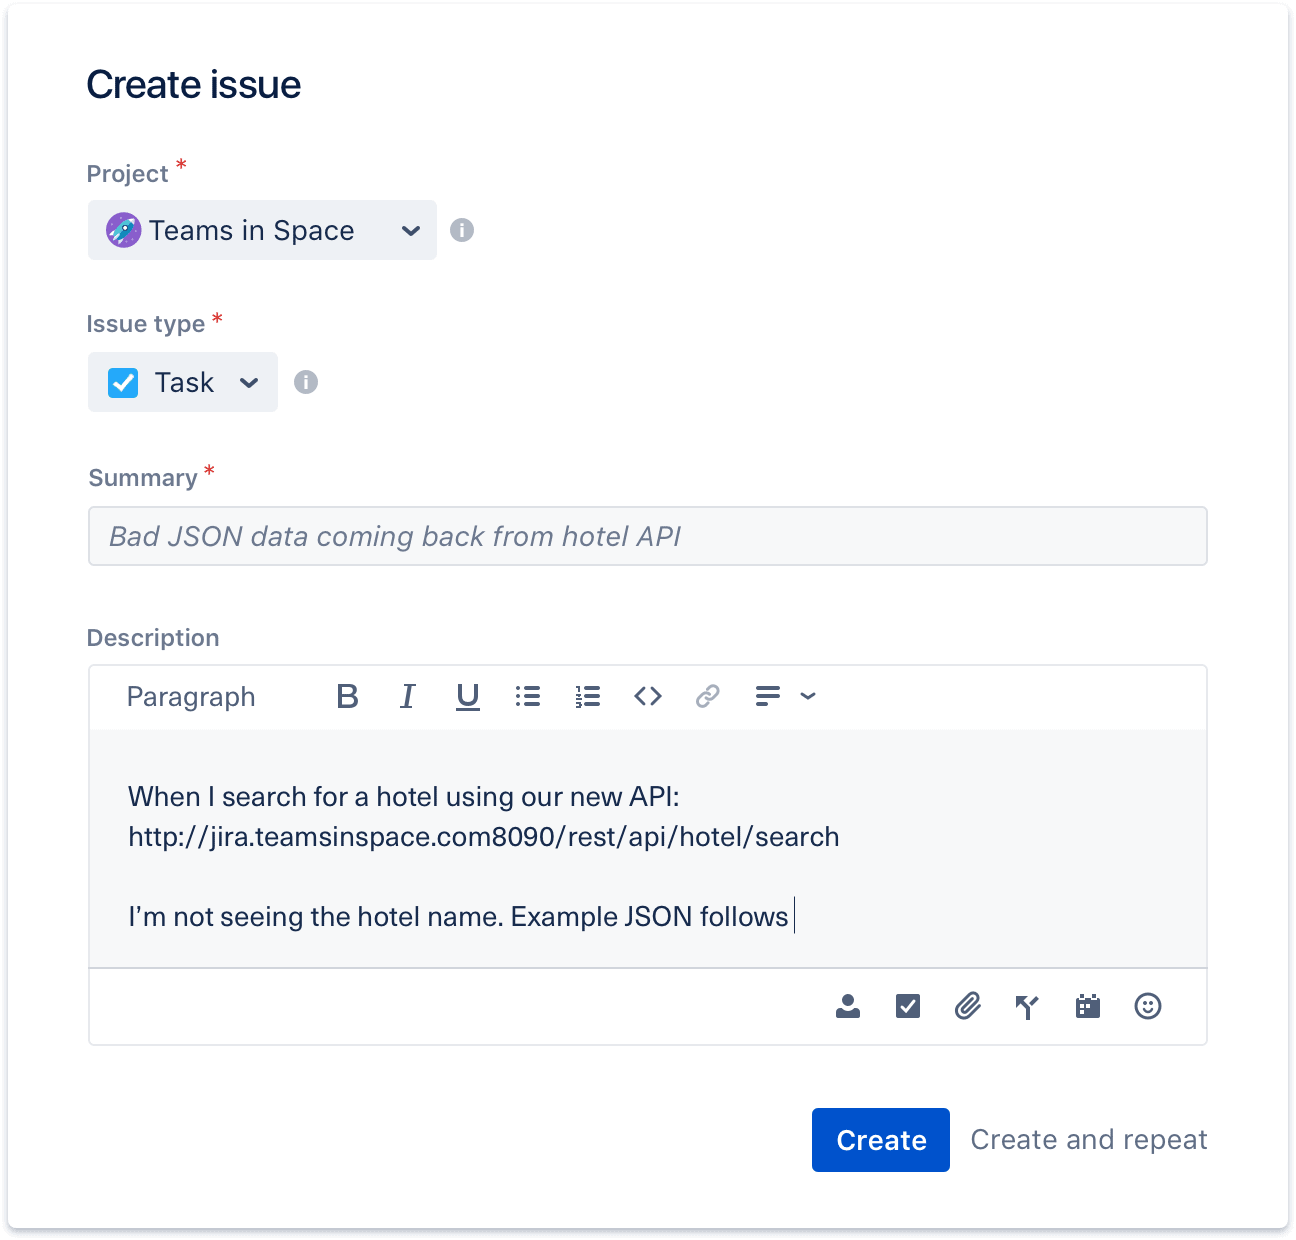
A bug report should allow a developer to focus on solving the bug. It can include details such as a description of the issue, screenshots, and information about the user’s system and software.
Because of this, it is very important that your bug reports have the necessary structure and formatting to capture all the necessary technical details.
Given this, you’ll likely want to have an intermediary between engineers and any kind of direct user reporting in B2C and most B2B scenarios.
An easy way to do this is to allow customer support operatives to create issues – also cutting down on the number of duplicate items that are created in the system.
Meanwhile, when linking bugs to tickets in a support project, use the “is delivered by” / “delivers” issue link type. This enables you to create a report of all the tickets affected when the corresponding bug is resolved.
Step 2: Assigning and Prioritizing Bugs
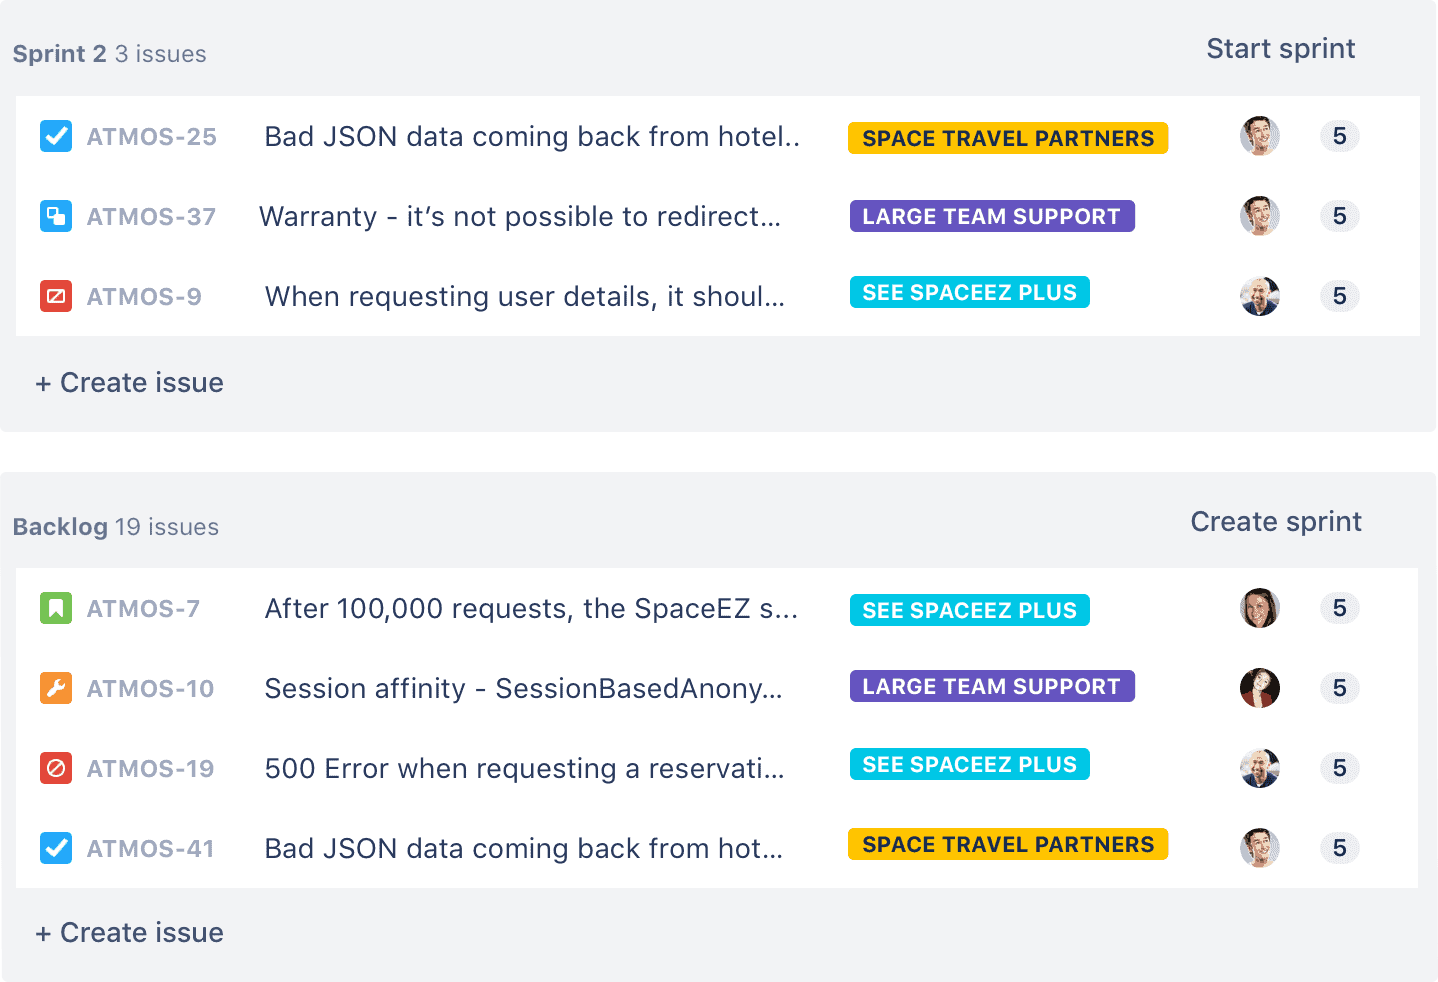
Creating the bug report is just the first step in tackling the issue. The next challenge is for your team to assess how important the bug is and to assign it accordingly.
Urgent problems need to be tackled as soon as possible, after all. But minor issues can take their place in the backlog to be addressed when the appropriate resources are available.
Fortunately, issues can be quickly and easily assigned and prioritized directly from the ticket and it’s simple to see what the most urgent issues are.
The following considerations are useful for prioritizing issues:
- If a fix can be achieved with minimal effort (for example, changing a single line of code) then it should be moved to the front of the queue and completed quickly.
- Bugs that qualify as being critical or blockers should be picked up immediately and inserted into the running sprint. Additionally, you should assess whether you need to add story points to them.
- Major and minor issues should be grouped by component and inserted into relevant feature development.
- Trivials, meanwhile, need to be addressed during the course of work or later on, as part of technical debt resolution.
If the bug cannot be addressed in a short period of time, then it should be recorded as a ‘Known Issue’, to be addressed at a later date.
Step 3: Assigning the Issue – and Establishing the Root Cause of the Bug
Once you’ve prioritized the issue, you can now assign the ticket and work can begin on resolving the bug.
The first step to resolving bugs is to understand when they occur and why. That means being able to consistently reproduce the issue and identifying who is responsible for the root causing phase.
We recommend using a TDD (Test Driven Development) approach, first writing a test and proving that it fails. Then making a change and proving that the test succeeds.
If your Jira instance is integrated with a tool like BitBucket you can begin working on the bug directly from the issue page. Updates to the code, meanwhile, can be automatically logged against the ticket to keep the whole team informed of pull requests, merges, and deployments.
Step 4: Impact Assessment
Changes to code can potentially come with major consequences and side effects. If the impact of a fix is high, then it must be handled as a feature request with the necessary adaptation of the test cases.
Step 5: Test Coverage
Having fixed the bug, you should ask:
- Why is there a bug?
- How can bugs like this be avoided in the future?
- Is there a need to adapt support and documentation to reflect the fix or to prevent issues like this from occurring?
If failures in processes are resulting in bugs, then it’s important to make sure that they’re identified and addressed so that they don’t create additional problems (obviously!).
This type of review may span both discussion in sprint retrospectives as well as additions to documentation.
Whether a process review is needed is hence an important item to consider before closing the issue.
Step 6: Resolving Issues
The last step is, of course, closing the issue. At this point:
- The bug should be fixed
- You should be able to ensure that the problem will not recur
- You should investigate if there are potentially similar bugs in the product (or related products/integrations)
- And documentation and support processes should be updated to reflect any changes that have been made
Step 7: Reopening Issues
If the bug recurs then the fix has been unsuccessful – which likely means that the root cause has been misidentified.
As long as the fix is not yet on the release branch then the bug report can be reopened. If it is on the release branch, however, then a new issue should be created in order to track further work. Work can then progress to fix the issue for good.
Popular apps to Integrate into your Jira Workflow for Handling Bugs
Jira’s powerful integration with BitBucket enables engineers to work on bugs directly from Jira. And it’s just one of many source code management tools that Jira has integrations with.
There is also a wide range of plug-ins that can be extremely useful when building a Jira workflow for bugs. Here are some of the best:
Capture for Jira
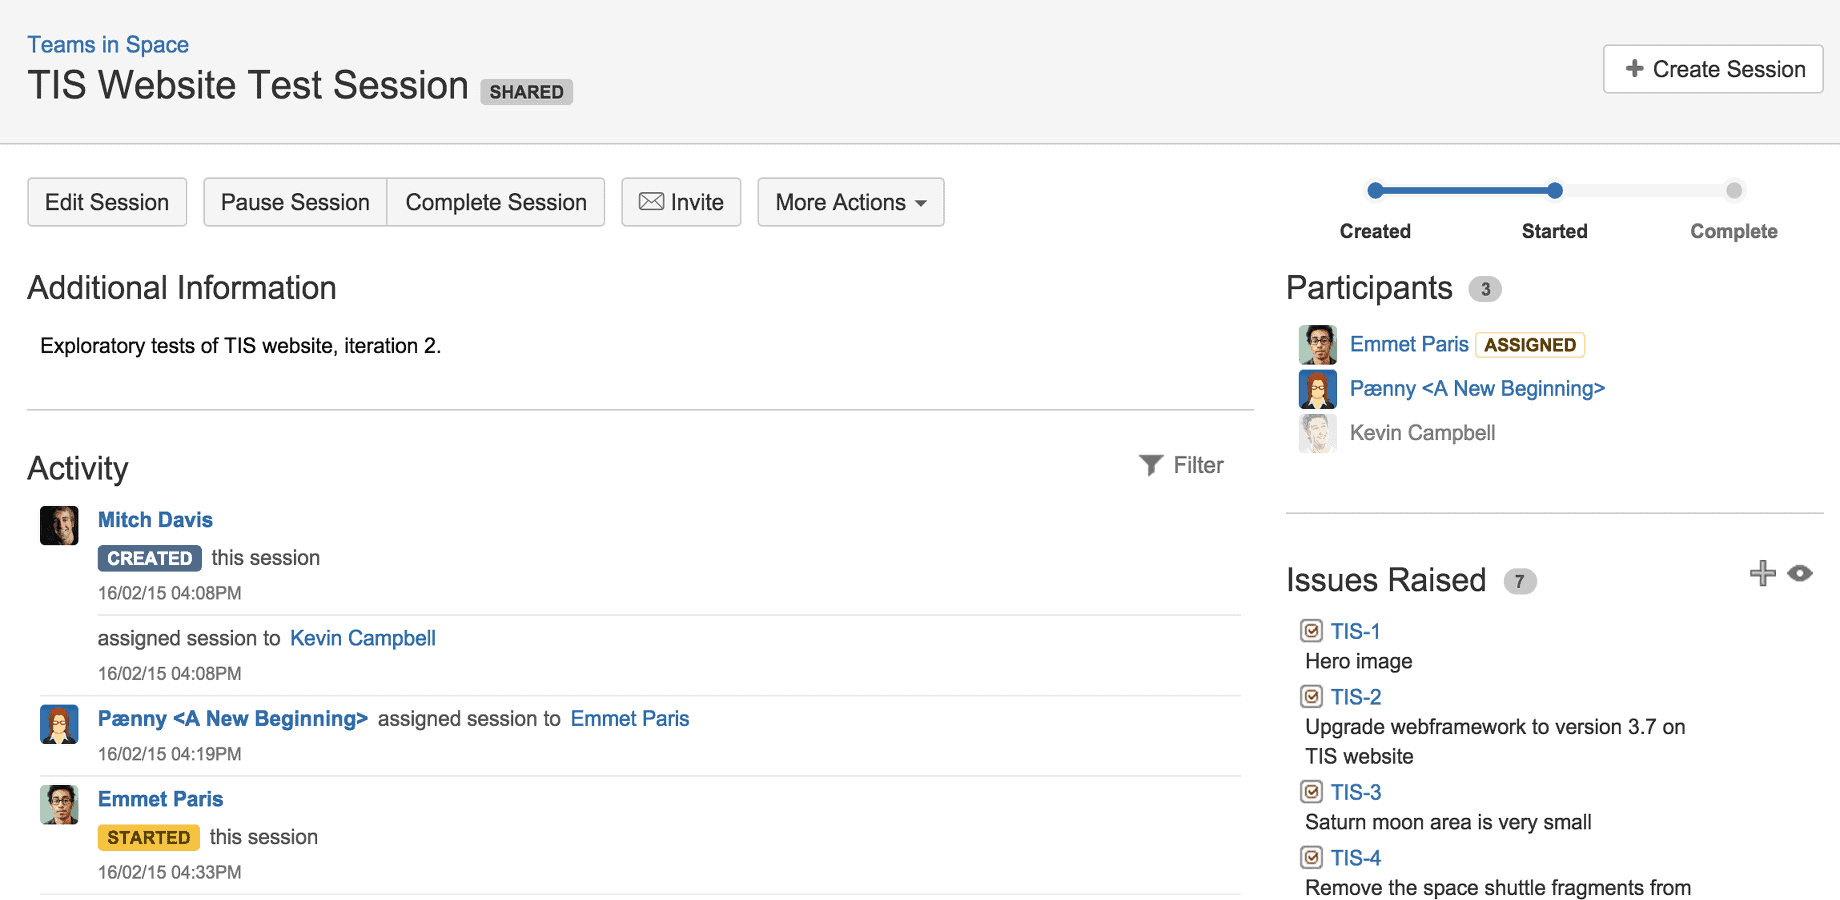
Capture is a visual feedback and collaborative testing tool that allows teams to record and annotate videos and screenshots while reviewing software.
What’s particularly useful for bug testing is that it saves all the relevant information about the user’s browser and system directly to Jira, cutting out any laborious note-taking. Instabug for Jira, meanwhile, is a third-party app with some similar functionality.
You can find Capture in the Atlassian Marketplace here.
qTest for Jira Test Management
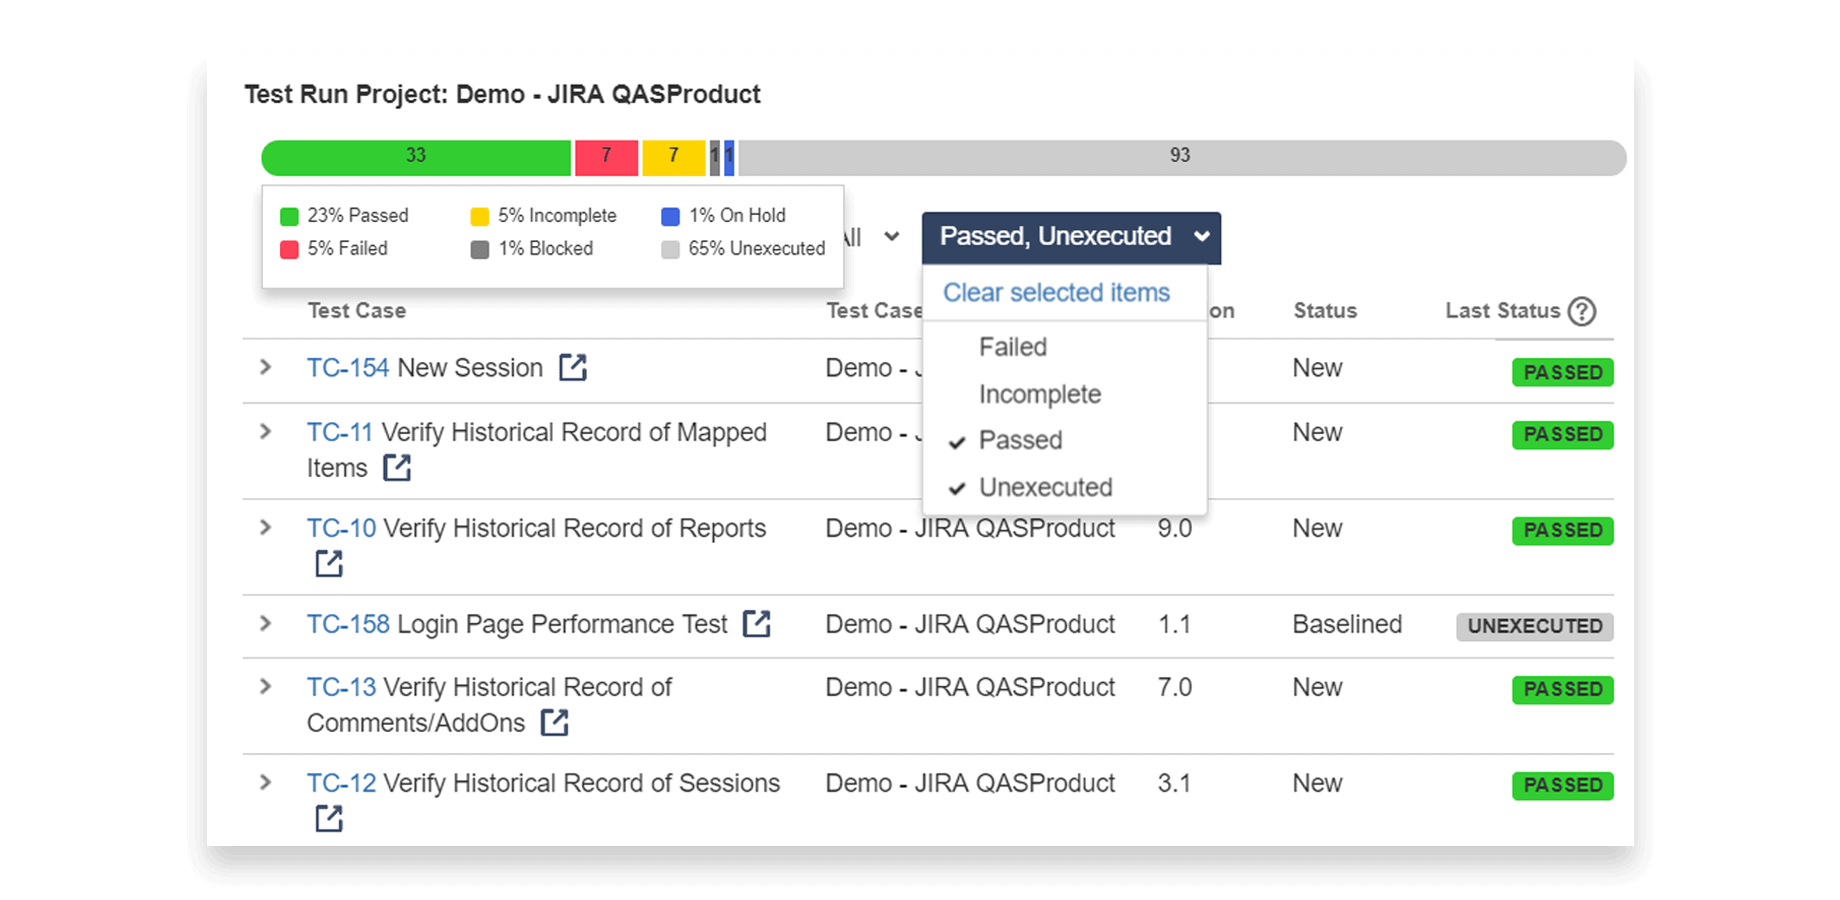
qTest for Jira Test Management provides Jira coverage for agile testing, QA, and bug reporting.
Jira bugs can be put through reusable test runs, with complete control over the configuration variables. The app allows you to visualize all the test cases and test runs associated with Jira issues in real-time.
And you can also organize test automation, regression, and CI results from a single view.
All of this makes this plug-in a powerful tool for bug tracking in Jira.
You can find it in the Atlassian Marketplace here.
Bug Watcher Notifications
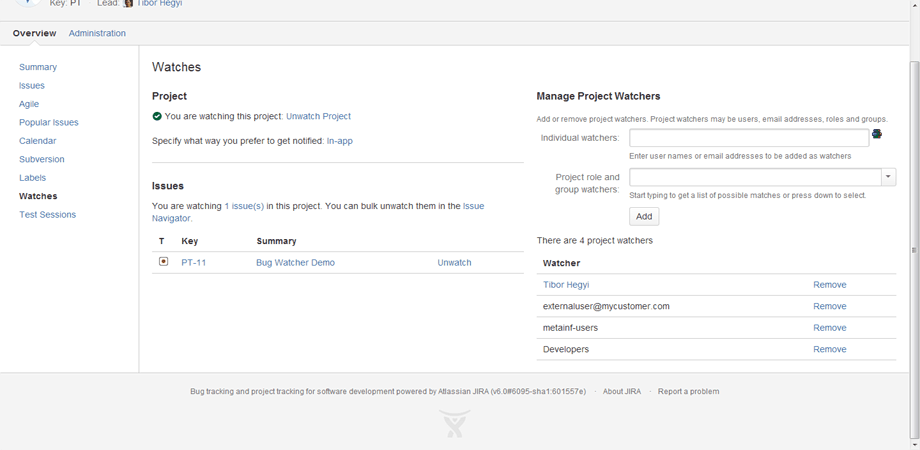
Bug Watcher Notifications gives you extremely precise control over exactly who gets updates on changes to issues. That means you can ensure that you only get updates on the events that are important to you.
You can also set watchers based on roles, groups, and email addresses. So even non-Jira users can watch issues.
Lastly, you can set notifications based on your needs, specifying whether you want to be updated by email, via the desktop or within the app, to minimize context-switching so you can keep working as efficiently as possible.
You can find it in the Atlassian Marketplace here.
Conclusion
Jira’s power comes from the fact that it’s infinitely customizable. Meaning you can build exactly what’s right for your organization.
However, it’s important to keep in mind that adding complexity to processes will slow things down. And over-customizing your workflows will make them increasingly incompatible with those used by other teams and groups.
Because of this, it’s important to keep your bug-tracking workflow lean.
Make sure that everyone has the information that they need when they need it and aim to build a workflow that is as efficient as possible.
Then, with a little iteration and optimization, you can create a process that is as close to perfect as possible.
Do you have any tips and tricks of your own when it comes to Jira workflows for bugs? Or have we missed anything out? Let us know in the comments below.